04 lexus rx330 radio removal. Lexus Navigation CD Changer DVD Display Cluster Repair 2019-05-10
04

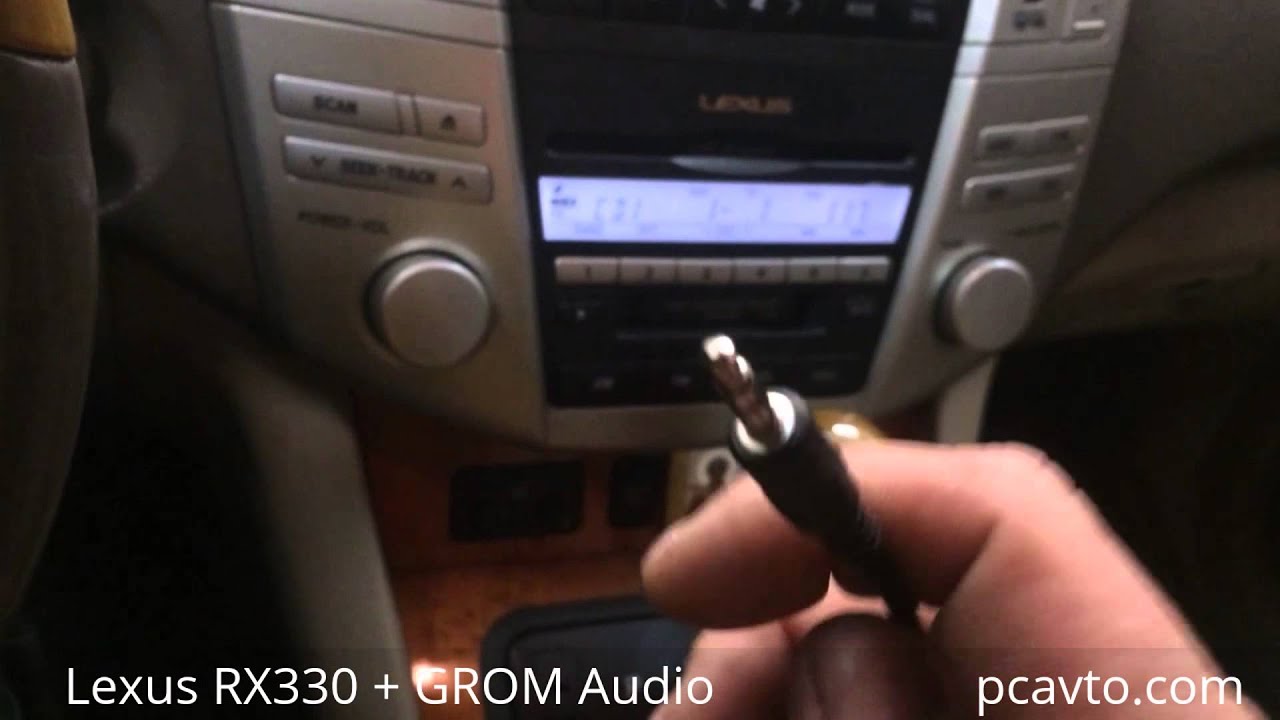
The case has no major damage and the connectors have no corrosion. In the pic below, you can see my ratchet extension sticking out from the dash. This adapter will allow you to input any Apple iPod, portable music player or mp3 player into your factory car stereo. Please excuse the quality of the pics, as they were only taken with my iphone. The pic shows the 10mm bolts already removed. You'll see 2 10mm bolts. You will need an automotive aux input adapter.
Lexus Navigation CD Changer DVD Display Cluster Repair

The whole idea behind a club forum is to help each other out where you can, so that is what I'm hoping to accomplish by this picture tutorial. Car Stereo Help Removal Guides 35 2 19 25 22 62 131 49 3 23 5 63 4 6 107 6 47 1 73 18 32 26 2 29 13 12 69 25 50 57 22 1 38 124 20 6 6 13 37 7 6 3 2 17 5 2 9 13 94 5 26 4 We repair factory installed Car Stereo. We recommend changing the battery in Lexuss every 4 years. The entire lower portion of the radio unclips, and comes out. This is what I was installing when I took the pictures for this tutorial. You'll see 2 10mm bolts. If you've gotten this far, then you're all set! It's only plastic clips holding it in, so it won't take much to release it.
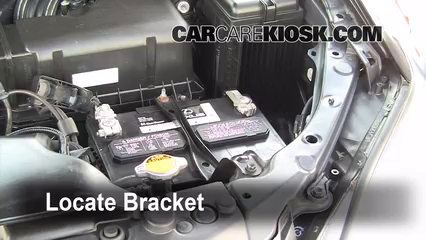
Battery Replacement: 2004

Anyway, here it goes: 1. . Check for water damage to amplifier. Popular lexus rx330 radio of Good Quality and at Affordable Prices You can Buy on AliExpress. If you can't find it, call Lexus and they will give you the code for free. Carefully remove the bezel containing the heated seat switches, and cigarette lighter plug. I know this it my first post I hope I'm posting in the right section , and I must confess that I am not a Lexus owner, however I am an installer, and figured this might help some of you out.
How to remove radio lexus rx330 (05)
In some Lexuss, the highbeam is the same bulb as the headlight and it is possible for the highbeam to work, but the headlight be burnt out even if they are the same bulb and vise versa. Clear audio signal from every speaker. This is what I was installing when I took the pictures for this tutorial. Please excuse the quality of the pics, as they were only taken with my iphone. I have the choice of stripping the unit apart or phoning around to get an estimate on repair.
Popular Lexus Rx330 Radio
Some Lexuss have high intensity discharge headlights, sometimes referred to as xenon lights. It's only plastic clips holding it in, so it won't take much to release it. Putting it all back together is just as simple. Remove those using a suitable ratchet. Anyway, here it goes: 1. You'll need a decent sized extention on your ratchet to reach these.
Headlight Change 2004
This was carefully removed from a vehicle with an unmodified and fully functional audio system. The pic shows the 10mm bolts already removed. These bulbs have a very high voltage that runs through them, even if the battery is disconnected. Carefully remove the bezel containing the heated seat switches, and cigarette lighter plug. Our selection of brands is always growing, so chances are your favorite is on AliExpress. Please note this will not fit any factory Mark Levinson premium sound system.
04

Thank you - and welcome to the Club! Check for this code in your owners manual - it will usually be either a sticker or small card in the booklet. I know this it my first post I hope I'm posting in the right section , and I must confess that I am not a Lexus owner, however I am an installer, and figured this might help some of you out. Adding More Information If you would like to help the Modified Life community by adding any missing information or adding a new car audio wire diagram to our resource, please feel free to post it at the bottom of this page. Putting it all back together is just as simple. This is where it gets a bit tricky.
Car Stereo Help
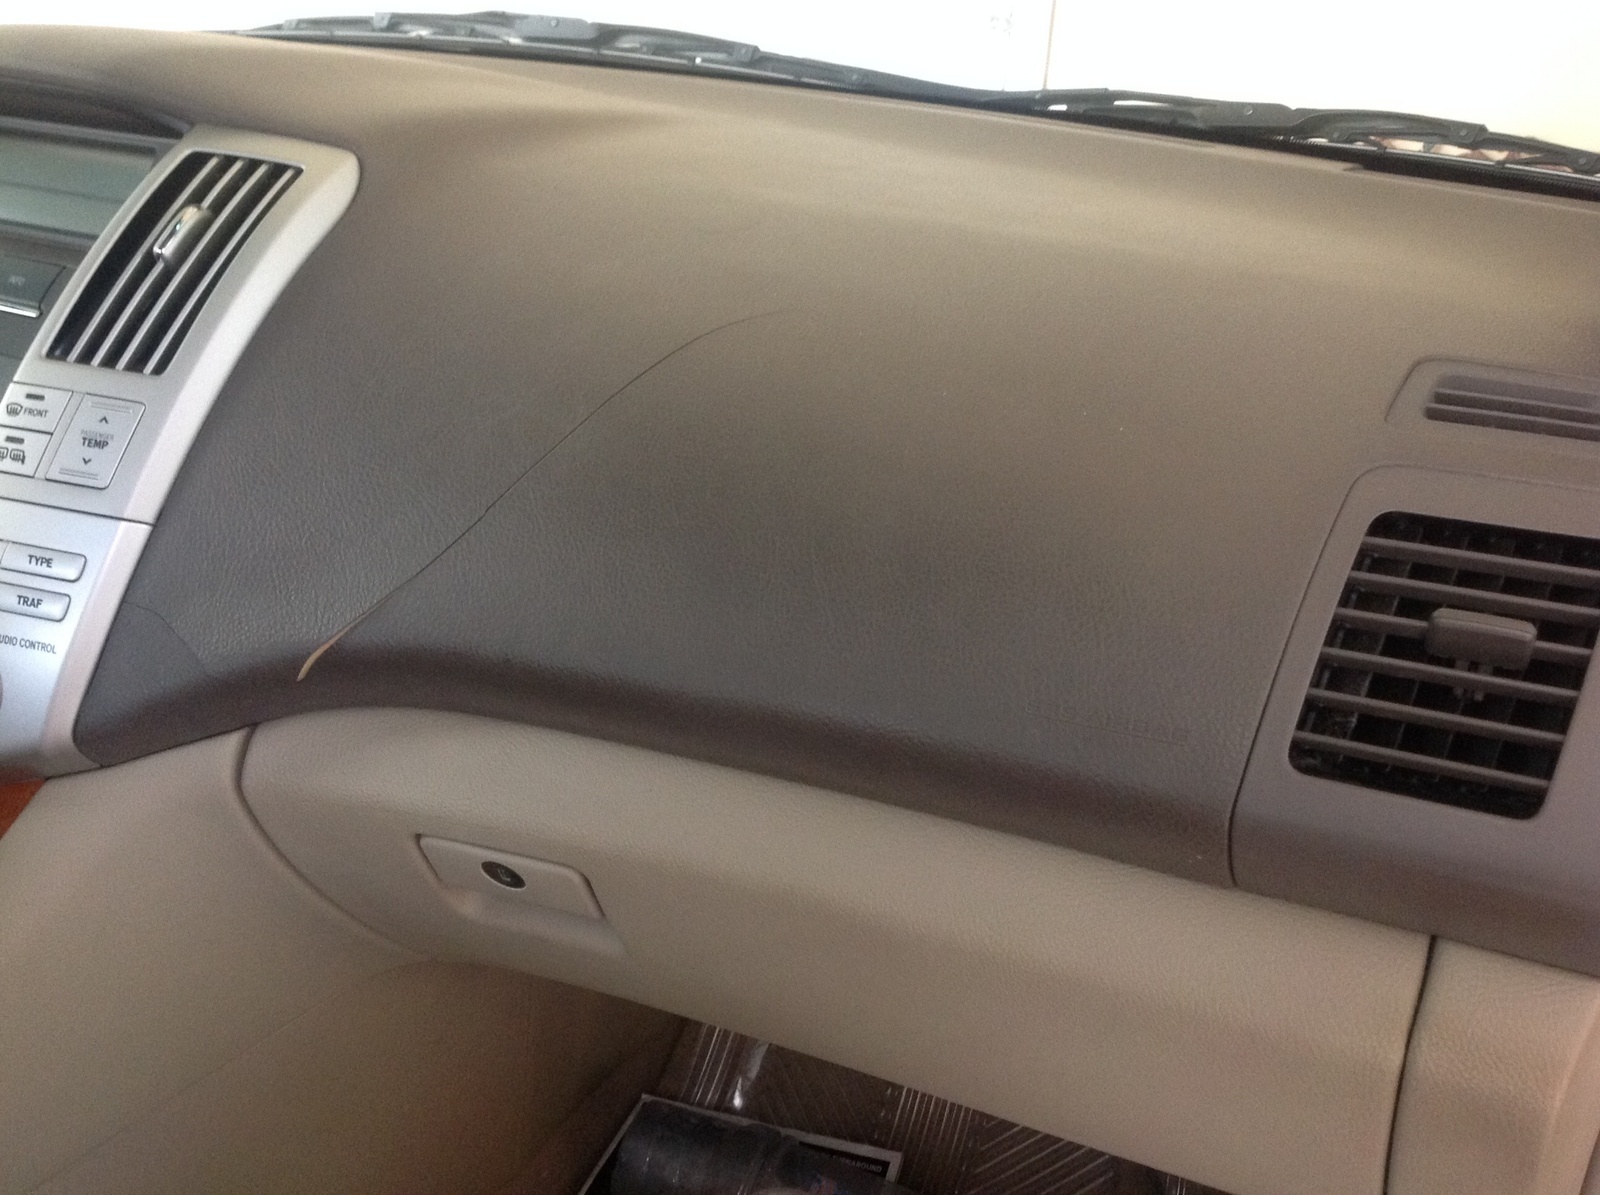
This is the easiest and most cost effective way to add an audio input into your factory car stereo. The closest thing to a tutorial I was able to find was a half-assed description telling you to remove one panel, and then you're given a link to go pay someone for the rest of the instructions. In the pic below, you can see my ratchet extension sticking out from the dash. This is where it gets a bit tricky. Remove the bezel around the shifter, using your hand as shown in the pic. Remove the bezel around the shifter, using your hand as shown in the pic.