1991 toyota previa starter location. How hard or how easy is the removal of Previa starter, 2WD. 2019-04-08
1991

Which, for some reason, isn't shown in that picture. I also referenced these sites before starting in:. Removing and replacing the starter is not so easy. Most of the work happens from below. Use of the wiring information is at your own risk.
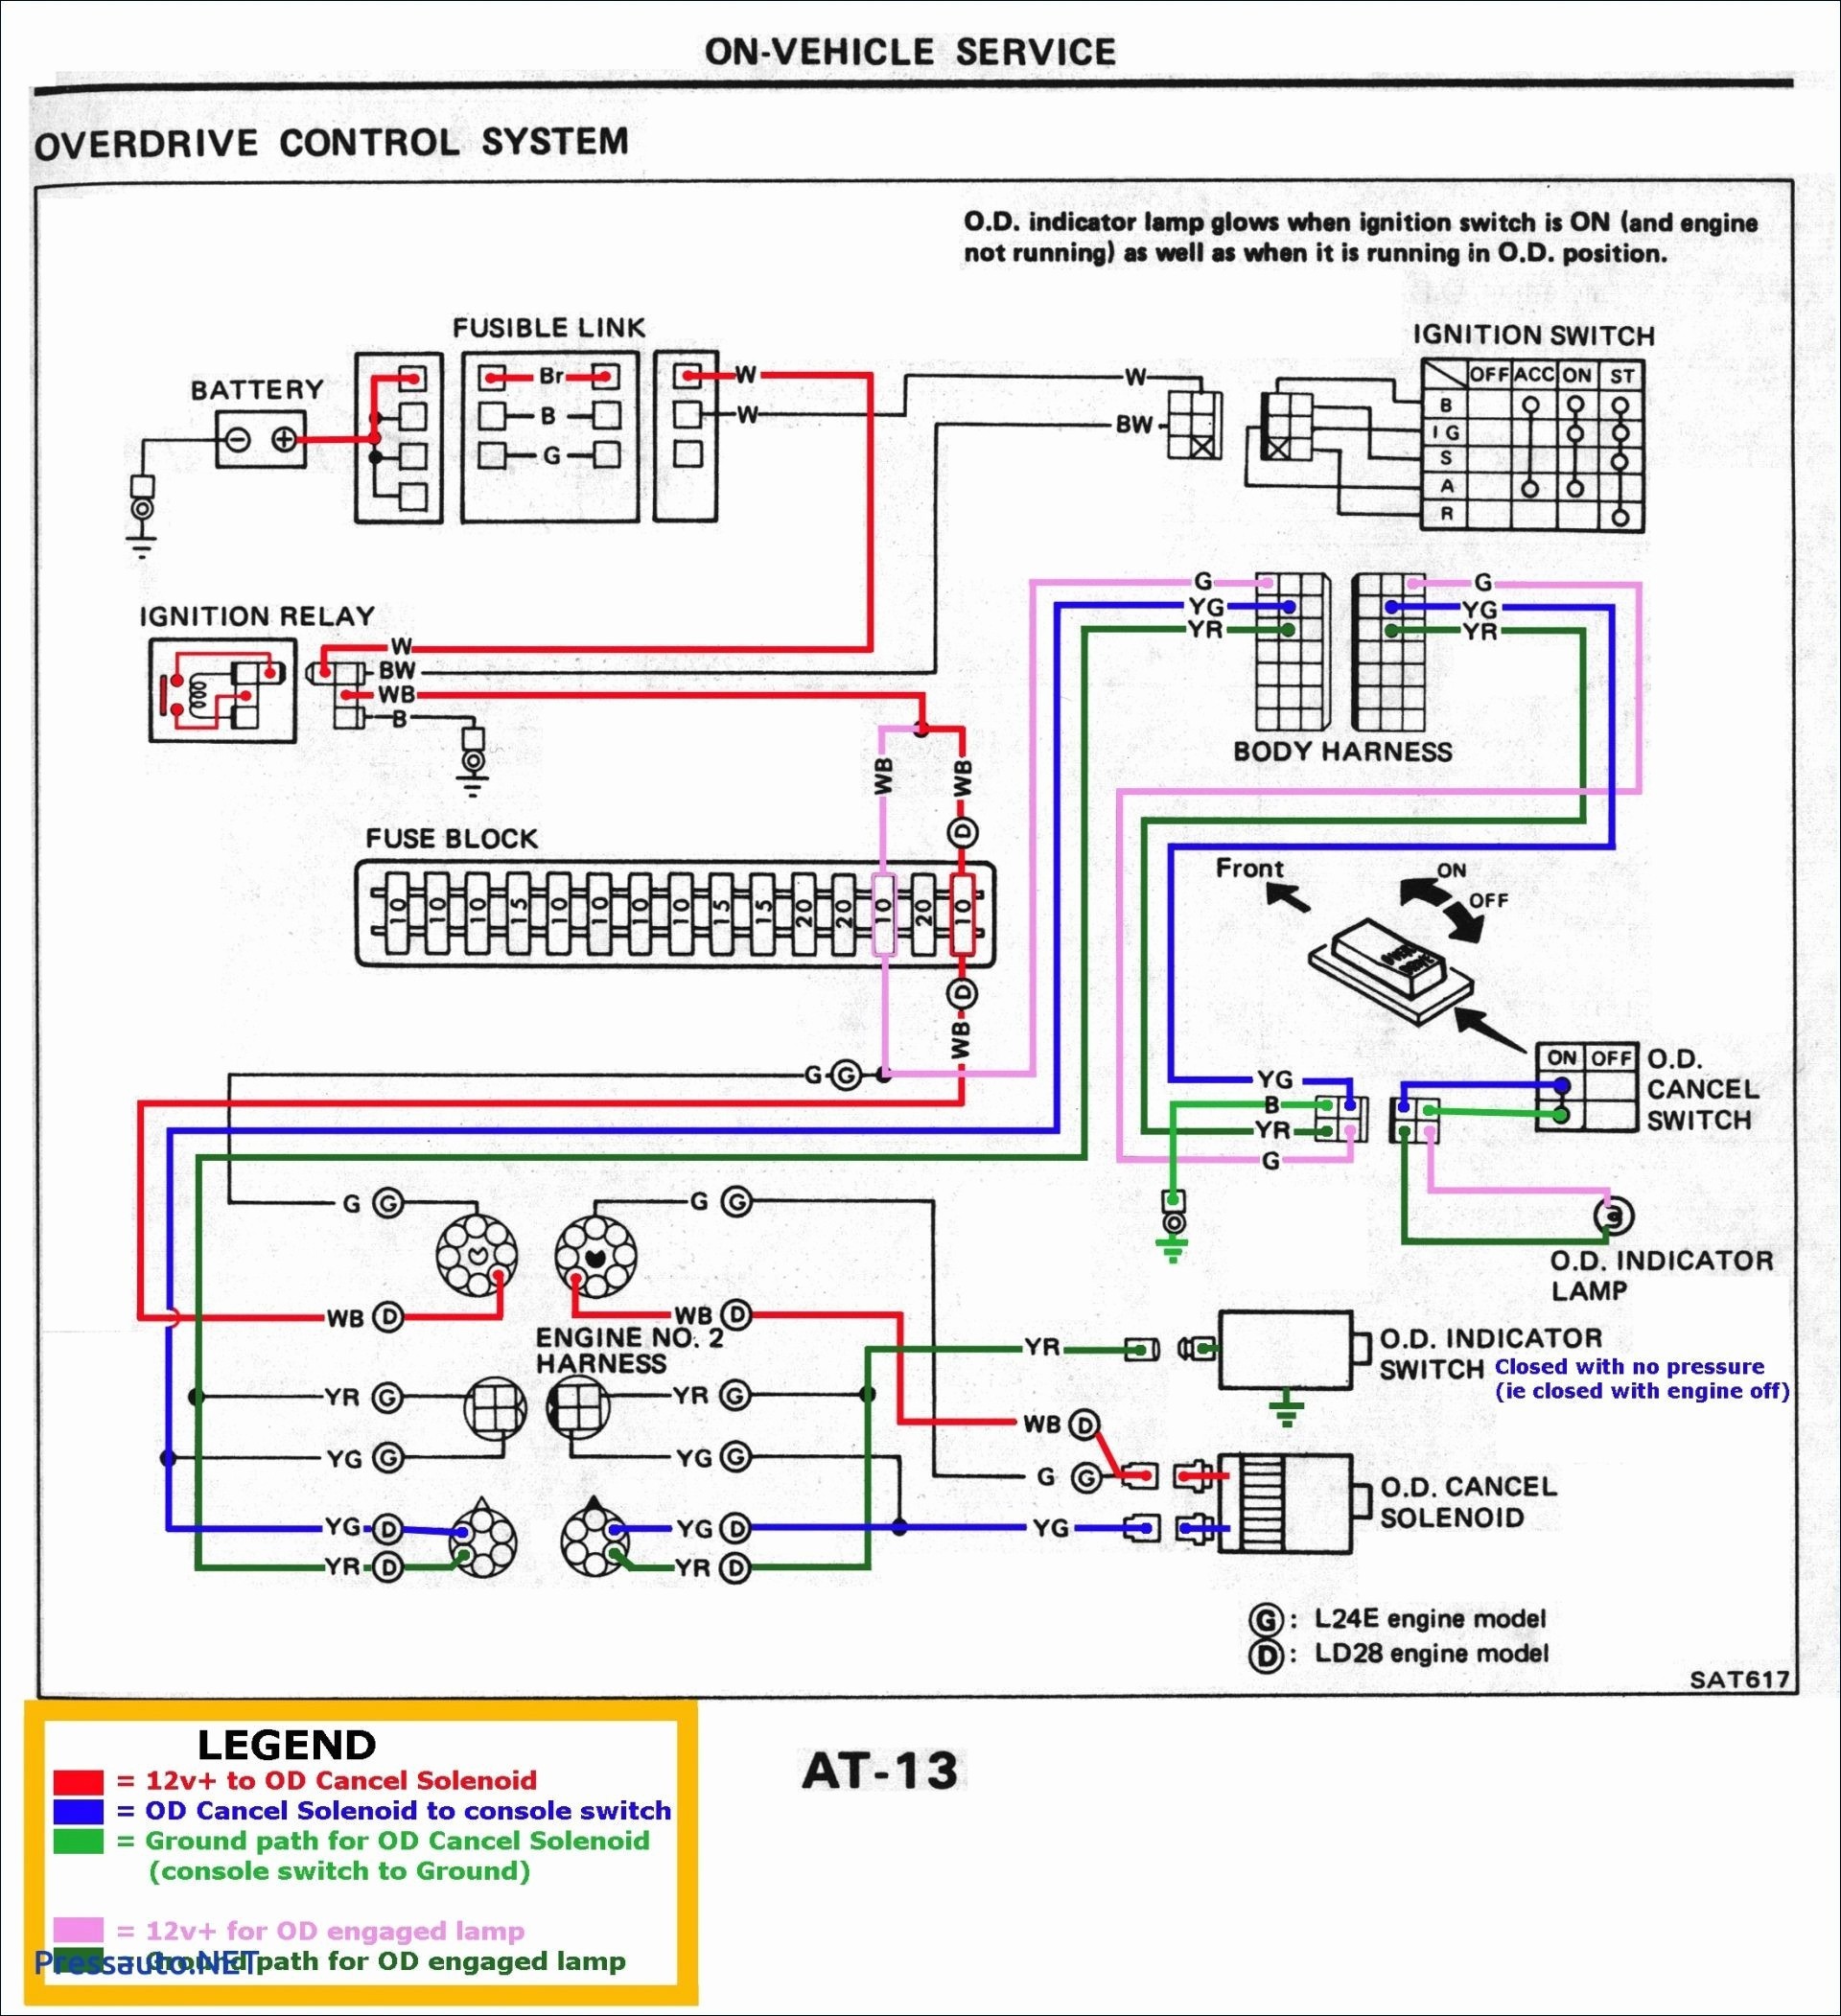
1991 Toyota Previa Remote Starter Wiring Info
This video does not have enough information to help someone in. Most of the work happens from below. Tighten the nut to 78 inch lbs. They dont have upper front control arms. Extensions and a short handled ratchet will help. This is the hardest one to remove. Tighten the bolt to 43 inch lbs.
1991

The upper most bolt is hidden from view. Angle the light so that it shines toward the direction of the right front wheel passenger side wheel perpendicular to and just beyond the 1 inch diameter black bundle of wiring harness. There are two large hose clamps that need to be loosened in order to pull the hose free from the large opening of the throttle body. Different year model but should give you a good idea. Once these are loose and the two plastic clips nearby are squished inwards the whole wrap-around fascia + radio assembly can be removed together. My previa has the original starter according to the records both previous owners provided and after reading the rebuild thread, I think I will tackle this soon enough. Remove this bracket and bolt with a 13 mm I think open end wrench.
1991

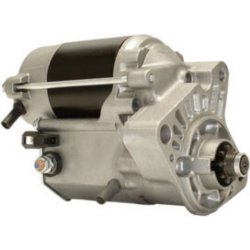
Tighten the bolts on the 1. You will find three main starter bolts, and a couple of smaller ones on a small plate on top and is used as a top brace, steadying the starter from the top. Set the brake, be redundant, be safe first. Apply grease to the gear and clutch assemblies and place the clutch assembly, idler gear, bearing and pinion gear 1. It looks like any other starter. Use a long extension for your ratchet, mine was about one foot long.
1991 Toyota Previa Auto Alarm Wiring Schematic

Use a long extension for your ratchet, mine was about one foot long. Mar 11, 2013 Hi there Carolina, The battery is very low. You can start from the fuel filter and look up. The main cable attaches with a 12mm bolt. Tighten the bolts on the 1. Disassemble your dash, the control unit is right behind the instrument cluster.
SOLVED: 1991 Toyota Previa won't start
Posted on Nov 23, 2008 Unless it is the fuse or relay to the fuel pump, you need a new one. Undo it all the way. Also if you have problems to start your previa and you remove the starter with this test you can be sure is not a starter problem, a it can be the the battery or the just dirty terminals. If you dont want to drill a hole you will have to drop the engine and that is not a cheap option on a previa. The Front Wheel bearings Must be pressed out and pressed in as a unit You can save some time by buying a new hub if the old one looks bad in any way.
How do you remove 1991 Toyota Previa ingniton

In the service panel, under the drivers seat is where you start. But access to it is easier than it first looks. A floor jack and jackstands will work also. The other wire comes off when you squeeze the connector just so. You will need to drive your front wheels up onto a stand to make the water pump accesible.
91 1991 Toyota Previa Starter

Pull out the field frame with the armature from the magnetic switch. The Modified Life staff has taken all its Toyota Previa car alarm wiring diagrams, Toyota Previa car security wiring diagrams, Toyota Previa car alarm wire diagrams, Toyota Previa car security wiring schematics, Toyota Previa car security diagrams, Toyota Previa remote starter wiring diagrams and cataloged them online for our visitors to use for free. Be extra careful when tightening the nut attaching the thick electrical lead to the bottom of the starter so that you don't accidentally rotate the wire's metal connector into the plastic connector that holds the thinner plug-in wire. With rubber mount completely Removed, compress engine mounting bracket down to frame mounting bracket usjng c-clamp. It's right next to the engine and transmission, where they bolt together. Whether your an expert Toyota Previa car alarm installer, Toyota Previa performance fan or a novice Toyota Previa enthusiast with a 1991 Toyota Previa, a Toyota Previa car alarm wiring diagram can save yourself a lot of time.
1991 Toyota Previa Remote Starter Wiring Info
Nov 23, 2008 Holy hell these engines are tight. Under the passenger or driver seat? You will find the contacts by taking off the end, and removing two long bolts, and opposite the bell shaped end. Reverse the steps for the installation. You may have to before you can post: click the register link above to proceed. The main cable attaches with a 12mm bolt. The thermostat is connected to the water pump.
Where is the starter located on a 1991 Toyota Previa
The starter solenoid magnetic switch is an integral part of the starter assembly. You can start from the fuel filter and look up. Next remove the lower 2 shock bolts and the 3 upper mount bolts in the engine bay. I had to ratchet about two clicks at a time. Check starter system for proper operation.