1992 accord headlight bulb. Headlight (2) for 1992 Honda ACCORD SEDAN 2019-02-04
1992 Honda Civic Replacement Bulb Size Chart

Like all light bulbs, headlight bulbs will eventually burn out. The video above shows you to replace the headlight in your 1992 Honda Accord. More clarity can improve contrast and object visibility such as street signs and road hazards. This should provide easier access to the headlight bulb and wiring harness. Replace housing screws and tighten. I have a Honda Accord 1991.
Headlight Change 1990

See sources and related links below for replacement bulb information. There's a clip on the back of the white plastic part that you can press in with your thumb as you wiggle it downward to release. Plug it in and screw the frame back on and you're good to go. The bulb is held in with a round plastic locking ring. Push the bulb in to the back of the headlight assembly so that the ring can clear it as it turns clockwise to lock.
1992 Honda Civic Replacement Bulb Size Chart
I am used to the replacement bulbs that do both high and low. Facing the driver's side headlamp, and looking at the headlamp itself, at clock positions 8, 11 and 1 are the headlight housing screws. Caution, you can break the ring but if you use a small hammer things should be fine. Seat the boot and make sure the three prongs have come through the center round hole. These are dual filament headlights. Screws at 11, 1 and 4 o'clock positions. Is this the side marker or is it in the bumper, to replace the light in the bumper, you need a Philips screw driver, and on the inside side of the light, there is a little hole in the bumper, stick it in and loosen the screw.
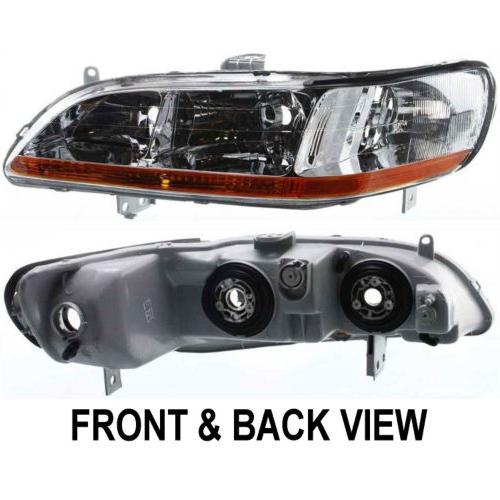
92 1992 Honda Accord Headlight Assembly

Loosen the screw theres no need to completely undo it so you can pivot the spring clip clear and the … n pull the bulb out. Caution, you can break the ring but if you use a small hammer things should be fine. Adding More Information If you would like to help the Modified Life community by adding any missing information or adding a new light bulb size information to our resource, please feel free to or post it at the bottom of this page. The sticker saying shock may result and could be fatal means what it says! It is usually hard to move because the socket is actually inside the bulb base and the pins are in the socket on the wire. When I tried to refund my money in store they said I had to wait a number of hours before it could be authorized since it was an online purchase. Once the ring moves it needs to be positioned so that the ears of the bulb can exit the socket. This is one of those times when a nice sharp rap on the end of a cold chisel screw driver is the only thing that seems to work.
92 1992 Honda Accord Headlight Bulb
This is what you do. Next plug your new bulb into the plug and place the bul … b into the hole where the old bulb came out. Remove the old bulb from the socket by firmly, but gently pulling it straight out. I think it makes it easier to hang on to. For further instructions on the Removal of the bumper, please follow this link. They are more street friendly.
Headlight Change 1990

Composite headlight systems, such as the one found in the 1992 Honda Accord, only require a change of the light bulb. This loosened the grit and grime. Headlights grow dimmer by up to 20% over time and eventually burn out - for this reason, we recommend changing your headlights in pairs. Headlight , 4 bolts hold it in place, 2 on the top, 1 underside left and 1 underside right. Line up the three tabs on the replacement light bulb with the slots on the headlight assembly and insert the bulb. Guess I got to take the good with the bad.
Headlight Bulb

Slide the latch to the left to release the hood and raise it. Push the bulb in to the back of the headlight assembly so that the ring can clear it as it turns clockwise to lock. I did not have to hit the ring to make it lock, however, I did lever the screw driver against it and frame pieces to make it turn. The combination of downroad, sideroad, and white light produced helps the driver achieve more clarity during night time driving. Turn the plastic retaining ring to the left to loosen the bulb from the assembly and pull the bulb outward. One answer above, the user talked about using a screwdriver to gently tap off the connector, while other users were talking about tapping off the lock ring.
92 1992 Honda Accord Headlight Assembly
This setup makes the pressure applied on the outside of the plug somehow less effective and more force than one would expect needs to be applied to force the plug off the bulb. Easy to install, they utilize your vehicle's original lighting fixture. If you're doing both sides, remove the battery and windshield washer tank. Take out the old bulb, put in a new one, and turn the ring back clockwise until it clicks. Five screws and it pops out. By this point, you should be able to see it with a flash light.
1992 Honda Accord Headlight Bulb

Passenger side headlamp is mirror image of driver's side. Bulb packaging needs to read clearly what is inside. Style and performance in a single package! The 2013 Toyota Prius needs a bulb for each. You may need an extra pair of hands to perform this slightly awkward task. Make sure headlamp is off and open hood.