1996 f150 4x4 front rotor removal. Ford Bronco Questions 2019-02-16
VIDEO: Truck Brake Rotor Removal Made Simple (Seriously)
The parts they have are a very cheap version, which may work, but I wouldn't trust. Pull the shaft and joint assembly from the splines of the stub shaft. Slide the right shaft and joint assembly through the knuckle and into the slip-yoke making sure the splines are fully engaged. If necessary, tighten nut to next slot to allow installation of retainer key. Install C-ring or lock ring.
Used 1996 Ford F
Use care to avoid damage or interference with disc brake caliper 2B120 , front disc brake rotor shield 2K004 or front wheel knuckle 3K185. Be sure your jack or lift and your stands are suitable to hold the weight. WheelSystemFilter selectedWheelSystemList, null ; wheelSystemFilter. Place the front wheel spindle in a vise on the second step of the front wheel spindle. This is not a lubricant. Put the inner bearing into the hub assembly, and then tap the seal into place over the bearing. Never work on the vehicle if it's only supported by a jack.
Ford F150 & F250 How to Change Brake Rotor

Install C-ring or lock ring. They wanted a bill of material number from my axle located on a sticker on the back side of the passenger side axle beam. I know that of course i need the axel and leafs. Reassemble hubs using procedures in this section. The front axle and front driveshaft should rotate with the wheels. The nut was so tight he crushed the new Timken bearing case he installed. Step 5 - Install the rest of the components Put the wheel on, tighten the lug nuts, raise the car, remove the jack stands, and lower it.
VIDEO: Truck Brake Rotor Removal Made Simple (Seriously)
/1987F-150_timeline-56b7fe6d5f9b5829f83d3f40.jpg)
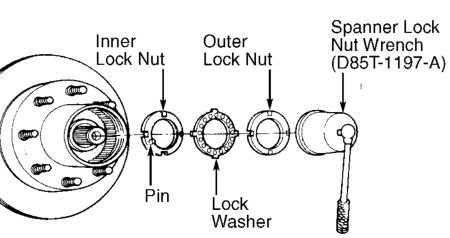
Eventually, the pressure from both bolts will be great enough to break the rotor loose from the hub. You might want to check the parking brake while you are here. Install retaining key into the spindle keyway by inserting the short leg into the aligned slot in nut. Then use your pry bar to gently pry the calipers loose. If slippage is suspected, mark the tire and axle shaft with chalk after locking the hub and apply a heavy torque load several times. ColorFilter selectedColorList, 'exteriorColorFilter', 'exteriorColorName', 'Color', 'colors', null ; colorFilter. Check that the final end play of the front disc brake hub and rotor on the front wheel spindle is 0.
Search Results 1996 f150 4×4 w auto locking hubs rotor removal
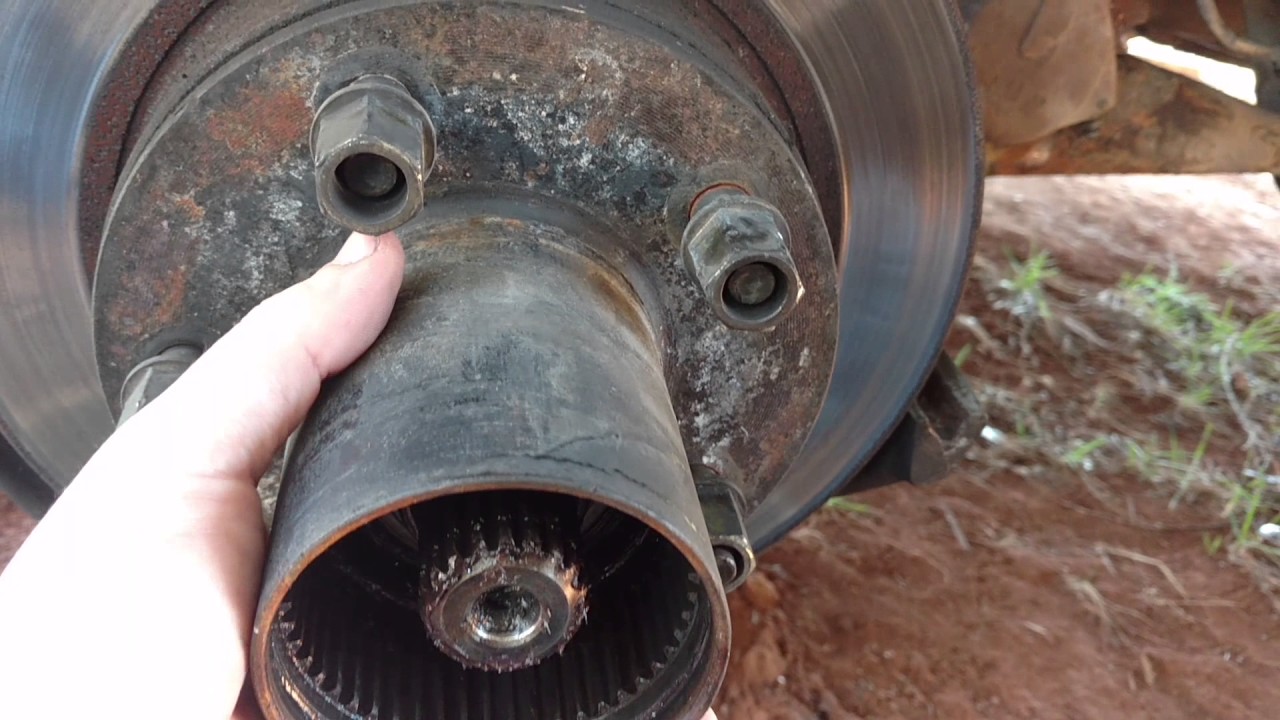
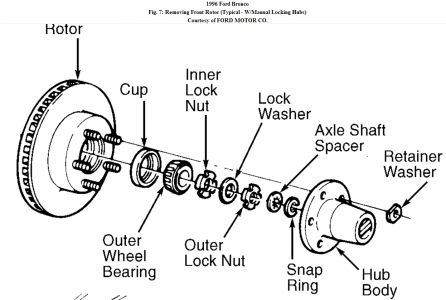
BodyTypeFilter selectedBodyTypeGroupIdList, bodyTypeGroupIdToNameMap, null ; bodyTypeFilter. It is standard practice to use a sledgehammer in an effort to try to force the rotor off of the hub. Be careful to avoid damage or interference with caliper bleeder screw fitting and front disc brake rotor shield 2K004. Remove the lock ring seated in the groove of the front disc brake hub and rotor 1102. Keep turning the bolts while holding the bolt against the washer with the open-end wrench.
Spindle Lock socket
Seat the rolling diaphragm seal by lightly tapping on the inner sheet metal lip of the seal with Spindle Seal Replacer T95T-3132C, Driver Handle T83T-3132-A1, and a hammer to make sure it is sealed squarely. Compress the caliper piston by using your C-clamp. I realize it is a salvage dealership, but would have appreciated an honest evaluation of the vehicle before I made that trip! I was wondering if i could get a small walk through of what to do, i have the basic idea - i have done it on an mazda mx-3 before but never a rear and never on an audi. Refer to Section 05-03A or Section 05-03B for replacement of outer axle shaft seals or spindle inner seal and bearing. On the left side of the vehicle remove the shaft and joint assembly by pulling the assembly out of the carrier. Seal 2 is actually a smaller version of seal 6, but the oneFord parts guy said that they don't have a replacement. Just make sure you don't hit the lug studs.
Ford Bronco Questions
Use a rubber mallet and hit them from behind. Should hublocks become submerged in water or mud for a long period of time, water may get past the seals and into the hubs and axle. Having a torque wrench is very convenient. It was truly a danger to drive with broken glass in the back area, the brake that had to be put to the floor to stop, steering so loose, it was nearly impossible to steer. Napa had to order in the 25009, but they got it in a day. Do not pry directly against metal caliper piston or damage will occur.
Spindle Lock socket

But the decals had a way of disappearing so I cannot tell if they are or not. The rear differential is located. Automatic Locking Hubs: Raise vehicle on a hoist so that all wheels are off the ground. Prevent separation of caliper housing from anchor bracket because contamination of guide pin journals can occur. Install retaining key into the spindle keyway by inserting the short leg into the aligned slot in nut.
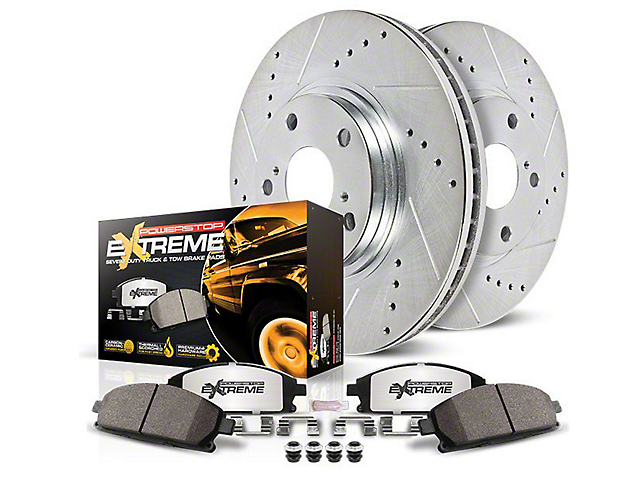
Brake Rotors
Align legs of cam assembly for installation of hub body. This reduces wear and tear on the front axle. On the right side of the carrier, remove and discard the keystone clamp from the shaft and joint assembly and the stub shaft. Step 4 - Pop off wheel bearing cap Remove the cover and take the 13mm nut off by holding the shaft. While rotating rotor and hub, retighten wheel bearing retainer nut to 68 Nm 50 lb-ft to seat wheel bearings. This time the hubs should release when the front wheels are spun in the forward direction. My rotors were too thin to allow machining so I discarded them and bough new rotors.