1997 toyota camry dashboard removal. How do you replace dashboard and console lights in a 1997 Toyota Camry 2019-03-04
97

The two screws can be removed by adjusting the steering wheel to its lowest position and using a short phillips head screwdriver. These bearings can wear out and they do require maintenance, so when something happens, the entire half shaft needs to be removed from the Camry. . Just remove the water pump, clean the place where it goes. This is not difficult, but just a bit time consuming. I know, I have a 93 Camry V6, and it is a real pain to do the plugs and wires with the plenum on.
How do you replace dashboard and console lights in a 1997 Toyota Camry
By - July 22, 2015 This article applies to the 4th Generation Toyota Camry 1997-2001. I found the answer earlier at this site, and it worked! Install the fuel sending unit to the pump bracket. You do not have to drain coolant down any lower that the stat level. You must do this while holding the assembly clear of the mounting points that you removed the screws from. Step 4 — Inspect the float in the brake fluid reservoir The float might be sticking. The graciousness of a FixYa rating for my assistance would be greatly appreciated.
How do you replace the water pump on a 1997 Toyota Camry LE

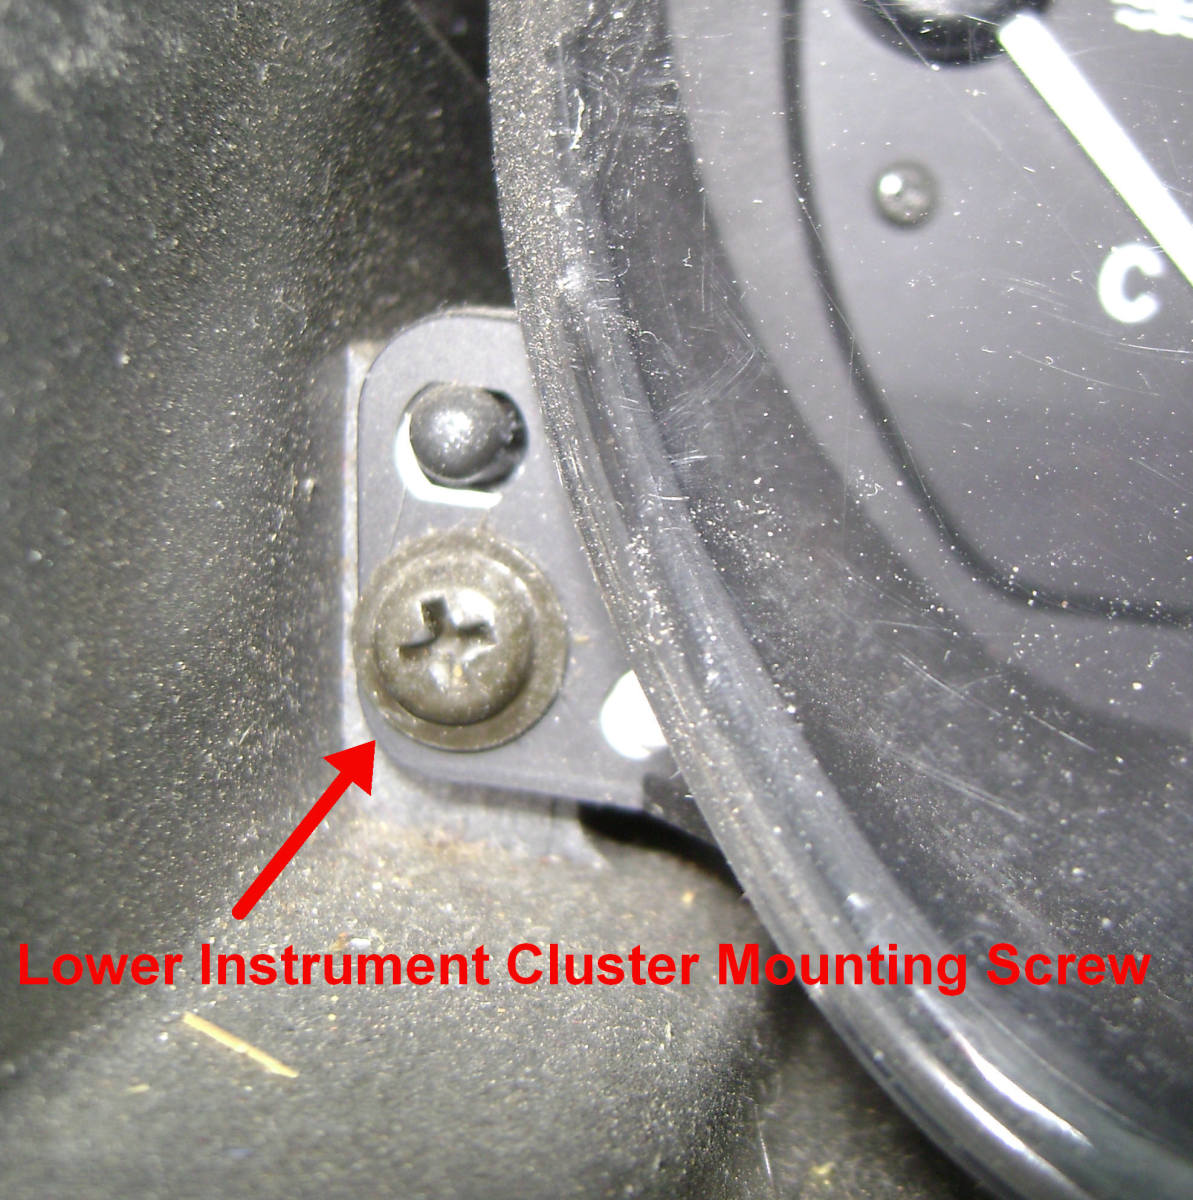
Then maybe it is time to replace the brake fluid. Unbolt the cruise control bracket below the battery tray 5. The dash on your 1993 Toyota Camry may be showing signs of wear and tear. Periodically, one of my brake lights will not illuminate when pedal is first depressed. These screws are located on the underside of the dashboard, just above the instrument cluster. Do not smoke or have any open flame in the work area when removing the fuel pump. If you have cracks in the dash or the dash is faded, you may want to replace it.
Remove Instrument Cluster Finish Panel
The warning light sensor located in the trunk behind the carpet behind the left panel is your problem if you have lights out. Taking out the stock stereo to swap in a different radio can not only add those features to your Camry, but it can also potentially raise the resale value as well. On the upper portion of the dashboard, there are two screws under the defroster vent. Inspect your brake fluid reservoir. Make sure you hold the mirror before removing the last nut or it will crash to the ground! With the assembly free of the vehicle, you can remove the bulb assembly by twisting it and then pulling it out. Then maybe it is time to replace the brake fluid.
Replace a Fuse: 1997

Japanese vehicles tend to use fusible links to protect the supply to the fusebox rather than the large 60 or 80 amp fuses commonly seen these days or no protection at all as in the past. There are no secrets or great tips on the plenum removal, just take your time. My 1996 Camry had 2 screws on the bottom of the door that also were holding the interior door panel in place. Then gently press the screwdriver handle down. This article applies to the Toyota Camry. Place the tip of the nylon pry bar in the small reveal between the bezel around the stere Nothing is more frustrating than getting into your car expecting it to turn over or start and nothing happens. Remember that there are different size bolts, and where they go.
1997 Toyota Camry TSBs

Before removing the 4 bolts, remove each wiring connector from the coil by gently squeezing the back of the connector like a clothes pin and pulling slightly backwards away from the coil. I am not an auto mechanic and do not even know the correct names for all the tools, but here's a link you can copy to the file, which is a Word document with pictures: members. Look inside the trunk behinds the light panels. Replacement clip-in-bulbs can be purchased at any auto parts store. Do not yank it out as there are three electrical connectors attached. The trim will come right off. The fuse box is located under the steering wheel.
SOLVED: How to replace 1997 Toyota Camry dashboard lights?
Identify the bulb to be replaced. Do your brakes feel different? The panel is mounted to the dash by 2 screws and 4 press-fit clips. This article applies to the 4th. No tools required, just the bulb. Replace the globe and reverse the process to reassemble.
Toyota Camry 1997 to 2011 Why is Brake Light On

You really have to t … ug to get the plastic cover off, but they are down there. Always relay the year, make and model to the parts store when purchasing a window switch, because they are model and year specific, such as for the 1991 Toyota Camry. Mirror If the '97 is similar to the '96 then this is how you would do it: On the inside of the car where the mirror is attached to the door is a cover plate. By - September 14, 2015 This article applies to the Toyota Camry 1997-2011. Please get back to me if you need any more info. When you remove the last part of protection you will see water pump and tops of scr … ews around it.
Remove Instrument Cluster Finish Panel
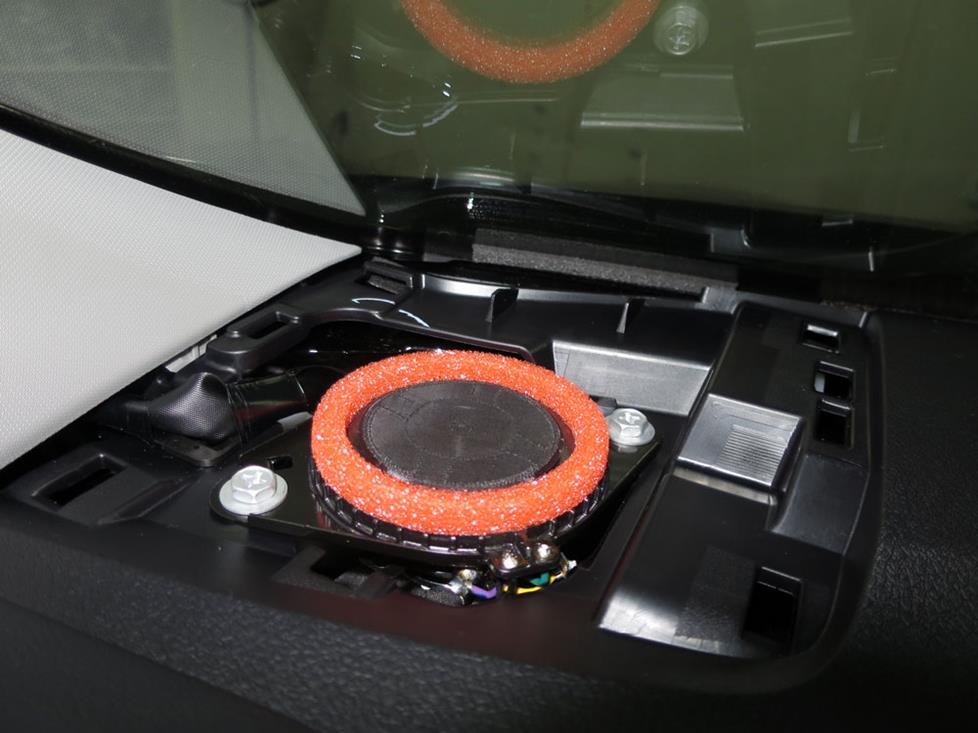
Once this small panel is removed, the deck can be taken out using just a ratchet and socket set. Next will be the gauge clusters take the 2 screws out on the left and the 2 on the right. Dependin The Camry comes equipped with a factory radio and speakers. The clear plastic case as well. Dont worry it wont break it. This article applies to the Toyota Camry 1997-2011.
Remove Instrument Cluster Finish Panel

My most sincere thanks and 'wow'!! Once the screws have been removed, the 2 bottom press-fit clips can be detached by pulling on the bottom of the panel trim. Be very careful during this process not to break the spark plug. Instrument cluster light bulbs, as with any other light bulb, will eventually burn out for good. Just remove the water pump, clean the place where it goes. Using the long extension attached to the 16mm deep well socket, thread the spark plug clockwise by hand until it stops turning. Find out why by clicking on this article. The trim will come right off.