1998 bmw 318i water pump replacement. BMW 3 2019-02-24
BMW E36 Coolant System Rebuild Part 3 of 5 Water Pump Replacement

The process to remove and service the head involves removing the intake and exhaust manifolds, camshafts, hydraulic lifters, valves and valve stem seals. The tank was replaced and the vehicle tested, but unfortunately the head gasket had been damaged by the over heating episode. Take note of the proper belt routing. Make sure you have the M6 extraction screws handy before you start this job. Note: This is a very light torque. The four nuts incorporate a washer and are torqued to only 10Nm. When they fail, the end result is always the same: no coolant flow through the engine.
BMW E36 Coolant System Rebuild Part 3 of 5 Water Pump Replacement
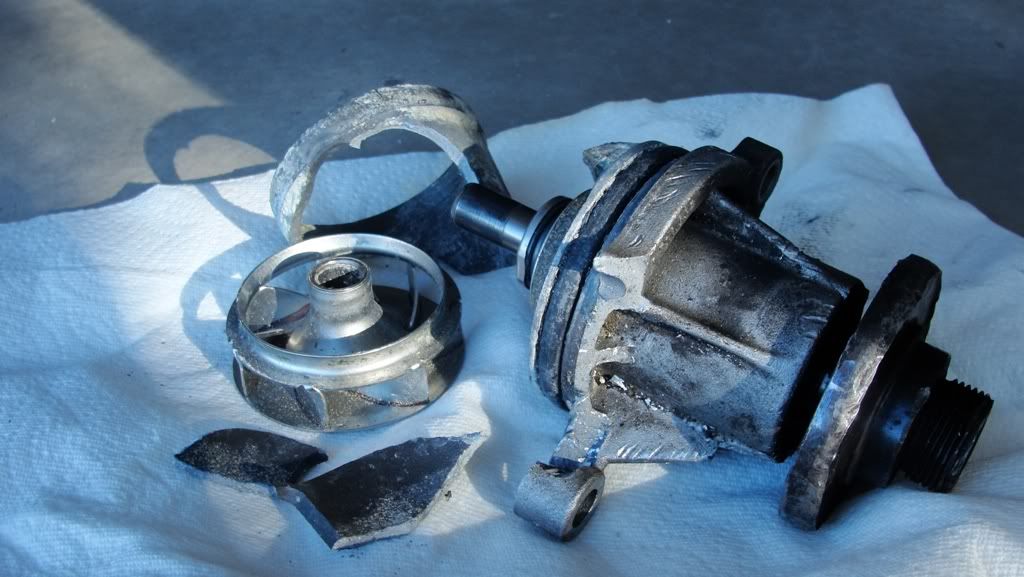
It uses a larger bearing to address one of the failure modes associated with pumps equipped with heavy metal impellers. For vehicles with M42 engines. Tighten the clamp until you start to feel solid resistance. Clutches last a long time, but can fail in two ways, one of which is destructive to the fan, so it's best to replace it before it fails. The fan clutch will most likely fail in one of two ways: it will either freewheel or lock up permanently. The hose clamps can be loosened with a small flat blade screwdriver or a 5mm socket and small ratchet.
BMW E36 Coolant System Rebuild Part 3 of 5 Water Pump Replacement

Begin by using a 10mm deep socket to remove the four nuts on the studs holding the water pump to the block. I also recommend ordering this part as far in advance as possible as it is occasionally not in stock. Little if any coolant should flow from the either hose junction provided the coolant has been drained, but as long as the belts are removed and you have a can of brake cleaner handy to decontaminate the pulleys if necessary, this should be a non-issue. For vehicles with M44 engines. The fan itself is made of a high grade plastic, but it is subject to fatigue resulting from countless heat cycles just like any other plastic part. This procedure is documented in my. They offer good selections, great prices and quick delivery.
BMW 318i Water Pump

If the clutch locks up permanently and you rev the engine too high, however, the plastic fan can self-destruct and send projectiles into the radiator, the belt, or even the hood. Remember that it's an extremely good idea to put some lithium grease anti-seize around the bolt holes on the new water pump, so there is a reduced risk that it will be seized whenever it needs to be replaced again. This closeup shows the correct mating. Here's where you need to attach a breaker bar or ratchet with a 13mm socket and apply a clockwise force to detension the air conditioning belt. This site was designed and produced solely by Pelican Parts.
1998 BMW 318i Head Gasket Replacement

Then, install the pulley with the alignment mark set accordingly. On a new clutch, this nut is hard to rotate by hand when the part is cool. If it freewheels cooling efficiency will be diminished but as long as the is operational you probably won't notice the failure. Highlights Note: These pictures were taken during a larger job involving the replacement of the alternator and power steering pump. This article is provided freely for entertainment purposes only and is not intended to be instructional in nature. Arrow 1 shows the M6 bolt used to pull the old pump out of the block, while Arrow 2 shows a crude but effective method used to prevent debris from entering the thermostat opening while the radiator hose is removed. Most people seem to complain more about dealing with the fan than they do about the pump itself.
BMW 3
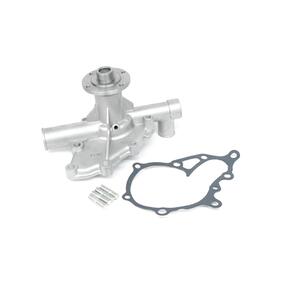
All pictures and references to the Porsche name, and the car names and shapes are for restoration reference only, and do not imply any association with Porsche. Conclusion Replacement of the water pump is a relatively simple job that should take no longer than about two hours for the uninitiated. A closeup of the new pump installed. This procedure is documented in my. Repeat as necessary I typically find ten sharp and quick blows is sufficient.
BMW E36 Coolant System Rebuild Part 3 of 5 Water Pump Replacement

If the hose clamps are original factory equipment and squeezed on, they are best cut off with a pair of diagonal cutters. Newer versions of the tensioner have a 16mm hex bolt head cast into their body for this purpose so it is not necessary to remove the protective cap in this case. Failure of this pulley can throw the main accessory belt and thus disable the water pump, alternator and power steering pump simultaneously. You'll need it to install the belt later. No technician I know bothers with it.
Doug's Domain :: BMW E36 Water Pump DIY
Contrast with the new style tensioner depicted below. This would also mean more new parts instead of relying on old parts, and result in a more reliable repair. While it is not strictly necessary to completely remove the belts to replace a water pump I strongly advise that they be removed to avoid this contamination. Temporarily mate the water pump and new pulley. Put them aside somewhere safe, labeled accordingly. By entering this site, you agree to hold Pelican Parts free from any liability arising out of the use of any information contained within.
1998 BMW 318i Water Pump
The flow of coolant cannot be controlled in any practical sense so this explains why the belts must be removed before the pump. The vehicle's head was removed, and completely serviced. If it rotates easily it's time for a new clutch. The plastic becomes brittle with time and breaks under pressure and heat. Coat the o-ring on the pump with a bit of fresh coolant to serve as a lubricant and then press the pump into the block.
BMW E36 Coolant System Rebuild Part 3 of 5 Water Pump Replacement
Rotate the pump so that the alignment mark made on the pump flange is visible. All pumps designed for the E36 and E46 are remanufactured at this point, but as such are as good as new. . The alternator pulley goes where part 19 is shown, the idler touches the face of the belt just to the left of it below part 17 , and the tensioner pulley fits in the loop in the belt to the left of part 19. If it's not obvious, that failure mode can result in damage far more expensive than a fan and a clutch, so you'd be wise not to complain about the cost of parts in this case. Eventually, you'll figure out the subtle difference between the nut tightening and the belt slipping on the pulley.