1998 buick park avenue blower motor location. ac 2019-03-31
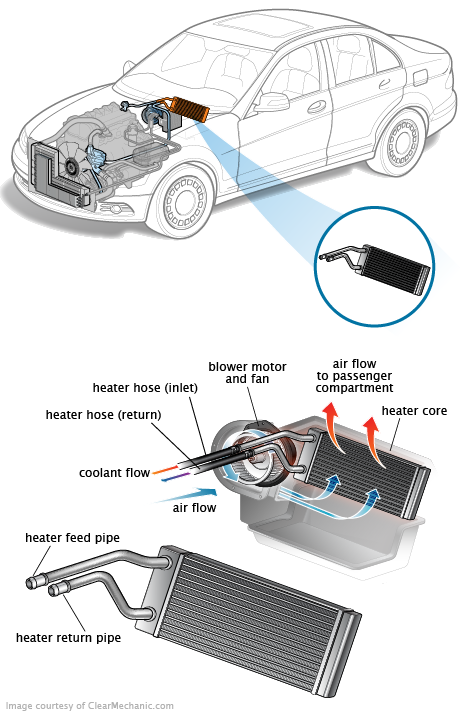
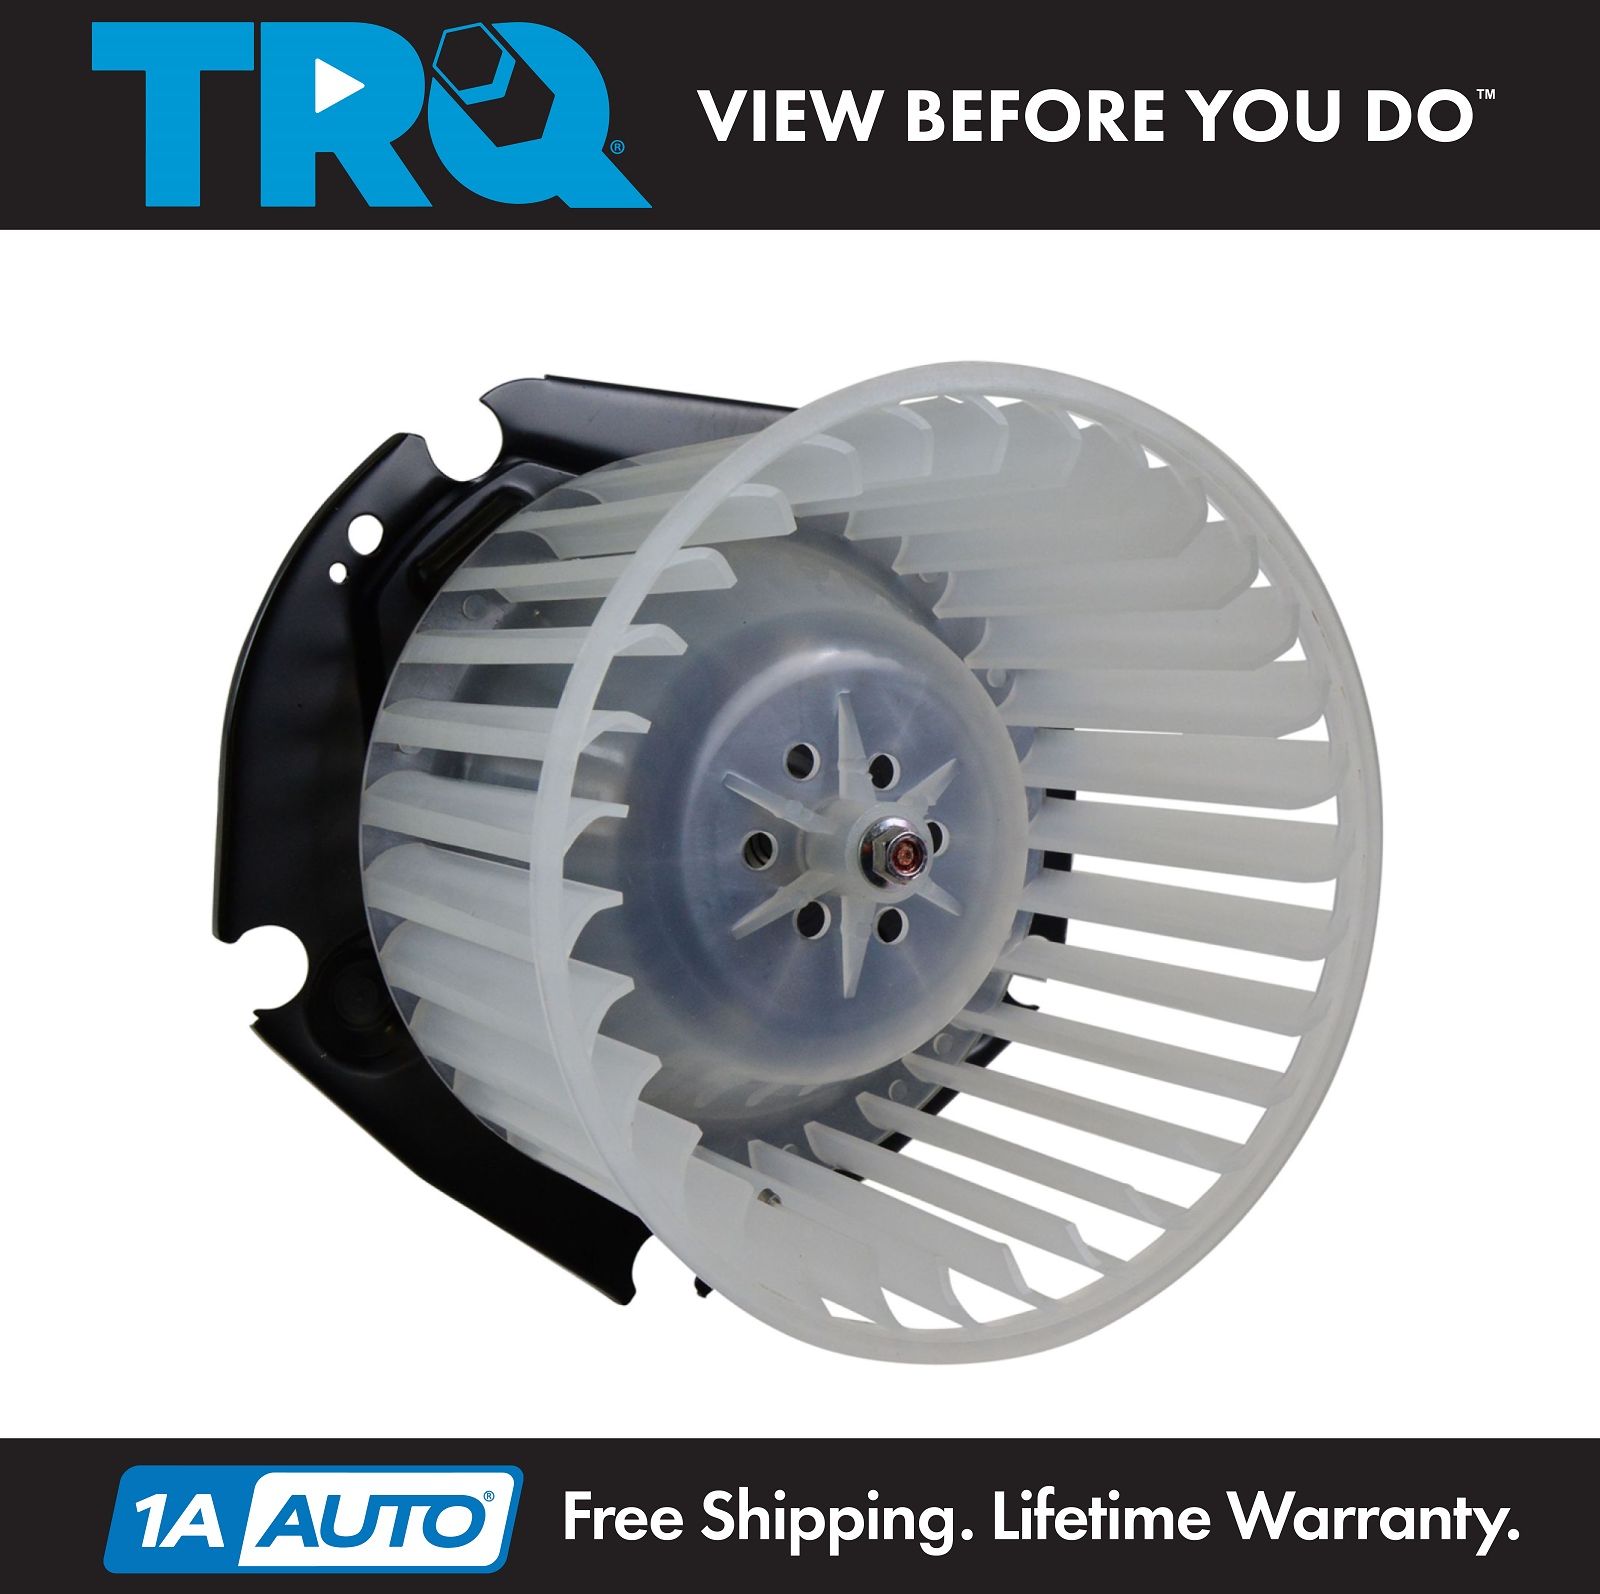
Blower Motor & Fan for 1998 Buick Park Avenue
I had mine replaced at the garage, because I couldn't see how to get all the bolts out or if special tools were required. Boy was that thing fried. You need to remove the bolster cover under the glovebox. I just don't know which relay is related with the fuel pump. Hey, I'm also having problems with my fuel pump relay, and i know where the relay center is located under the hood. Instead it has an electronic power transistor that goes in the same slot where the resistor pack goes for the manual speed version. Make sure the power is off to the blower before you start.
Please Help

When you work your way through the connectors, remove the bolster and the blower motor cage should be visible. No information contained in this video shall create any expressed or implied warranty or guarantee of any particular result. Recently the heating and air stopped blowing. If door is not being commanded to its correct low value of zero percent, go to next step. When pulling your old one out, be ready for a good amount of debris to come out along with the elements depending on the last time it was changed as you can see from my picture, the last time mine was changed Clinton was probably still in office. If an open circuit is not present, go to step 11. The blower ran for 5 minutes with a 20 amp fuse, a couple of days with a 25 amp, and for a week or so with a 30 amp fuse.
No Air Flow From Vents in Dash
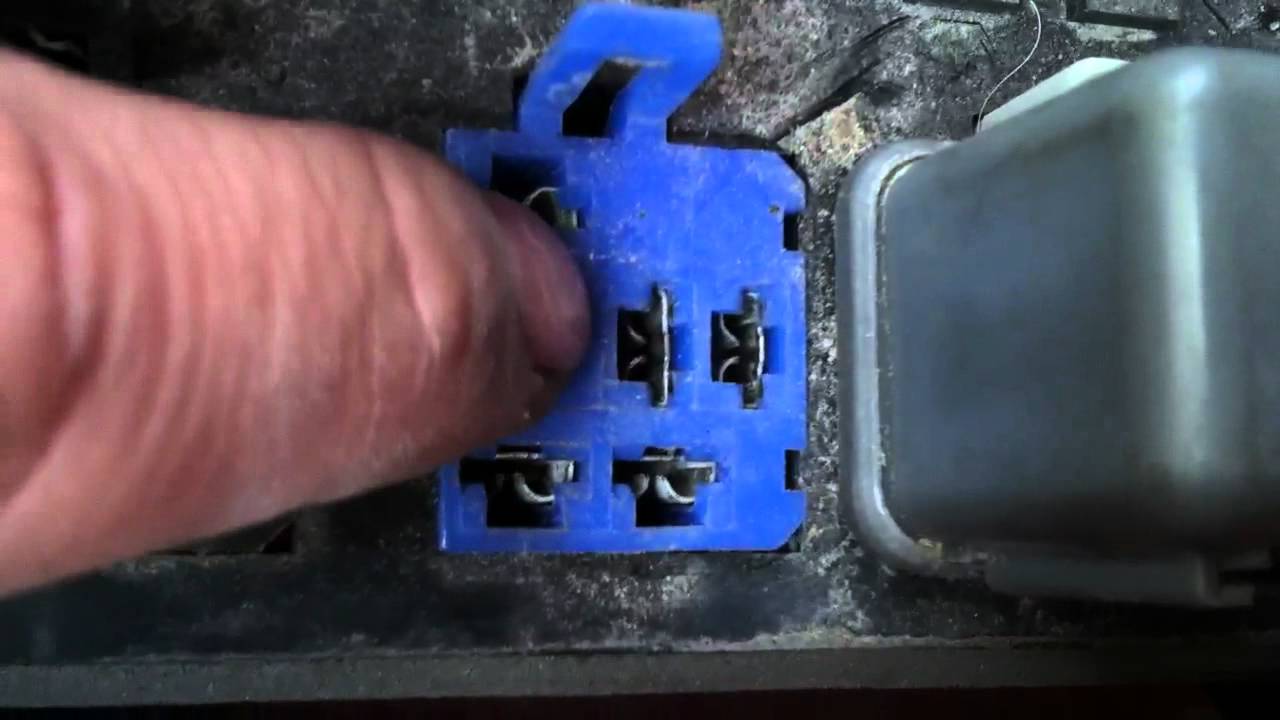
Thanks for the help on locating it. This video is applicable to the Buick LeSabre and Park Avenue, model years 92, 93, 94, 95, 96, 97, 98, and 99. I am fairly handy and do not mind getting dirty, what should I look for and where. The automatic speed control does not have resistors. If the blower motor is easy to get at, I would go and pulling the connector off and check that you're actually getting power to the motor and only then pull the motor if you've confirmed that you do. It works this way in both the manual and automatic modes. Air conditioning problem six cylinder front wheel drive automatic 113,000 miles.
ac

Reapply the bolster and snap some fresh connectors into the holes. Check linkage between door and actuator. You need to remove the black cover under the dash. Tighten the 3 6mm bolts and you are good to go! It acts normal in every other way lights and indicators work as normal but I am not getting any blowing at all no matter the setting. Put the first element in with the plastic flap on the bottom and facing the access hole.
Park Avenue AC Heater Blower Motors

I wonder if the failed blower resistor could be contributing to this? My blower was partially shorted -- which means to me that it was drawing more current than it normally would. Next is three little screws in the motor, take them out and the motor sho … uld come out. If terminal contact is okay, replace programmer. Check voltage at actuator connector terminal No. Follow the upper radiator hose, it is connected to it.
No Air Flow From Vents in Dash
When you have the second element all the way in bring the white plastic flap of the first one down over end of the second one as you push both up into the hole to make room for the third and final element. I read somewhere that the blower normally draws under 20 amps. The Ultra required a different starter and more expensive than the… On my 1994 with a 3. Take some wire cutters or diagonal cutters and clip the plastic connectors. I put a fuse inline with my blower and hooked it up with a relay as above. Once all 3 pieces are out it is a good idea to vacuum up the mess you made as well as try and stick the vacuum nozzle in the cabin air filter access hole to try and suck up any trash you did not get out. It is a pain to get to the one screw, but be patient and take your time.
Will a 1998 Buick regal blower motor fit a 97 Buick park ave

And be aware that a partially-shorted blower motor hard to diagnose - still works but draws more current than it should can cause premature failure of the solid-state blower speed module. Remove these and the motor should simply fall downward. Is your blower motor working? Can someone tell me where it is in this thing and what the resisitor will look like? At AutoZone, trustworthy advice provided by helpful staff helps get you the right products every time. Repair door or linkage as necessary. No matter what the history of your car is, maintaining a properly working engine is crucial to maximizing the miles you get out of it.
Buick Park Avenue Questions

After removing those bolts the entire assembly will drop down. Here is a diagram below to show you the location and check the guide above for reference. If 5 volts are not present, go to step 10. Here is a guide that will help you fix it: And diagrams below Here is a testing procedure to help as well. To do so, just slowly pull the bolster out from the sides of the passenger side until you come to a plastic, one way connector. It is my son's car and he has the digital readout.