2001 s2000 torque sensor. Steering having seizures. Very stiff and jerky. Torque sensor problem? : S2000 2019-01-18
Honda S2000 MAP Sensor
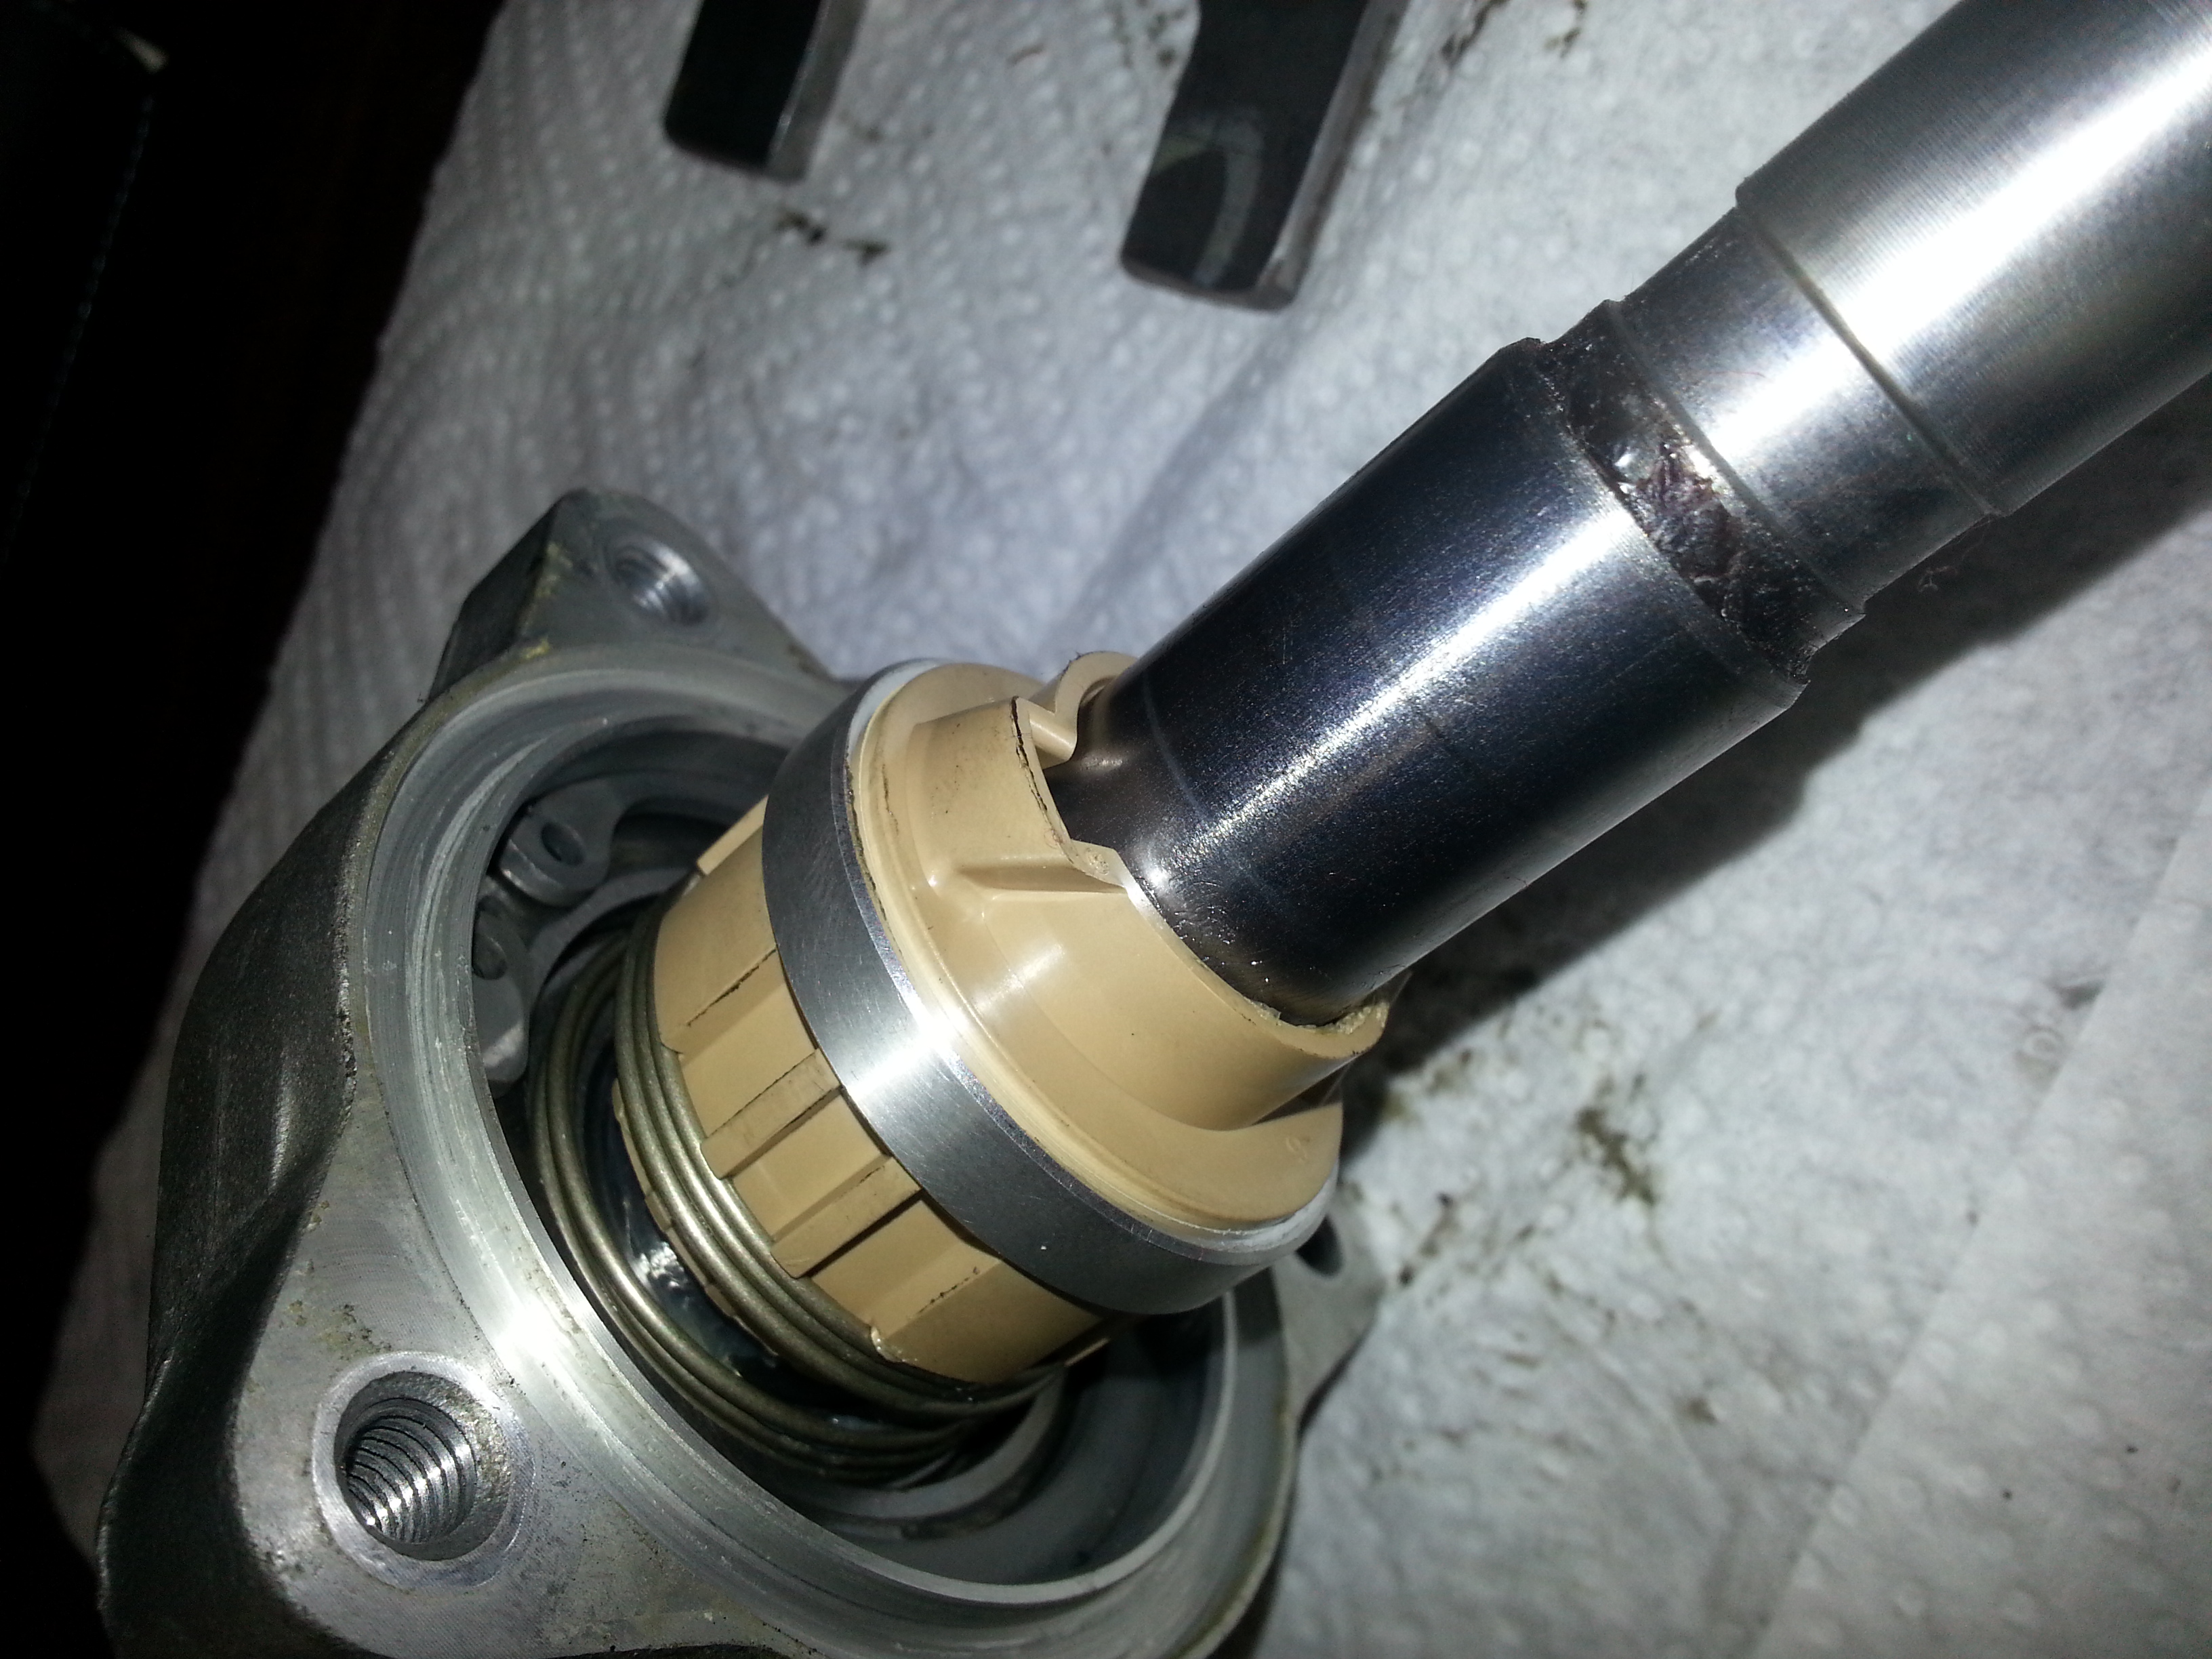
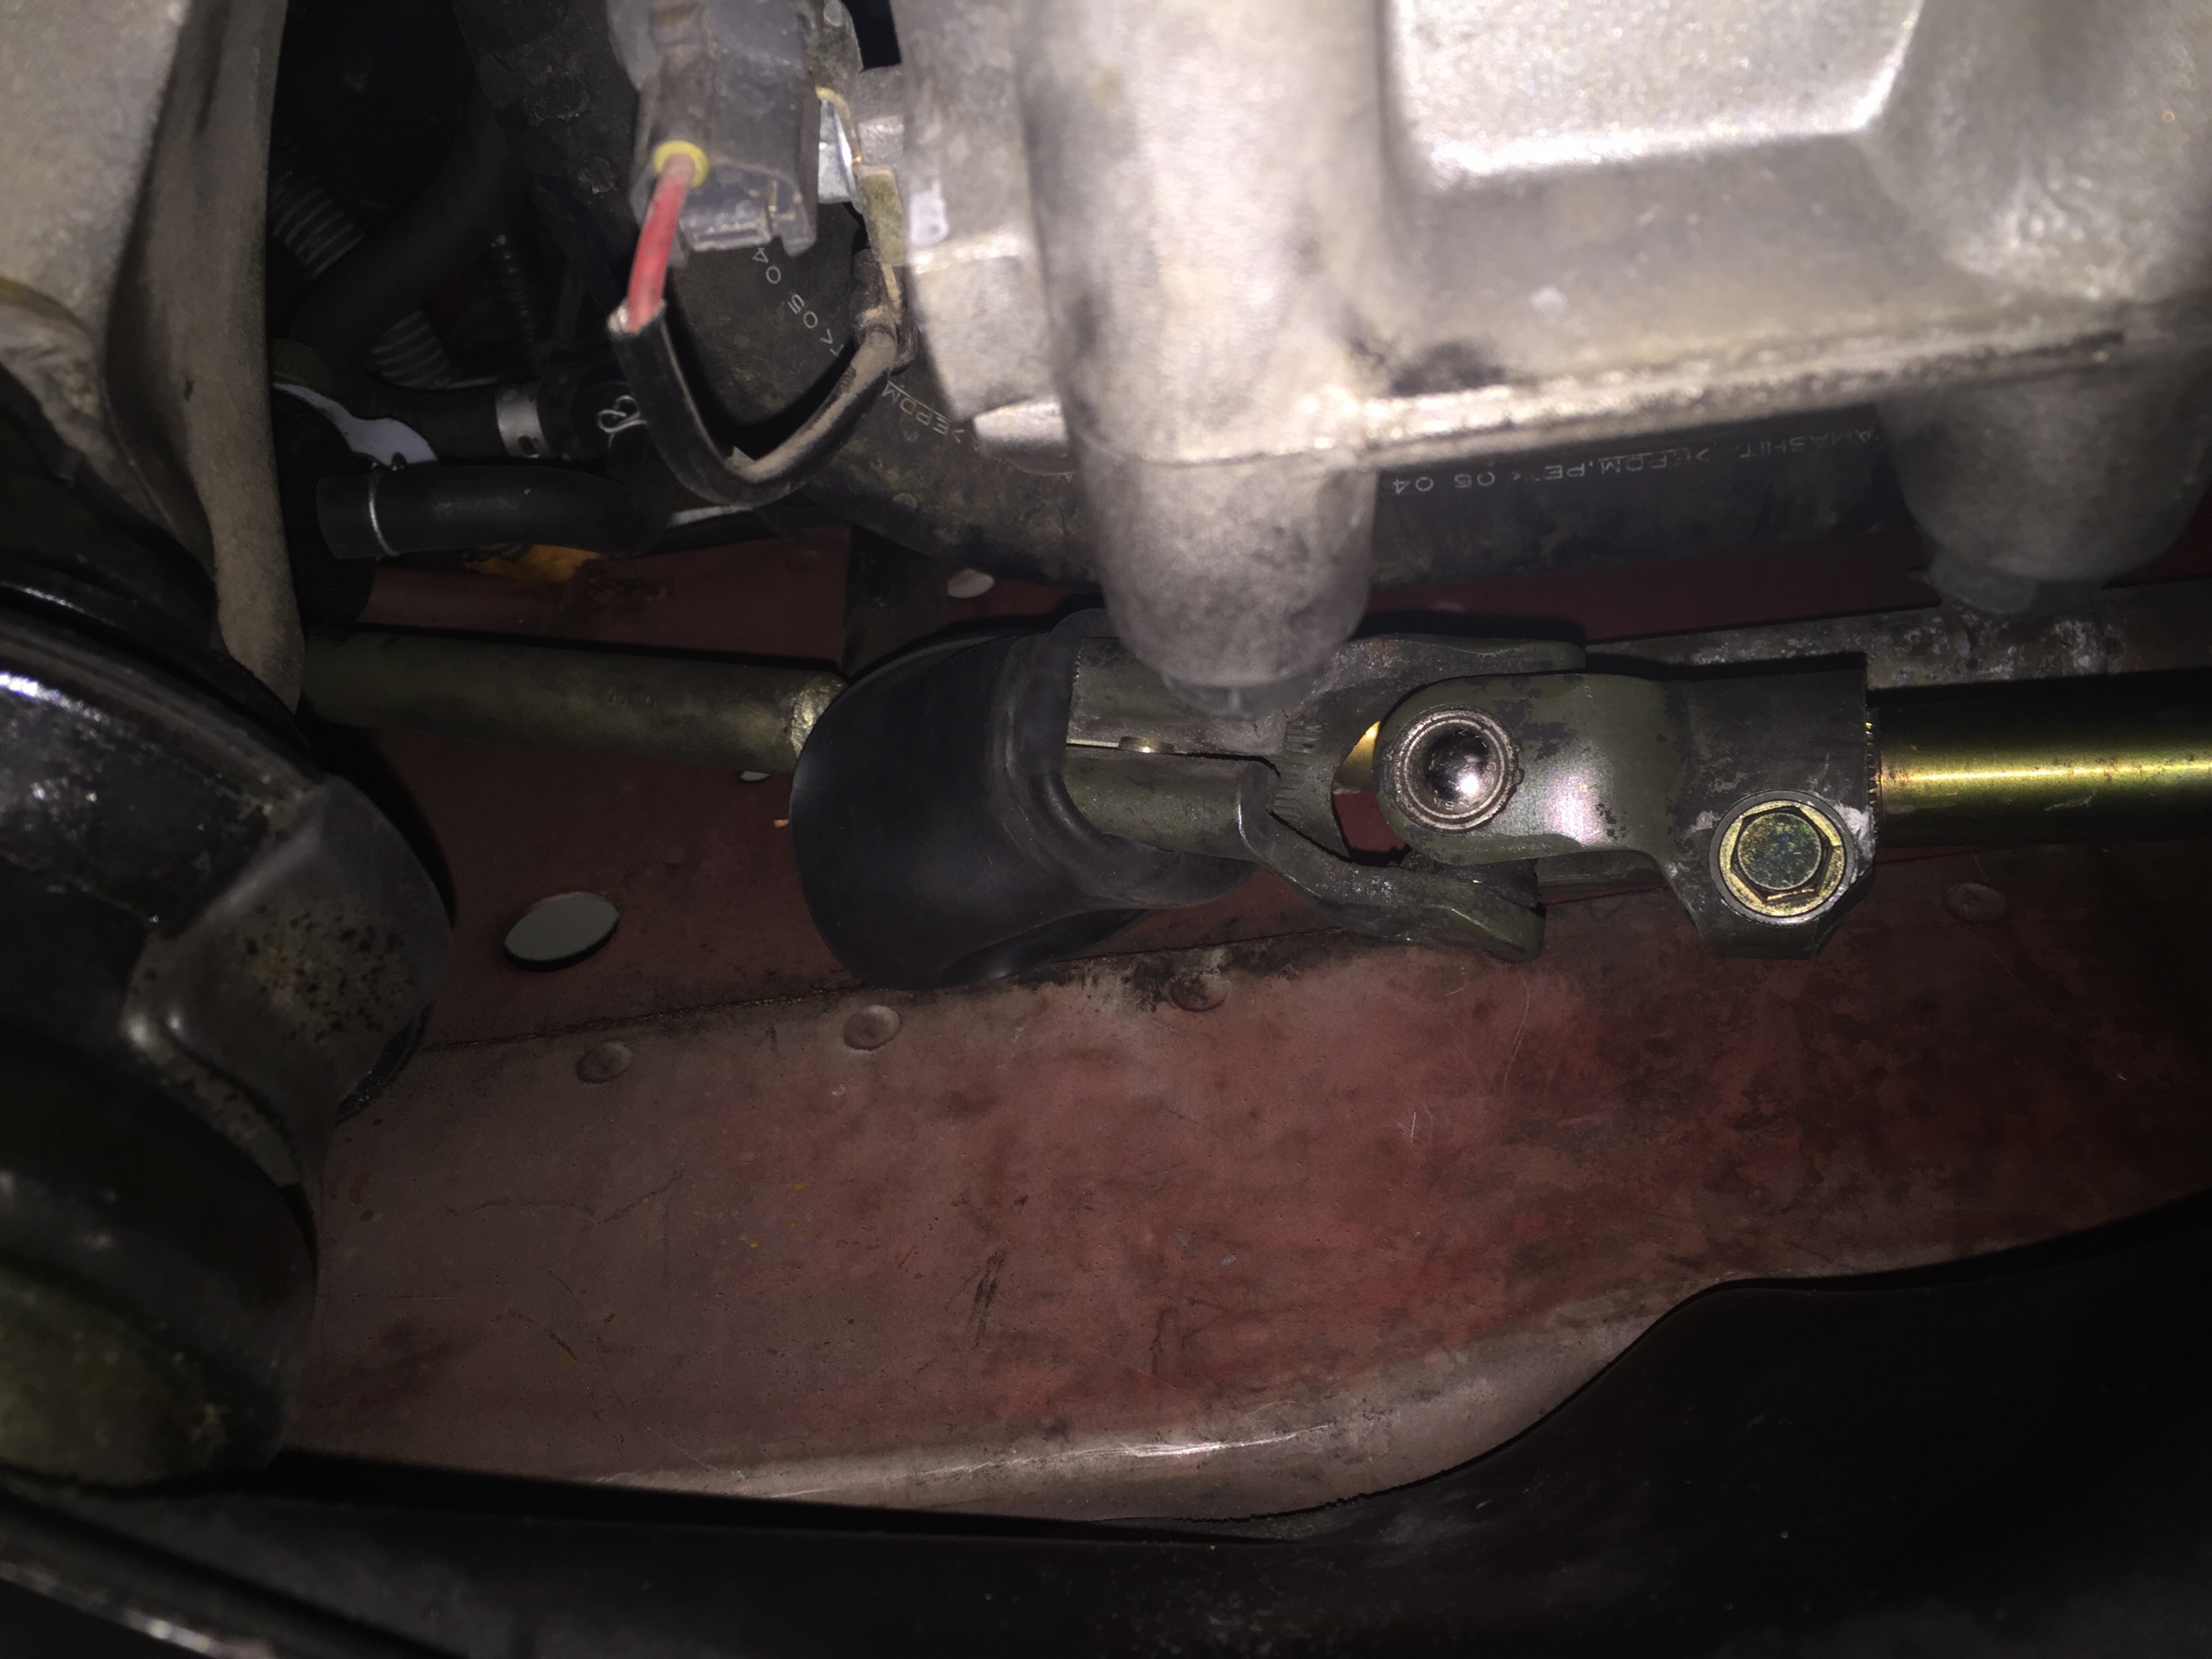
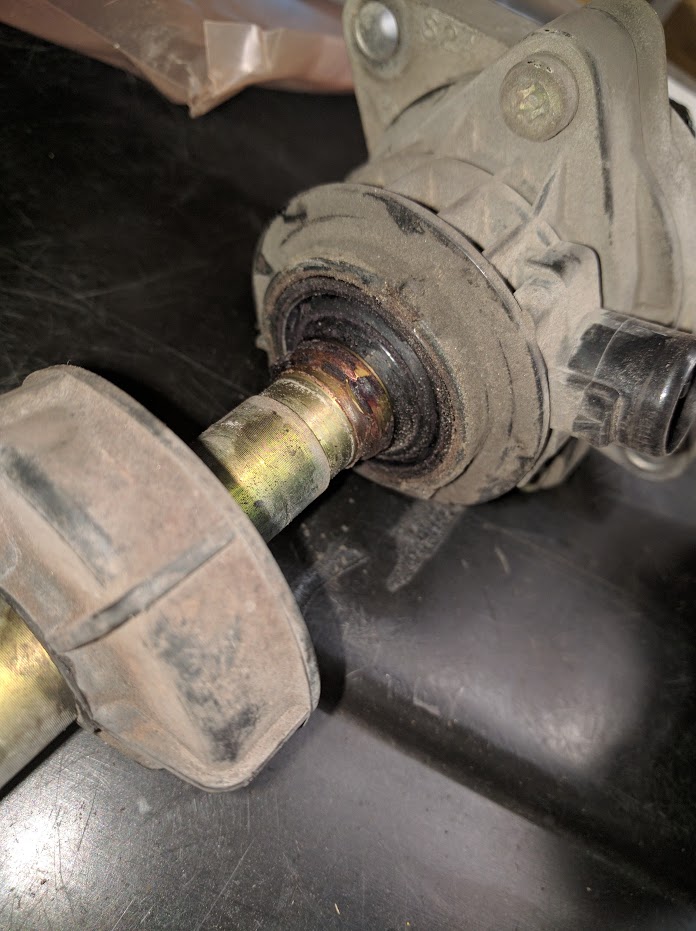
I figured they might be old codes, and if there were still issues it would raise a code. Oddly enough, if I tried the reset off center, the calibration would take, meaning my torque sensor more likely than not has developed a dead spot on center. I added some grease to the end of the torque sensor which fits into the steering rack. Many people have had issues with the torque sensor acting up and providing feedback into the steering wheel. Just in case anyone is curious here's how i removed the torque sensor. Replace the o-ring that sits between the steering rack and the torque sensor housing making sure to grease the new o-ring 9.
Steering having seizures. Very stiff and jerky. Torque sensor problem? : S2000
Also with wear valves normally tighten up so I recommend shooting for the middle of the valve clearance adjustment range. Fire up the engine and enjoy the sweet harmony of the freshly tuned S2000 engine. Remove the 5 10mm head cover bolts and pry up the washers and rubber seals beneath each of them. I'm sure there's a better way of doing it, but i sure didn't see it in the service manual. I am guessing that if it has been sitting with the handbrake on for a long while that it is the driver's side rear caliper which has siezed. Closely inspect the spark plug holes and seals once the head cover is sitting flush with the cylinder head. In principle an engine torque damper works a lot like the shock absorbers on your suspension.
2001 Honda S2000 Torque Converter (Used/OEM)

Aftermarket Honda S2000 engine torque dampers work by mounting between the top of the motor and the chassis to reduce the amount that the motor can move laterally. Verify you removed the wrench and socket from the crankshaft! Managed to find a torque sensor locally. I performed the testing in the service manual by checking each of the 3 pins on the torque sensor connector for continuity. Here at Andy's Auto Sport we have a fantastic selection of Honda S2000 engine torque dampers for you to select from. If they all feel cold, then carefully feel the disc rotors. The intake valves are on the intake manifold side and the exhaust valves are on the exhaust manifold side of the engine no shit? Watch the washers, they will fall off the rubber seals.
Has anyone had steering issues with their s2k? : S2000

It's best to let the car sit overnight. My old torque sensor had a clear failure. Maybe just takes abit more time. With the feeler gauge still in place turn the screwdriver part of the valve adjuster tool clockwise to shorten the gap and increase drag on the feeler gauge or turn it counterclockwise to increase the gap and decrease the drag on the feeler gauge. For the exhaust valves we're looking for. It ended up being the torque sensor that was the problem.
Honda S2000 MAP Sensor

If it gets extremely tight the valves can actually begin riding the cam lobes full time or risk pushing the valve too deep into the cylinder head for a piston strike. I then take it to my mechanic and have him do a four wheel wheel alignment, check the condition of the rims and tyres and tyre pressures. Insert the coil packs and clip on their electrical connectors--make sure you hear a solid click for each one. Reinstall the ignition coil cover and secure it with 4 small hex bolts. Remove the fuel rail cover. If a valve needs to be adjusted leave the feeler gauge in place and put the adjustment tool or 10mm box wrench on the adjuster lock nut and turn it counterclockwise to loosen it. Q: What is an engine torque damper? Every time you step on the gas your engine torques to the side as it transfers power through the drivetrain to the wheels.
Has anyone had steering issues with their s2k? : S2000

Re-insert the torque sensor and bolt it back in. While there was some resistance around 500 Ohms i believe it looked ok to me. You can work through that from the top and steady the wrench that way while turning it from above to loosen it or it is a straight shot to reach it from below the car. The diagram listed above is for your reference. Take it for a drive and check the bolts are still tight. I gently hit my cover with a rubber mallet to get it loose.
Horsepower/Torque Curve 2001 Honda S2000 (man. 6) (model since mid
Except as expressly authorized by automobile-catalog. The best thing to do is replace it. I find the Procedure to read the eps codes and clear them. I used a large screwdriver to pry them out of the head cover then wiped some motor oil on the new seals and pressed them into the head cover by hand. Clean the top of the spark plug tubes, the mating surfaces of the cylinder head and head cover and around the 5 head cover bolts. Order today for better horsepower, torque, and overall system performance from your Honda S2000. Once off inspect the spark plug rubber seals and the cylinder head cover gasket.
EPS issue on 2002 Honda S2000 L4

Many of the valves will be in spec and will not have to be adjusted. Removing the battery heat shield will make it easier to adjust the exhaust valves but I didn't have any problem with leaving the heat shield in place. I inserted both to check the intake valve clearances and those I adjusted I set the adjuster screw so I had just a little drag on the. Detailed engine characteristisc: Horsepower and Torque Curve Honda S2000 man. Its cam lobes will be at 11 and 2 o'clock. This is how you will see it: thanks folks, looks like I have area things to check this weekend. I replaced a couple of my spark plug hole seals.
ap1 torque sensor neutral position recalibration

Do this now to keep things from falling into the spark plug holes. Cylinder 1 Intake Valve Adjustment Note: The Valve to the Right is Also a 1 Intake Valve Adjusting the Valves Each cylinder has 2 intake valves and 2 exhaust valves. Double check all the electrical connectors around the cylinder head cover. When you finish you should consider going back and checking cylinder 1 because you'll gain enough experience feeling the gap drag that you may be able to do a better job at judging the valve gap on the cylinder you started with. We stock map sensor parts for most Honda models including , , , , , , , , , , , and. The full Terms and Conditions of using this website and database can be found. To ensure reliability, purchase Honda part 53101-S2A-A02 Sensor Assy.