2007 dodge ram radio bezel. 2006 2007 2008 Dodge Ram 1500 2500 3500 Dash Radio Bezel Trim 2019-04-19
Dodge Radio Bezels www.littleboyblu.com

All parts are used so expect some wear. Disconnect the wiring harness from the rear of the bezel. Install the screws and snug them. Some vehicles can be offered by one more auto as well as others need towing by a larger vehicle especially developed to haul hefty tons. Returns: We have a 30 day return policy on all items.
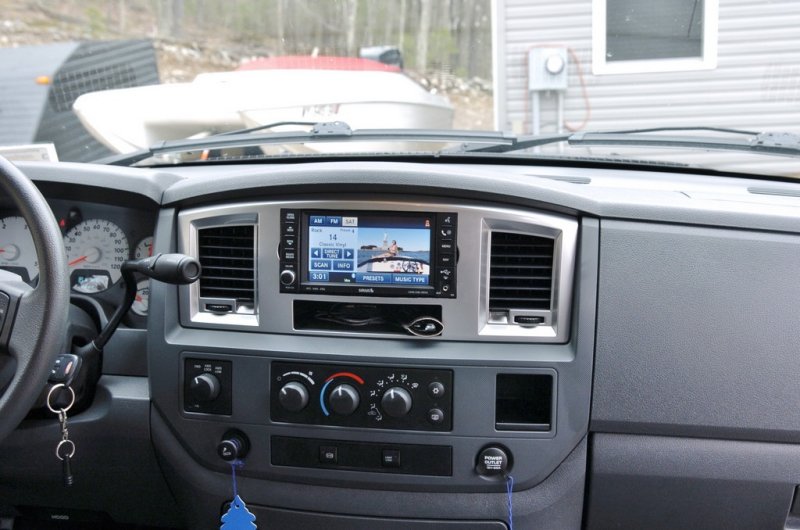
2007 DODGE RAM 1500 PICKUP 5.7L V8 Instrument Bezel

A typical rule-of-thumb is to establish your highest budgeted amount at 20 % of your take-home pay. Align the mounting holes, install the screws and snug them. Nevertheless, it's finest to inquire before you show up. If you are looking to move your car, study your choices ahead of time to decrease price as well as potential harm to your auto. All returned items must have the original packaging and any hardware or installation instructions. Pull the stock wiring harness and antenna adapter through the cage.
Dodge Radio Bezels www.littleboyblu.com

Remove the center console--remove all the screws inside the storage bin with a screwdriver, lift up the bin, lift up the parking brake lever, disconnect the electrical connectors under the console, lower the brakelever halfway and pull out the console. Obtain a feel for just what's available as well as consult with the dealer before visiting the lot to verify the information. Idling the car places tension on the modern-day energy injection systems in today's vehicles. You must remove a number of rim panels from the bottom to the top in order to completely access the radio unit. Most parts and accessories are covered by a one year factory warranty against manufacturers defects. Customer service is very important to us. When trying to find autos available online, stick to automobiles that are being sold by your loved ones or their acquaintances.
2006 2007 2008 Dodge Ram 1500 2500 3500 Dash Radio Bezel Trim

If you're still not sure of which finish to go with, order some! Slide the cage for the new radio into the install kit, and bend the retaining tabs outward until you've secured the cage in place. Slide the radio into the instrument panel and align the mounting holes. If you are an owner of an iconic Dodge vehicle, you have good taste and a propensity for good old fashioned American engineering. Slide the tip of the screwdriver between the instrument panel and the bezel surrounding the radio. You will definitely find something special for your car among various exotic real woods, synthetic wood grain, carbon fiber, brushed aluminum and fun color dash kits for Dodge. However today, you don't have to do that! Shipping: We ship once per day.
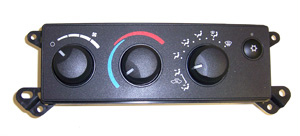
Dodge 1500 Pickup Dash Bezel

Install the bezel as in Section 1, Step 3. Plug the radio harness into the radio. Multiple quantity item will receive a part in similar condition of the item in the photograph. Idling was used in cold or warm weather conditions when gas shot wasn't widespread in older vehicles. Pull the radio out of the instrument panel. As a result, they are best for unique celebrations or for making an excellent impression.
Dodge Radio Bezels www.littleboyblu.com
A lot of larger dealers have websites with their supply and also search devices developed to aid you hunt for your desired features and also costs. These concepts nevertheless are now closer to truth taking into consideration the engineering innovation that automobile makers employ these days. The installation videos and given on this website will help you understand more about our dash trim kits. Now that you have actually considered your needs as well as the potential prices, try looking online to read more regarding the options readily available at previously owned vehicle suppliers. Guide the radio install kit and cage assembly into the instrument panel. Plug the wiring harness into the radio bezel. Should fit the years listed in the main title.
Dodge Ram Radio Bezel Sale: Up to 70% Off
If you have a hard time getting out the harnesses, use the small blade flathead screwdriver to push in the clips. You will adjust your budget plan correctly. There should be two screws on the left side and one on the right, and they will require either a Phillips screwdriver or Torx wrench. Certain items may be charged a 20% restocking fee. Pull the bezel away from the dashboard, then shift the transmission back into park and turn the key off. If the number of folks in attendance at your occasion exceeds the ability of a single vehicle, you will really want to think about reserving a fleet. These types of automobiles are generally utilized for significant occasions, such as wedding celebrations or family reunions.
Dodge Radio Bezels www.littleboyblu.com

Radio Removal Wrap masking tape around the tip of a flat-head screwdriver. Failure to do so will result in a cancellation of your order. . Remove these screws using the Phillips-head screwdriver. Most parts and accessories are covered by a one year factory warranty against manufacturers defects.
Dodge 1500 Pickup Dash Bezel

When making this decision, you must consider the expense of possessing the automobile, paying for gas, as well as your various other associated expenses. As you could picture, these automobiles are ideal for delivering visitors from the wedding to the reception. Remove the mounting screws for the radio unit. Plug the wiring harness adapter into the stock radio harness. Disconnect the connectors for the speakers and the antenna and completely remove the unit from the panel. Just send us a message for instructions and you will be taken care of asap.
Dodge Radio Bezels www.littleboyblu.com

Plug the antenna adapter into the radio, then slide the radio into the cage. Trailer movers could likewise sell cars and trucks of all sizes and shapes. Remove an inch of insulation from the end of each wire in the new radio wiring harness and the wiring harness adapter. Tap around the edges of the bezel with the palm of your hand, as to fully seat the bezel. Use the small blade flathead screwdriver to disconnect the wiring on the back if it's too difficult to push with your hands. Pull the radio out of the dash, and disconnect all wiring and antenna connections from the back of the stereo.