2008 f250 4x4 ball joints. 08 2008 Ford F250 Super Duty Ball Joint 2019-03-21
How To Replace Ford F250 F350 Super Duty 4X4 Upper and Lower Ball Joints

Tighten the nut to 50 ft. Just work with it and it will come out. If replacing the clutch master cylinder, it must be bench bled before it is installed. Basically it is like a big C clamp with cups and spacers etc that will press the ball joints into the knuckle. Of course this will have to be replaced and is a major pain to install onto the axle shaft.
Ford F250 Change Ball Joints How to

If it is dry you will have to replace it and maybe the axle too if there is damage on it. Rotate the clutch master cylinder 45 degrees clockwise and remove the clutch master cylinder and reservoir. The Ford manual states that failure to replace this could cause a vacuum leak and loss of four wheel drive operations. You will also need two new axle dust seals, two knuckle seals and two o-ring hub seals There are many forums available were the procedure has been described in great detail. This wi … ll also give you new control arm bushings which is good for ride and handling. Remove the upper ball joint from the knuckle and replace with the new one. Disconnect the negative battery cable.
Ford F250 Change Ball Joints How to

Problem with that is if you are not a good aim you could mushroom the edge and then you might as well shoot yourself. Tighten the lower ball joint nut to 150 ft. Make sure it is located on the correct side of the clutch pedal. Remove the outer tie rod for the steering. Do not forget to put the snap ring back on the lower ball joint.
Ford F250 Change Ball Joints How to

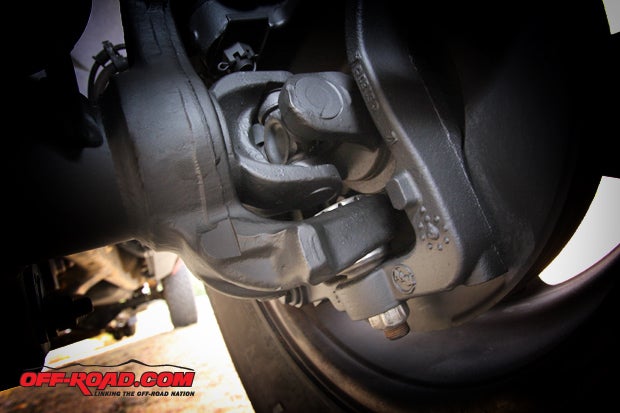
Notice in the picture that the screwdriver in the first groove coming up from the knuckle. I think they are 10mm. When finished with ball joints an alignment is needed on many vehicles. Lube the outside of the knuckle seal with a good quality grease and reinstall the axle. The driver pushes the axle in to the correct depth. You will have to apply pressure to the lower ball joint in order to get the nut going and get the ball joint snug before you can torque it down. Knock each ball joint out of the housing and remove the knuckle.
Super Duty F250 F350 4x4 Complete Ball Joint Kit 2005 2010
The main thing is to make sure the inside of the knuckle is clean and smooth. Have your auto parts store test your old alt. Verify the starter motor will only crank the engine when the clutch pedal is fully depressed. Then cross-tightened the hub bolts and this will push the axle shaft in as it is tightened. Hit the side of the knuckle where the end goes through to pop the end out.
F250 super duty ball joint replacement

Step3-The book says to unplug the wires going into the alternator, but I found it much easier to remove the alt bolts first and rest the unit on the fan shroud while unplugging the pesky little clips that hold the wires on. This process is different for various vehicles. Also examine the axle for any unusual wear etc. Thoroughly clean the area around the hydraulic tube and disconnect it from the master cylinder. The axle can't go in too far so don't worry about the seal pushing out the back or anything.
Super Duty F250 F350 4x4 Complete Ball Joint Kit 2005 2010

Is this normal on the F250??? Fill the reservoir and repeat the above steps 4 more times. Install the retainer and pushrod on the clutch pedal pin with the flange portion of the bushing facing away from the pedal blade of the clutch pedal. Place the clutch master cylinder in position and rotate the body 45 degrees counterclockwise while pushing inward. Install the retainer and pushrod on the clutch pedal pin. Make sure the 4 studs are in good shape and clean.
Ball Joint Front
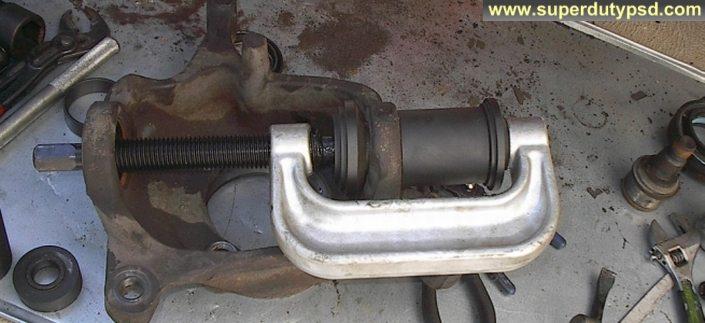
Lightly grease the thrust washer and install onto the axle. You will have to hit on top and bottom and then from side to side. The bearing needs to be packed with the grease. Install the brake rotor, caliper, and mount. This article applies to the F-150 2004-2014. The bolts are usually heavily corroded and special tools are needed to remove the balljoints from the steering yoke and to install them.