2008 torrent heater core removal. 06 equinox with no www.littleboyblu.com sort of 2019-05-11
Heater Core Removal in a '95 Pontiac Grand Am

The yellow wiring harness is for the passenger-side airbag. I checked coolant level in expansion tank and noticed it was beginning to bubble over so I put the cap back on. I can't recall where I bought this bit-holder. It involves removing much of the dashboard, which takes a long time. . Heater Core Replacement Tools Required J 38185 Hose Clamp Pliers Removal Procedure 1.
How To Fix A No
So a possibility is you did not purge the air from the cooling system when refilling it. The expansion tank functions somewhat differently than a conventional recovery tank. These holes go over studs or bolts? A flush machine is preferred, but flush aggressively to the best of your ability. My dad has replaced heater cores before but on my vehicle he cannot find it. Remove the heater inlet hose clamp from the heater core.
Pontiac Torrent Questions

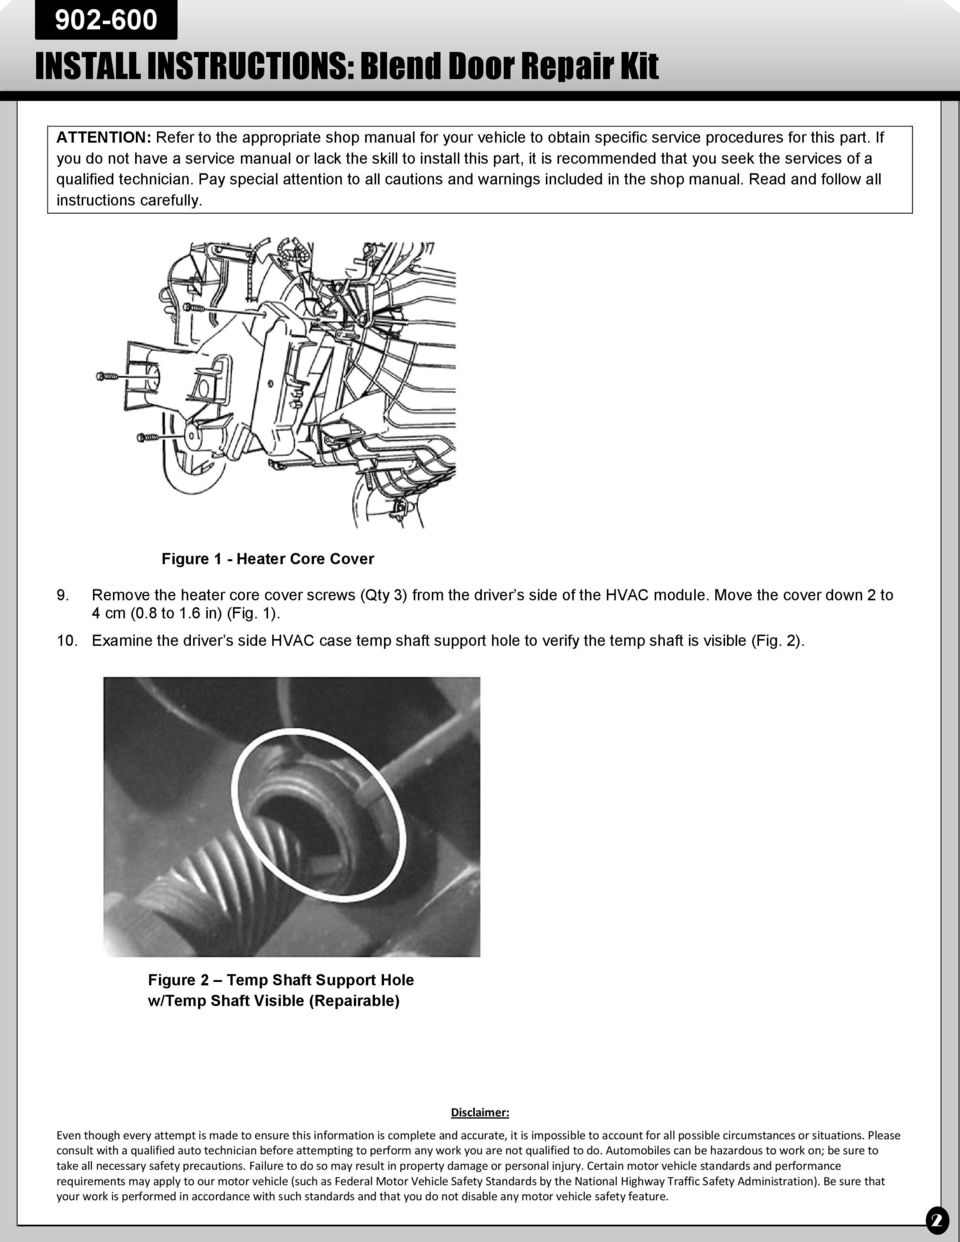
After an hour of messing around, I was finally able to separate the rear half of the air duct and slide it off the heater core. Reposition the heater outlet hose clamp at the heater core. Sneaky Hidden Fastener From Hell: I didn't even know about this nut in the back until I had struggled to pull out the cross-bar for a good ten minutes. This is at the rear of the center console, just in front of the hand brake. Air pockets would cause the engine to run hot, and no heat threw the heater. Remove the heater core cover screws.
How do you change a heater core in a 2008 pontiac torrent?

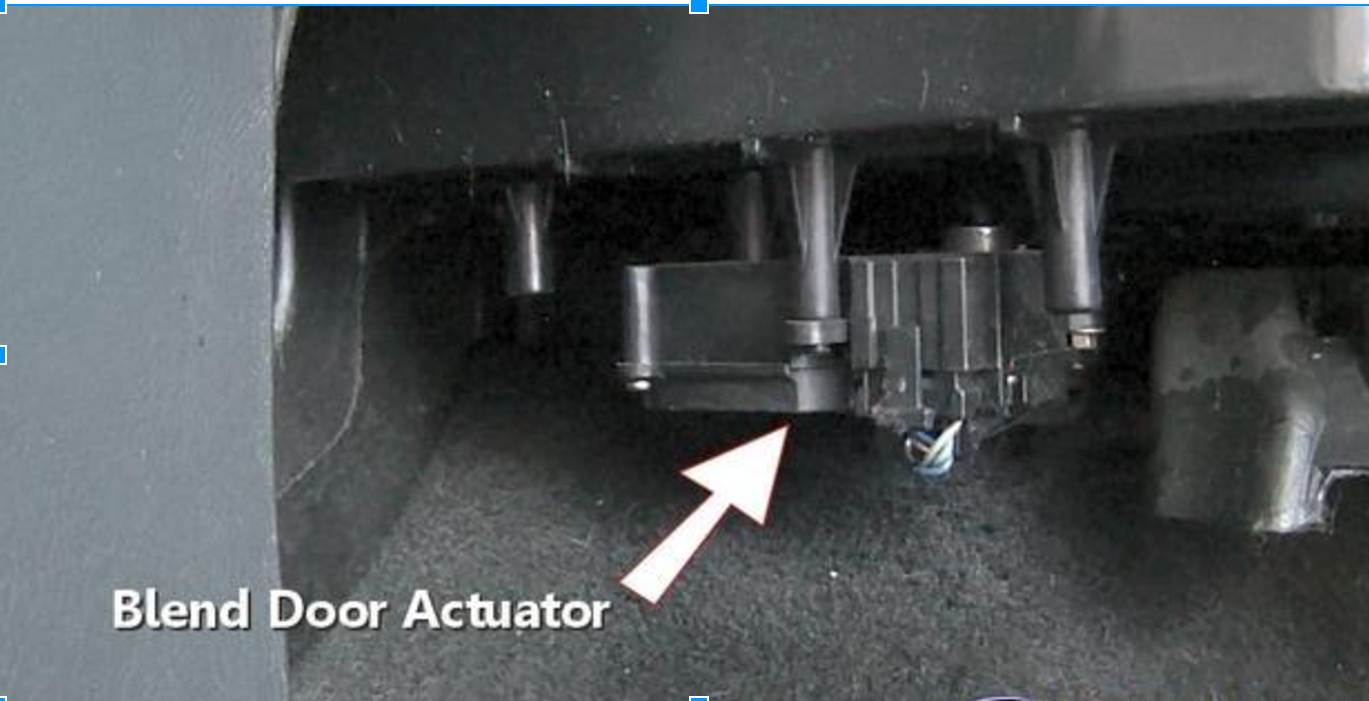
I had to flex the panels somewhat. Then I screwed the duct housing to the rear portion. Heater pipes that are long can create destructive forces to the connection joint at the tank, if excessive force is applied to these pipes during the installation process. Then I had the almost overheat thing and knew it was a bad head gasket. This is the break point on the blend door. More Trouble: I aligned the end of the new flapper-door with the actuator motor and tried to turn the actuator until the mounting holes lined up.
How do i remove the heater core from a 2008 pontiac torrent

Then I pulled out the black plastic hinge pins at the back of the glove box. Then I installed the side cover that conceals the tubes for the heater core. These all required a 7mm socket. There are small plastic covers at each end of the dashboard top. Many of these were quite hard to find.
Heater Core Repair Manual 04 Pontiac Grand Prix

I strongly recommend disconnecting the battery at the beginning of this repair job. The tip of the bolt can be held with a very small socket, if necessary. I just pulled straight back on this small panel and it popped out. Engine coolant circulates through your engine to keep it cool in the summer but won't freeze in the winter. So I'm pulling the radiator thinking that its plugged. This uses a bunch of small screws with a 7mm hex head.
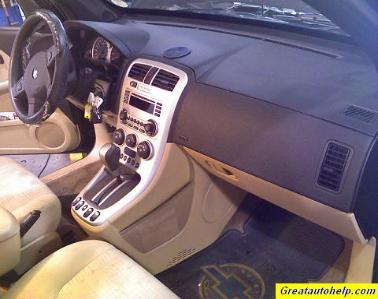
Chevy Equinox Temperature Door Replacement Pictures
Sometimes after it's been driven for a while it will keep heat at idle but later in the drive it will get cold again. Within a couple of minutes there was warm air blowing from the registers. I did disconnect the heater core and flushed water with hose both ways to make sure it was not plugged. But this is not nearly as difficult as it sounds. Next I replaced the steel cross-bar. I unplugged the actuator and removed three mounting screws.
Pontiac Torrent Questions

I lifted up the steering column and replaced the two screws that connect the U-bracket to the underside of the steel cross-bar. The top of the air duct is on the left side of this picture. After installation, the center rod is pushed flush with the surface. Is This A Do-It-Yourself Repair? The factory manuals will tell you to remove the dashboard to gain access to the heater core. This little stub was stuck in the actuator motor. Remove the heater inlet hose at the heater core. There is a wiring harness for the power window switches that needs to be placed in a C-shaped notch on the driver's side panel.
Need to Replace Heater Core: Six Cylinder All Wheel Drive ...
These bolts hold a U-bracket that supports the steering column. I replaced the small panel that conceals the rear end of the center console. I ran the motor until it came up to temp. The engine also began overheating. But the trouble light appeared after a few days. This year chevy has made a sleeve. I removed this nut with a 13mm socket.