2009 polaris ranger 700 xp throttle body. POLARIS NEW OEM Intake Throttle Body Adaptor 1253527 Sportsman, Ranger 700 EFI 2019-03-22
Problems with a polaris ranger 700efi 4x4

Refer to maintenance information in Chapter 2 for more details. Remove skid plate if necessary. Be sure machine is secure before beginning this Wheel, Hub, and Spindle Torque Table service procedure. Hand tighten lower A- arm bolt. Mark or tag rocker arms in order of disassembly to keep them in order for reassembly. Due to the nature of light utility vehicles and Place the vehicle on a level surface with the headlight where they are operated, headlight lenses approximately 25 ft.
2009 Polaris ranger XP 700 EFI problem

Remove the shims from the armature shaft and their guides and remove brush plate. But even then, it is idling real bad. Be sure the 10T input pinion gear and the output pinion gear mesh smoothly. Visually inspect each cam lobe for wear, chafing or damage. But, the advantage a bench seat has over the buckets is 3-row seating.
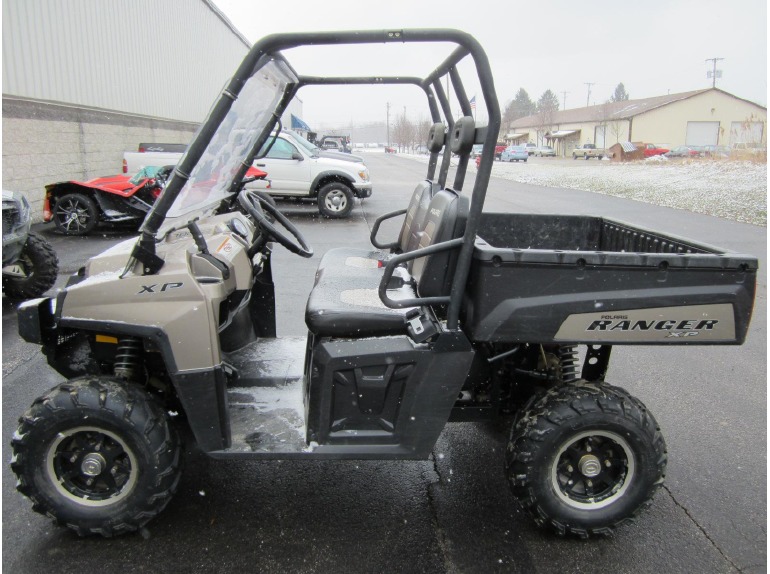
2009 Polaris Ranger XP 700

Remove lower A-arm from ball joint. Replace starter drive if gear teeth are cracked, worn, or broken. Torque screws to 8 ft. Tighten ball joint nut to 25 ft. This will ensure proper sealing when chapter. To prevent shock or component damage, Route the cables correctly. Which is almost half the machine.
Polaris New OEM Intake Throttle Body Adaptor 1253527 Sportsman, Ranger 700 EFI

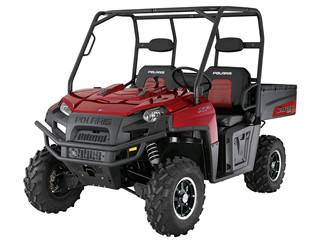
This has been going on for some time now. In 2009, Polaris has really paid attention to what consumers have wanted in their Ranger line up. Refer to the Troubleshooting voltage drop tests on the starter system in this chapter. What does this do, you ask? Disconnect the air intake hose D from the air box and remove the air intake hose. I take it seriously and having the best is important to me.
2009 Polaris ranger XP 700 EFI problem
Usually will die a few times before you can get going, really have to feather the gas pedal to keep it alive. Rear Gearcase 41 Nm Coil A-arm bolts Shaft Bushings Shock Upper A-arm Bushings Rear Drive Axle 30 ft. Remove the nut and bolt A from the brake pedal. The ignition and injection functions are electronically Place a shop towel around the fuel line to catch any controlled, monitored and continually corrected during. Verify pushrods are engaged in lifters. It will crank over fine but doesn't start but if you stop and come back 10 minutes later or so, it will start up. Pad Adjuster Screw Lubricate mounting bracket pins with a light film of Polaris Premium All Season Grease, and install rubber dust boots.
POLARIS RANGER XP 700 4X4 SERVICE MANUAL Pdf Download.

The new bolts contain 22. Refer to the procedure below. If there is excessive rings for the gearcase input and output covers. Follow the parking brake lever under the dash to locate the switch. Replace all O-ring, seals, and worn components. The power delivery feels relatively the same as last year, but one thing they did this year is change the gas pedal to further enhance slow speed drivability. Belt Deflection Tension Apply a light film of grease to the splines on the shaft.
Problems with a polaris ranger 700efi 4x4

Rear Brake Caliper Mounting Bolt: Remove caliper mounting bolts and lift caliper off of disc. Inspect cylinder for taper and out of round with a telescoping gauge or a dial bore gauge. Transmission Lockout Disc Drain Plug. Use the white mars that was previously applied for reference. Before attempting to service any part of the fuel system, the pressure must be relieved. Disconnect the fuel line from the fuel pump. If the rollers are worn, a new driven clutch assembly may be needed.
POLARIS RANGER XP 700 4X4 SERVICE MANUAL Pdf Download.

That has proven awesome in slow speed situations like mud riding or rock crawling, but when the speeds increase, being able to adjust the shocks is paramount for keeping a good ride quality. If above armature coil laminates. Thoroughly clean the lifters in cleaning solvent and wipe them with a clean lint-free cloth. Remove the two inner bolts that hold the fuel tank to the frame. All riders should take a safety training course. Drain and properly dispose of used oil. Killed mine last year cracked underneath where I couldn't see it.
POLARIS RANGER XP 700 4X4 SERVICE MANUAL Pdf Download.
Remove the oil pressure relief. Warning: Polaris off-road vehicles can be hazardous to operate and are not intended for on-road use. Rinse well with clean water and dry thoroughly. Lubricate connecting rods with 0W-40 engine oil. Polaris recommends the use of Polaris Special Tools when servicing any Polaris. Interact directly with top Vendors in the Industry, find exclusive discounts and specials and participate in weekly giveaways! Cable T-20 2-3 Nm T-20 8-10 in. Thread the bolt into the shift yoke pivot shaft L.
Problems with a polaris ranger 700efi 4x4

Carefully install the shaft assembly and gear cluster as a 20. The rollers must The front gearcase and drive shafts can be accessed from slide up and down and in and out freely within the roll cage both sides of the vehicle and limited access from the top. When riding in extremely dusty conditions replacement will be Apply the parking brake. Inspect the brake pads linings for excessive wear. Make sure you read the accessory section, because there are some new accessories that really increase the comfort of the Rangers.