99 camry headlight alignment. How do you adjust the headlights on a 1999 Toyota Toyota Camry 2019-01-13
How much is a headlight for a 99 Camry
Step 4 — Adjust both headlights Rotate the adjustment bolt on both sides of your Camry until each side is even with the other. Once backed up, block one headlight and look at where the other beam falls compared to the markings you made on the wall. Need to successfully repaired headlight adjustment? Continue making adjustments until both headlights are evenly aligned. If you need a reference, look at the new alternator and locate the bolt holes in both that and the old alternator. After that push the caliper to the right or left depending on which side you are working with.
How to Replace Headlight 97

In other words, your headlights should produce an even line or row of light against the surface of your garage door or a wall. Step 2 — Pop the hood of your car Pop the hood of your car to access the first screw you'll be maneuvering in this step to properly adjust your headlights. Again, you never want to tighten with a power tool. The tools you'll need are a regular flat blade screwdriver, a small flat blade screwdriver, and a 10 mm wrench or socket and ratchet. However, it's important to note: Making sure your headlights are properly aligned and adjusted is a job that you will need to come back to again and again as you rack up more miles on your Camry. After that you will be able to remove the rotor. Determine which headlight s is not working.
1998 Toyota Camry Adjust the Headlights

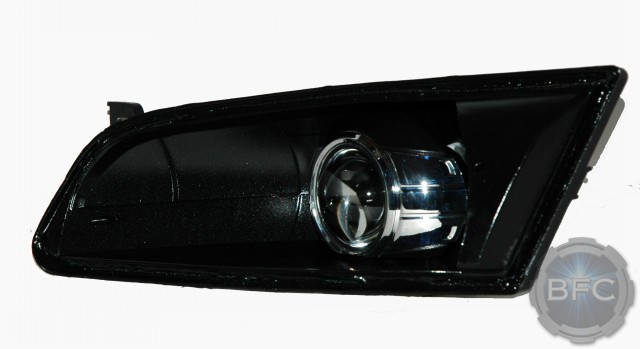
I had this happen with a 2000. You can only adjust composite headlights if they bolt to adjuster plates. Then there are three, or actually to get it off, there's two 10 mm bolts, here and down here. Now I'm going to unclip from the fender. Block one with a sweatshirt or other object while adjusting and testing the other, since the light-bleed can make it difficult to distinguish one from the other. Is there a way to adjust the headlights on these new cars with the total headlight system in one big package? This article was co-authored by.
How to adjust headlight 1999 camry
Close the hood and test the bulb replacement. After that remove the top bolt which holds the caliper and loosen the the bottom one. I bought it as a project, and have everything worked out, but I've run into a problem that I need solving. Lift the hood and remove the plastic trim panel above each of the headlights. Acura and Honda are two models that usually include this built-in level.
1996 Toyota Camry Adjust the Headlights

Rocco Lovetere is a Master Mechanic at Rocco's Mobile Auto Repair in California, which he owns with his family. Ther … e are might be different reasond espesially if the car was previosly in accidents. Headlights should appear evenly aligned against the wall. When locking via the remote you'll get more than the normal set of beeps if you've snuck out through the passenger door. Here is some info that I hope is helpful to you. Posted on Sep 30, 2009 The aiming of headlights is strictly governed by the country or state you reside in and is covered by the road ordinance in force there. Proper adjustment is necessary for adequate visibility during nighttime driving; bad adjustment can make it difficult for you to see or make it difficult for oncoming drivers to see, creating a potentially dangerous situation.
How much is a headlight for a 99 Camry
This aim ensures the headlights illuminate the road in front of you and street signs. After that just replace the bulb. Make small adjustments, and check the beam's placement on the wall. In another lifetime I could adjust the headlights on my car two spring-loaded screws on each bulb for up-down and side-side adjustment. Perform any necessary repairs, but make sure the vehicle is not moved, or is returned to the exact spot from which the lights were marked. Is your car idling poorly almost all the time? Thank you and enjoy the video. If you tuned into this just to see how to replace the bulb, I'll do that for you real quick.
How to Adjust Car Headlights: 9 Steps (with Pictures)
As well as this, check that your headlight aim adjustment wheel if fitted is at the zero position. Here are the steps that I took. Then switch the vehicles so the one to be aimed is back in the original spot. Second is the oil pressure sensor does not read the pressure properly. Next, find the adjusters, which are often located somewhere on the headlight housing. So much so, in fact, you can adjust your headlights right there from the safety and security of your own driveway.
Camry :: Headlight Adjustment

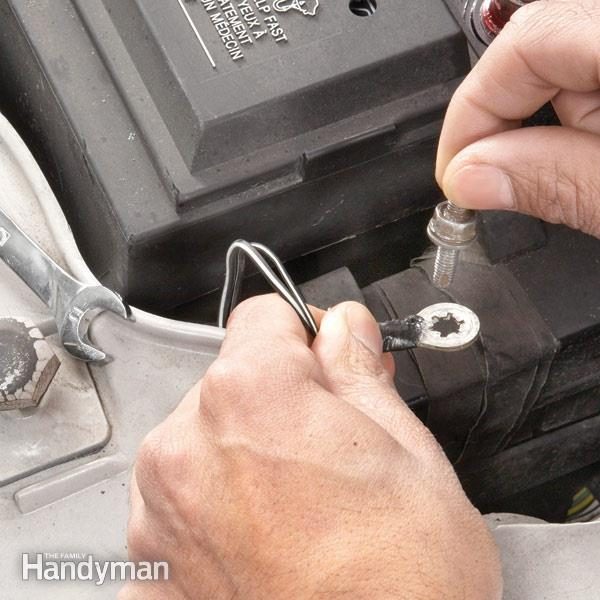
They are metric in size. Headlight adjustment may be temporarily made using a wall, as described below, or on the rear of another vehicle. Once the radio bezel is off you will see 4 nuts holding the radio in place. This article applies to the Toyota Camry 1997-2011. Re-connect any wires that were connected to the alternator. Make sure the lights are level. You need to move that out of the way to give you room to work.
1998 Toyota Camry Adjust the Headlights

Turn the dial to release the bulb. The front of the vehicle should be about 25 feet from the wall. Rocco Lovetere is a Master Mechanic at Rocco's Mobile Auto Repair in California, which he owns with his family. You look in at the back of the passenger side headlight, here's the washer bottle. If possible, have somebody sit in the driver's seat, and that the gas tank is half-full.
How to Adjust Car Headlights: 9 Steps (with Pictures)

But you have to understand that this is not a comprehensive list. This article applies to the Toyota Camry 2007-2011. Then to replace it, do the same thing. There you have a brand new, hopefully working, alternator! Now to put the belt back on. Then you pull this dustcover off. To remove the headlight, you could reach back in here and unplug just pulls off, the connector just pulls off the back of the headlight.