Aimp mac dmg. AIMP for Mac: download free alternatives 2019-03-19
Create a bootable USB drive from a DMG file on Windows
A wide range of other features is there in this version which makes it much better than the previous releases. Glitter aside, most applications are trying to tell you the same thing. Your drive can usually be identified by the size, but make sure you use the correct disk name, not the partitions within the disk. Your new Mac application is ready to use. If you do not want to download these programs, one other option is to follow our guide on. You'll need this to make the drive bootable on a Mac. It provides a very sleek and user-friendly interface for better usability, you can find everything with the glimpse of an eye.
AIMP For PC (Windows & MAC)
Hey Tech Readers, Welcome to Howali. Previous devices are supported by older releases. You can to get free tech information tips directly in your Email. Our two favorites are and. It is done to prevent unexpected hard drive space usage.
AIMP for Mac: download free alternatives

It will take a few minutes depending on size of. One of the most common mistakes I see among new Mac users is fumbling with how to install new software. In the background of the new features of this operating system, there are a lot of improvements in the lower layers of the operating system for speed and efficiency such as faster opening of programs, emails and pdf files, boot up faster … These improvements are noticeably in the programs Computational and heavy as well as games will have a great impact. Because it has attracted low-quality or spam answers that had to be removed, posting an answer now requires 10 on this site the. If you had done any mistake in following the above steps, then you won't be able to convert your files and this method won't work for you. So don't forget to subscribe to my email list and bookmark this post for future purpose. On Linux and Windows, you obviously have to use other ways.
Create a bootable USB drive from a DMG file on Windows
This version was officially released on July 25, 2012, and got numerous enhancements and many great features to take care of all the computer needs. The clean interface only shows the user the necessary functions, and all the heavy lifting is done at the back end. Nevertheless, the Mac method of installing software is actually quite simple and intuitive once you are accustomed to it. Furthermore, the compatibility with other devices is also enhanced to make it work in better way. . The conversion process will start with correct file names. You can find recommendations for the respective operating system version below.
Create a bootable USB drive from a DMG file on Windows
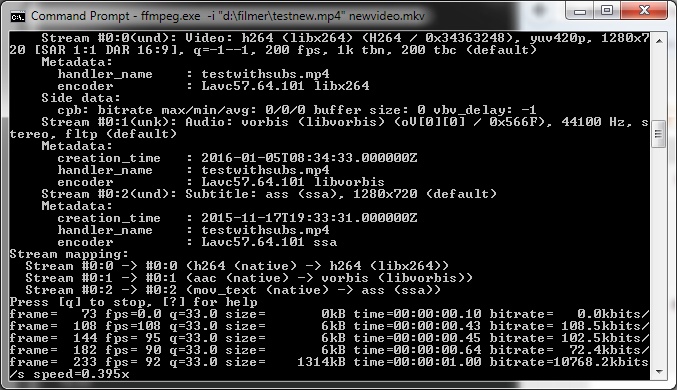
The command prompt will open, run the following command in the command prompt. One of the unique features of this increasingly popular software is the amount of beta testing it has gone through. Performance, stability and security This version of the operating system has noticeably increased. The installer should show up in your Applications folder. For Windows or Linux, you will need to use different methods. Drop it in the blank area below the drive names on the left panel.
Download Mac OS X Lion 10.7.5 DMG Free

Use , which has a 15-day trial period and works flawlessly. Since this is a native application, no downloads are required. We are affiliated with several other companies also and use their affiliate links to generate revenue for our website to serve you free contents. A new Finder window showing its contents should appear. Let it be in the Download folder itself and click Extract. It also requires command line executions, but if you own a Linux machine you may already be familiar with command line work. Browse other questions tagged or.
How to Install Software from DMG Files on a Mac

After that conversion is done, you can and access the files that way. It runs on any 64bit Intel-based Mac. The process looks a bit complicated, but it should work as long as you follow the steps described above. Different applications are going to show you slightly different Finder windows. Step 2: You should be able to see all the drive names in the left-side panel. But, you can still open them up and take a look. More than 200 new features are added to this release and many other enhancements have also been made to make it more stable and a professional environment.
Create a bootable USB drive from a DMG file on Windows

Further Explanation Alright, that was the abridged version. Disk Utility has a good burn success rate, so hopefully you won't have to repeat the process to get it right. But wait… Bonus Tip: Add Your New Application to the Dock I knew you were going to ask, so I figured I would cut you off at the pass. Use the command below to do this: mv sample. Comfort and quality in a single application.
How to Convert Mac OSX DMG files to ISO in Windows 10
Once you have followed step 1 to 4 properly, proceed with step 5 below. Some icons are licensed under the. Skip down to the last step to use it. But before that let me inform you that this post is going to get updated in future based on latest technological updates. If you have purchased several licenses, you can even mix versions to meet your own personal needs. Just follow the steps listed above according to the computer model.