Android snapseed tips. 11 Best Snapseed Filters, Settings, and Tips 2019-05-09
How to Enable Dark Theme in Snapseed on Android: 5 Steps

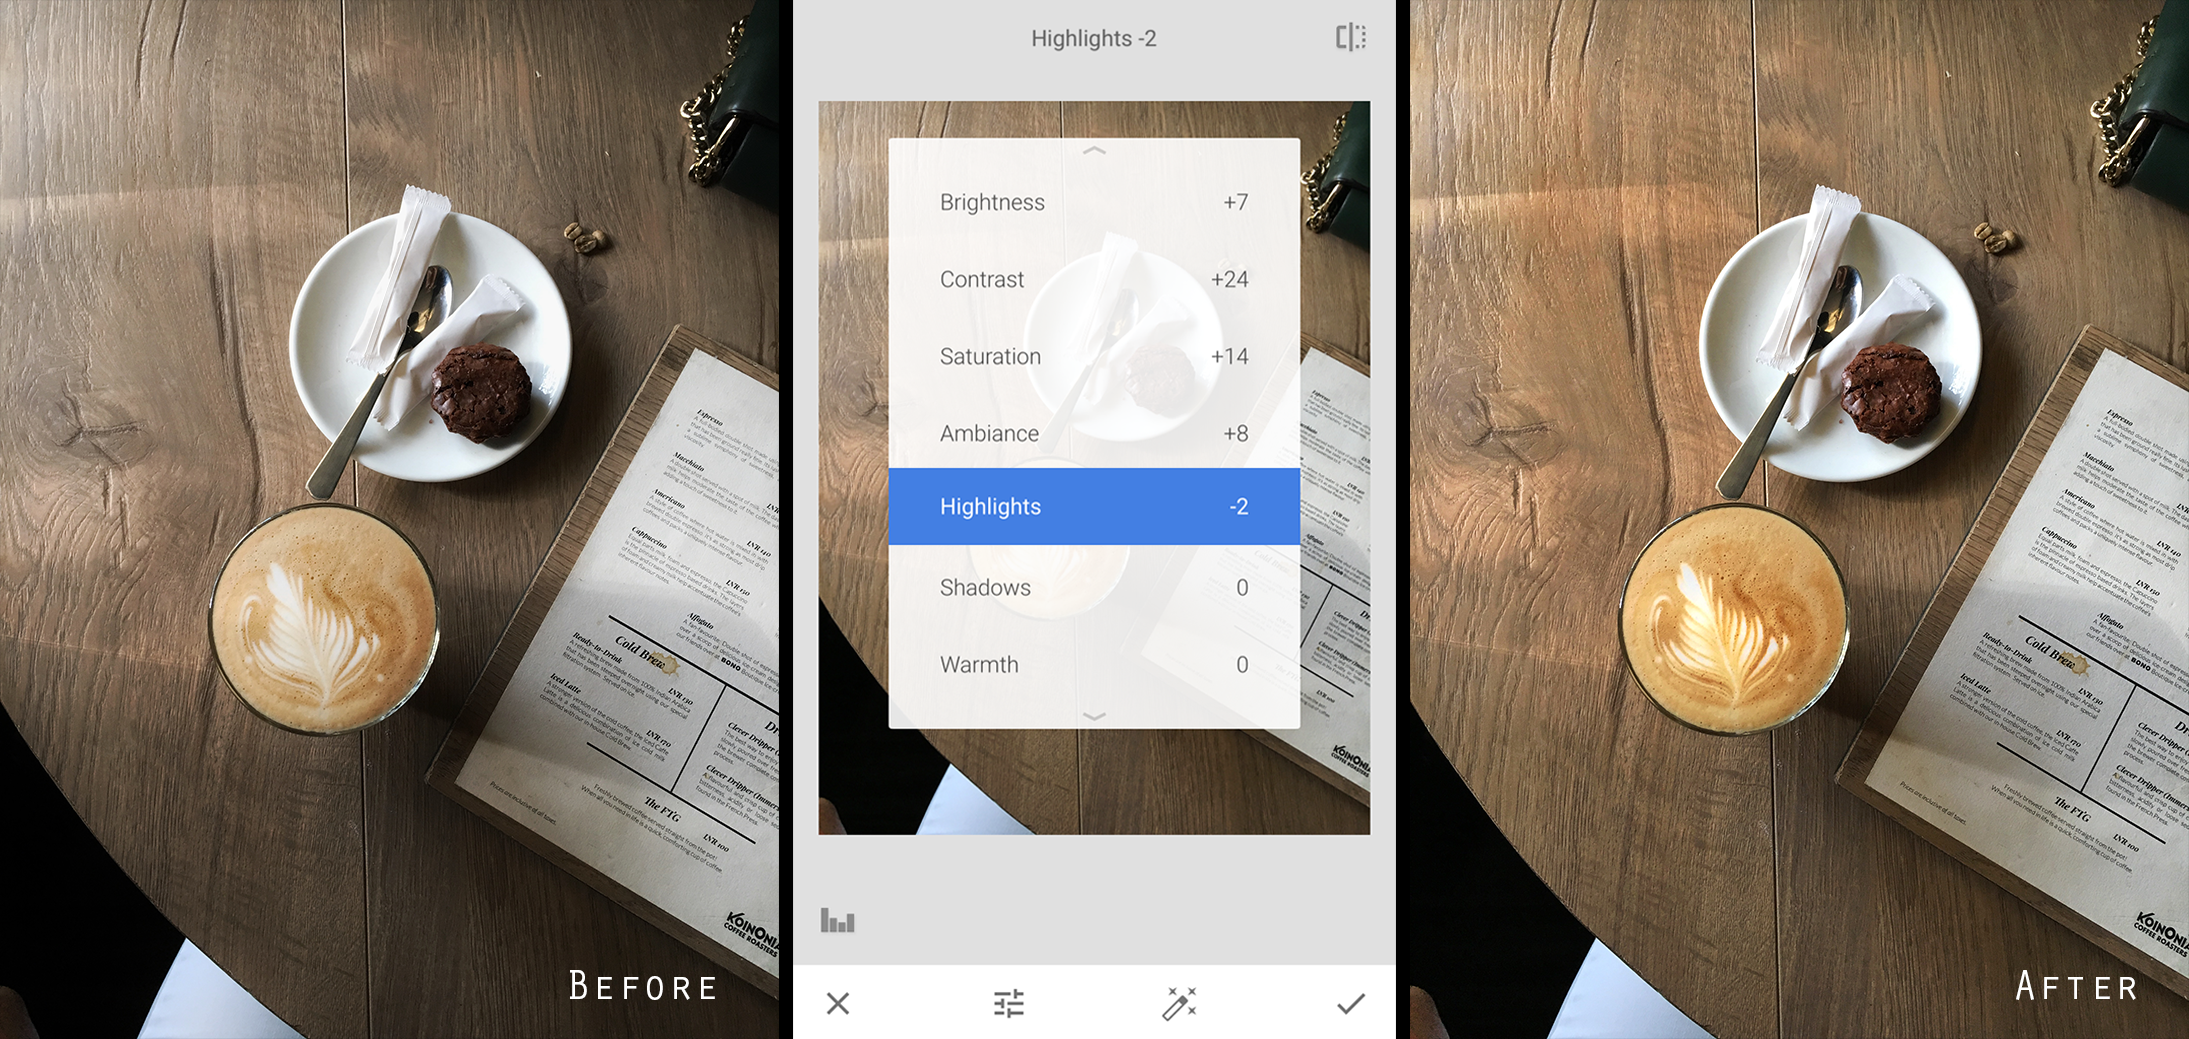
This would do the same. Do note, that the Healing tool cannot work magic so you might see some kind of distortion if you are removing an object as big as the bike in my example photo. These filters are not toys, though. Tap on this icon, and you will see your editing results against the original image. You really should have a look at that, as there are extremely helpful tips and images that you may want to apply towards your editing work, and you can apply their editing steps to your own photos.
Snapseed 101 « Smartphones :: Gadget Hacks

As you can see above, you are able to retrieve the deleted Snapseed Photos in three simple steps. By adding more Saturation under Tune Image options and swiping to the right, the photo looks a lot more lively and dreamy. Beware, for here be dragons, on social web lands yonder. It will stand out more in the Instagram feed and will attract more likes and reposts. Most often, I am doing said work at a standard desktop workstation, simply because I have yet to find a mobile tool that can stand up to the power of, say, or. There are so many photo editing apps available on Play store, but hardly any of them provides goods tools to edit pictures like a professional in smartphones.
12 Best Snapseed Tips and Tricks You Should Know
:max_bytes(150000):strip_icc()/snapseed-57c4e1433df78cc16ef81c24.jpg)
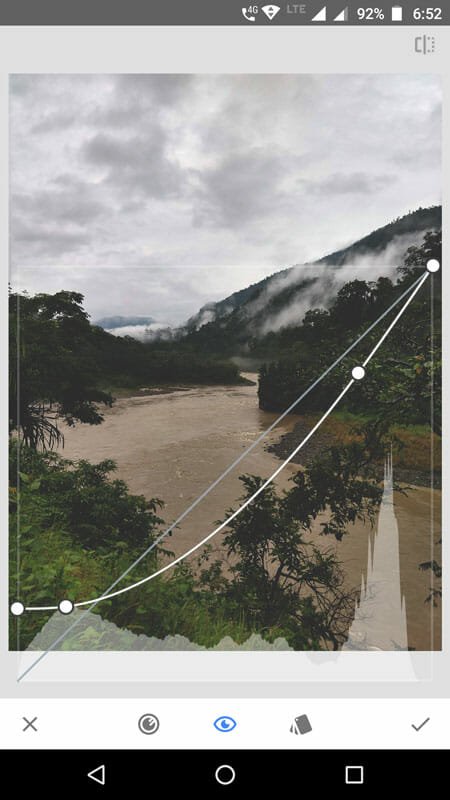
Most of your pictures just need a little retouching and adjusting these parameters can get the job done. As we move and enlarge, the blue box inside the square reduces its size, and it corresponds to the visible photo area. There are different types of brush tools that are available to use including exposure, temperature, saturation, and more. After completing the photo editing, a few portions of the image needs selective editing. Just the right amount of saturation can make or break a photo. You can either choose any preset settings or you can manage the curve with the help of manual options.
How to Make the Most Out of Snapseed for Android: Part 1
A vertical photo will always show more detail and space than a horizontal or square photo and is much more likely to catch the attention of the viewer. Now choose Details from the tools and adjust the structure and sharpness. You can adjust the intensity and Saturation by tapping on the Tune icon. With a simple edit, you can enhance a photo to have the perfect vacation beach vibe in just a few seconds. You can see a circle would appear in red. Here you can find all the options as mentioned earlier. If you want to remove noise more accurately then you can follow the above step and brush the portion where you want to remove the noise.
10 Snapseed Tricks To Edit Instagram Photos
Make sure you look through the insights to gain a better understand of the more complicated tasks such as double exposure. On the other hand, nowadays, almost every developer is including dark mode in their app and Snapseed is not an exception. We slide a finger from left to right to adjust, and you will see a slider on the top of your screen that reflects your selected level. Play safe with these filters since an aggressive intensity can give a processed look. Sometimes you just need to enhance or darken a part of the picture to make it stand out better.
Tip for snapseed for Android
Conclusion We are far from done with Snapseend. When you are in the selective adjustment mode, tap the plus sign at the bottom of the image to mark a point on the photo. That tool is , by Google. Only submissions that are directly related to Android are allowed. Let's install Snapseed and see how it works.
How to Enable Dark Theme in Snapseed on Android: 5 Steps

You may Tune Image a selected area using the same scrolling scheme as the basic Tune Image tool, copy the edits to another point, erase the edits, or back step them. When I talk about basic editing, I am talking about the basic parameters of a photo including brightness, contrast, saturation, shadows, highlights, and more. The setting is available in the same buffer icon we discussed earlier. In that case, using a Selective tool can come in handy. Let's open a different photo and apply the Lens Blur filter. You should play with Expand, Perspective, and Selective. You can save this look for future editing as well.
How to use Snapseed for easier mobile photo editing
Like millions of other users, I use Snapseed for all my mobile photo editing needs. Drag the corners in and out or hold the centre of the grid and move it around. Noise Reduction Okay, so sometimes or we can say that every time there is some kind of noise present in the photo. Course available: These articles are a great resource to learn a mobile photography specific technique or tip. Use swipe right-left gesture to adjust.