Chevrolet b0408-61. B1325 Control Module Power Circuit Low/High Voltage 2019-02-27
Replacing Air Conditioner (HVAC) Actuator

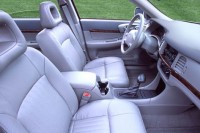
Look up beside the headunit and high in the dashboard your will see the actuator as pictured. The replacement actuator can now be installed into the vehicle. When the relearn is complete, test operation between feet, face and demister. Screw into place and reconnect the wiring loom. Pull away as shown by the orange arrows.
Diagnostic Information and Procedures

We now need to access that actuator. This actuator is much easier to access compared to the drivers side. To verify the actuator is faulty, run the relearn process as described previously. The relearn process runs all actuators for 10-15 seconds, allowing them to calibrate their positions. Press and hold the rear demister button until you hear the actuators moving.
Replacing Air Conditioner (HVAC) Actuator

Keep in mind we have removed the ducting on the passengers feet! After 10-15 seconds the actuators will stop and the system will be calibrated. Proceed to the next step. Replacing the actuator is a very difficult process due to the location in the vehicle. The process below outlines the actuator replacement procedure. Replace the actuator with a new unit.
Replacing Air Conditioner (HVAC) Actuator

Often permanently on heat or cold. There are two screws Red circles holding the actuator in place, and one alignment pin Green circle to ensure the actuator is in the correct position. Is it on the passenger or drivers side? Next place the actuator onto the alignment pin and begin to install the lower screw. How To Identify The Faulty Actuator Multiple actuators can be found on both the left and right sides of the dashboard. There are multiple actuators behind the dashboard controlling modes, temperatures and air sources. The bottom screw is relatively easy to access with a small stubby screwdriver or a ratcheting screwdriver set.
Replacing Air Conditioner (HVAC) Actuator
Listen around the footwell area on both sides and you should be able to determine where it was louder. Run the relearn again and listen for the clicking. There are three clips, one on each corner. You should now see the actuator moving smoothly without any clicking noises. . These actuators commonly fail on Series 1 vehicles and have been seen to fail on Series 2, however a revised unit is now being used.
Diagnostic Information and Procedures

The top screw is extremely difficult to remove as there is limited space to operate. You should now see the actuator moving smoothly without any clicking noises. The same actuator units are used regardless of its purpose. There is also a green wiring plug you will need to disconnect. This is a great write up. Our guide will show you how to identify the faulty actuator and the steps to replace it. Keep this in mind when performing your assessment.
B1325 Control Module Power Circuit Low/High Voltage

Keep in mind we have removed the ducting on the drivers feet! Using a trim removal tool, pop off the side trim piece. You may find yourself lying upside down in the footwell and painstakingly turning the screw millimetre by millimetre. When the relearn is complete, test operation between feet, face and demister. Test the air conditioner system and check if your problem still exists. . . .
Diagnostic Information and Procedures

. . . . . .