E39 m5 differential input shaft seal. Replacing BMW E46 front differential seal 2019-01-14
BMW Input Shaft Seal 23121228493

A California emissions test was completed just prior to this auction. Loosen the rear wheels bolts then place the rear of the car on jack stands. Gearing The E39 M5 diff comes with a 3. The accident-free Carfax reports Santa Barbara registration since 2009, along with consistent odometer readings and a number of service history records. Using a screw driver or something sharp remove the locking plate. If we are building a diff from our own stock a refundable core charge will apply until we get your original diff back.
BMW Differential and Gearing Upgrades for BMW 5 Series E39 (1996
Now the differential is good for at least another 30,000 miles. You can skip draining the fluid, let some spill out when you remove the seal and add more after you are done but not draining the fluid makes the job messy and stinky. Well, why not just do that instead of replacing the entire unit? Regular magnets lose magnetism at 175Adeg F; Dimple's neodymium magnets are rated at over 300Adeg F, so they continue to grab those destructive metal particles even when things get hot. Fitting is the same but in reverse. I havent spent much time under my car so I'm not that familiar what it looks like under there. If you're working with the electrical system, disconnect the battery before beginning.
Rear diff seals on E39 M5

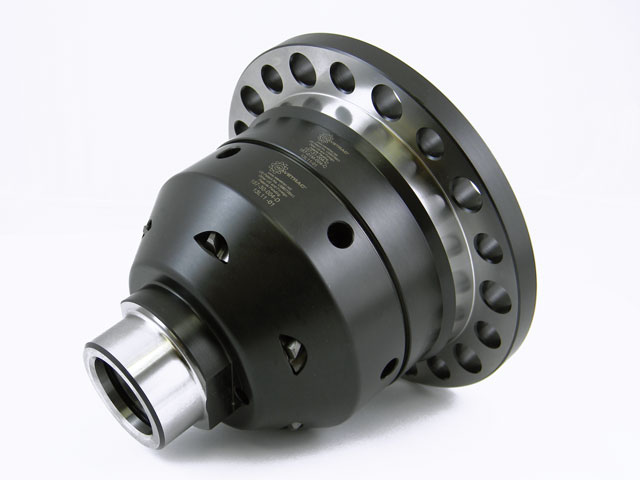
We can also vary ramp angles and setup to change the limited-slip behavior under acceleration, deceleration, and cornering. It is also less likely that you will experience oil oxidation, as the metal particles that contribute to the process of oxidation adhere to the magnet. I averaged 14 mpg on this thing and I am very frustrated with its fuel consumption. Install the drive flange back in place until the snap ring engages. The right side axle seal is much easier, as you have plenty of room to get to the fasteners and axle seal.
No Reserve: 2000 BMW M5 for sale on BaT Auctions
Suspension arms, bushes, links and ball joints will all need replacing at some point, depending on the type of use the car gets but 100,000 miles is the point where most need work. You will hear the snap ring seat. I use Liqui-Moly 10×60 oil and Mahle filters in my car — for more information. Complete shipping and return policy information can be found in our. It could be underrated and completely ignored and insulted, it could be rated and get some attention, or it could be waaayyy overhyped and gets too many attention. The seller recently had the front bumper and hood replaced and painted due to cosmetic damage, and the rear bumper was repainted to correct peeling clear coat.
BMW E39 528 what diff?

The item must be new and in its original manufacturer packaging to be eligible for a cash refund. There is no specified torque setting for this nut, it has to be reinstalled in the same position as it was before. The shorter gearing will help accelerate the car quicker by placing the engine in a stronger part of the power band for any given speed. I managed to do this with a ratchet spanner without taking of bumper, its tight but doable and i have big hands. Even an F430 got less attention than my M5 did at that car meet.
E46 M3 rear differential seal
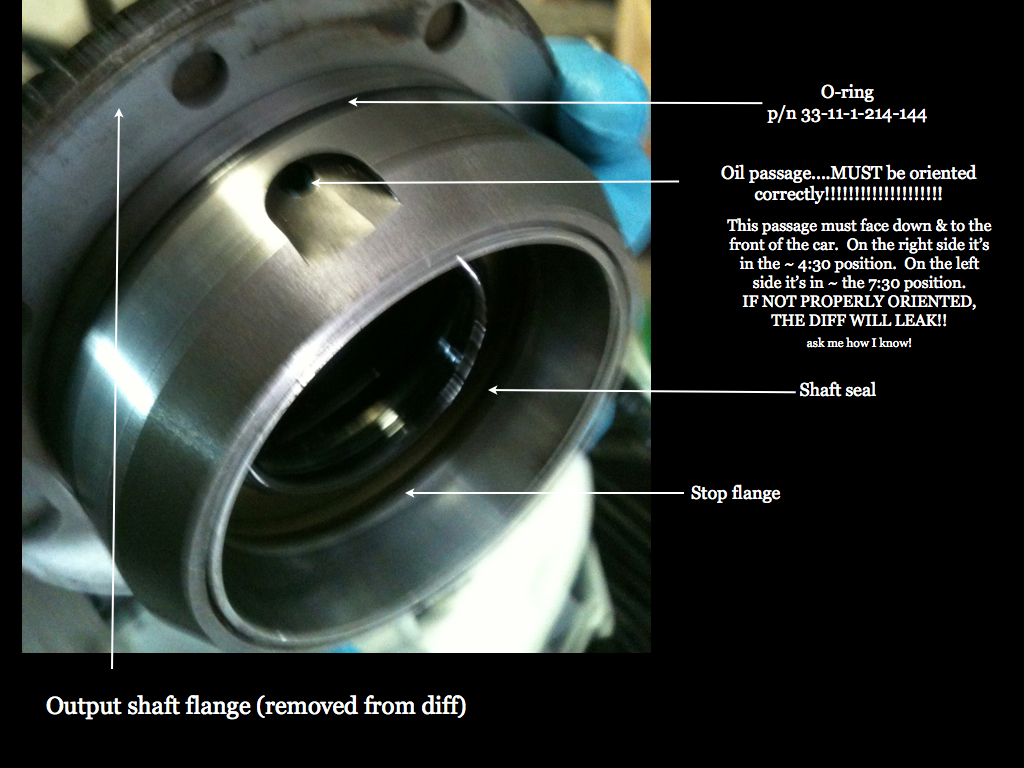
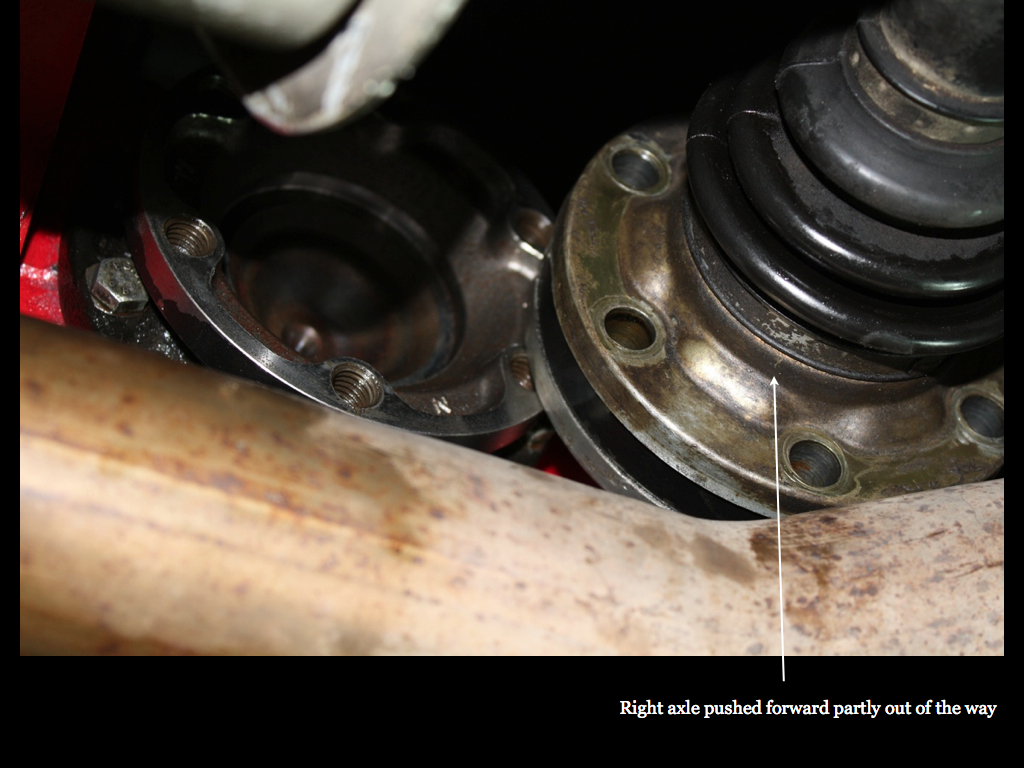
The drive axles, which power the rear wheels, are bolted to the differential output flanges. Then you must remove the exhaust heat shields, this is straight forward so I have not taken any photos. And without limited-slip an 'open' diff it means that power is really only being directed to one wheel not both rear wheels - the infamous 'One Tire Fire'. Drive the vehicle a short distance and confirm that the leak is repaired. Figure 1 Remove the drive axle from the axle stub flange. I'll change them soon but I'd really like to check the breather isnt blocked causing excess pressure but I think the diff needs to be removed to see it? Use a seal puller to pull the old seal out of the differential housing. Remember to tighten the nut accordingly and the prop shaft bolts.
Differential Oil Change on the E39 M5
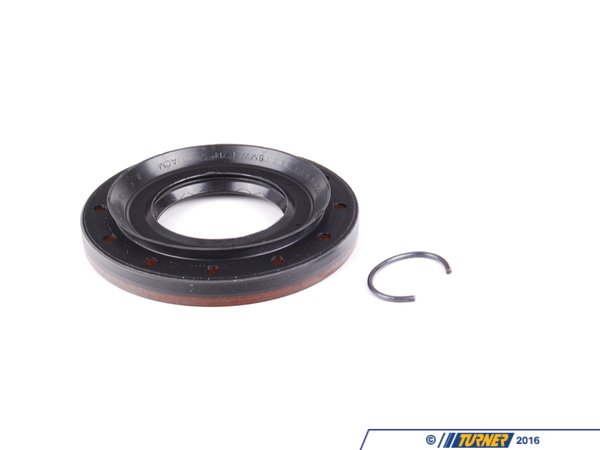
Product Description Manual transmission input shaft seal located behind release bearing sleeve. The oil seal didnt look very thick and of that good a design so I can see why they often leak. Jack car up and sit level on 4 axle stands 2. You have to determine if the leak is coming from the engine, the transmission, the output flange or the differential seals. I can see it is going to he harder than I thought now to change the seal. Install a new seal using a seal driver, reinstall the flange, torque the nut down so the marks you made on the input shaft and the nut align. We also recommend you replace the securing plate at the same time.
7 Reasons Why Owning an E39 BMW M5 Sucks
Ill try this way on Wednesday on my next day off and see if I can get at the seal. If you are having trouble removing the left side axle seal, you may want to remove or lower the exhaust for better access. At first it might feel like the input shaft is hart to turn but don't worry, after driving for a bit everything will be back to normal. The stock 540i has either a 2. Have someone hold the brakes and unbolt the flange nut, or use an impact wrench. This could be rather controversial but, in my experience, this car is pretty underrated. Or can you just unbolt the propshaft where it connects to the diff and let that end hang down? I have had a good feel about and cant seem to get it? Loosen all six E12 bolts.
BMW Differential Input Shaft Seal

I think the dimensions are given in the online parts catalogue. The rest of the installation is reverse of removal. Then you need to dismantle the exhaust system and lower it, either remove from the car or let it dangle if you prefer. If you're using a debit card we suggest you switch to a credit card. I guess this is just down to the ring and pinion and you can probably swap the internals from one to another and still keep the same. This is advised so as to not overload the diff bearing which can lead to noise or failure.
BMW E34 Website
Keep in mind that when your car was serviced before, parts may have been replaced with different size fasteners used in the replacement. Thanks in advance Dave I did the input seal on mine without removing the exhaust. This seal measures 50mm X 80mm X 9mm. Thanks Thanks for the picture. It's ready for the extreme conditions of racing, offers 100% progressive locking capability, and is able to do this while operating smoothly and quietly.