Fl studio demo exporting. Exporting the final product 2019-02-04
Does FL Studio free (Demo Version) Have Saving Features?
Unity Technologies is not the creator of it. It's a very solid piece of software and extremely affordable. With rhythm and bass established, you can get a better feel for the track and begin to introduce melody. . Doing so will import your sample folder. Develop your song using different layers.
Exporting Seamless Loops From Fruity Loops FL Studio : Sampling And Loop Making Chat : looperman forums
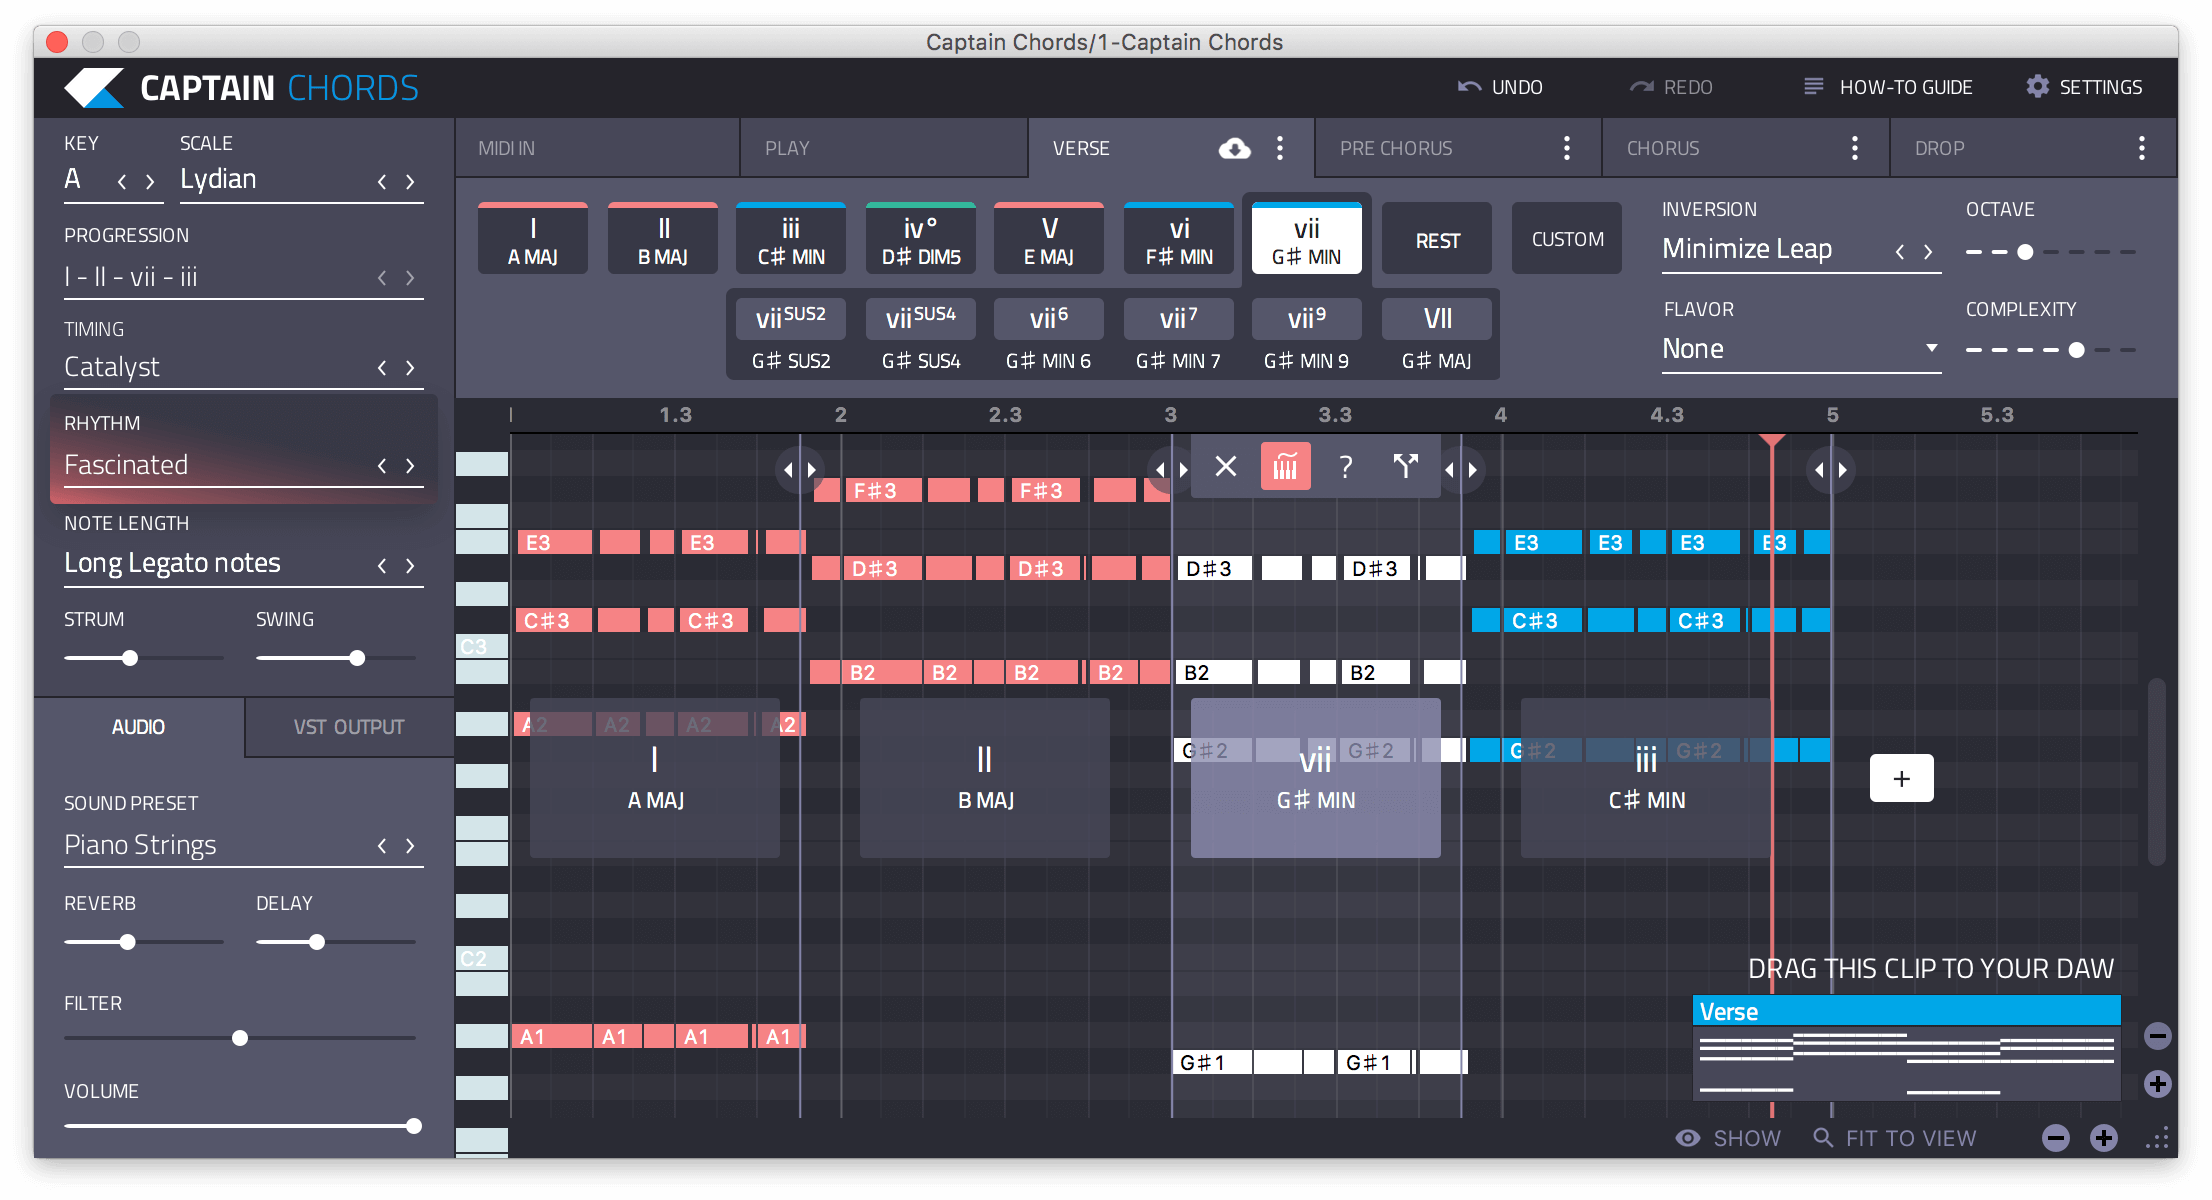
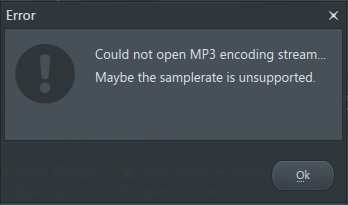
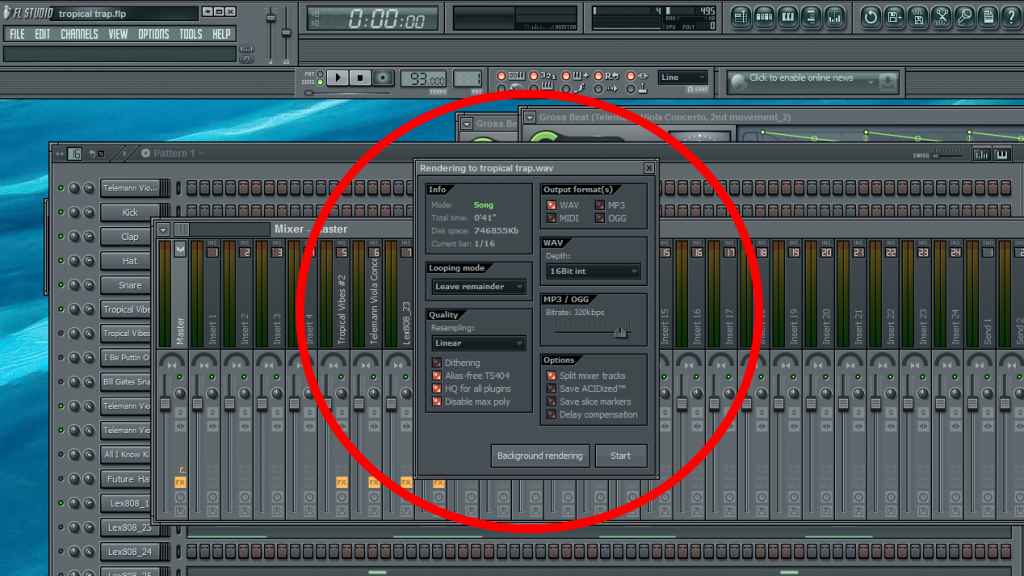
Pitch is displayed on the vertical axis, and time is on the horizontal axis. Plan one instrument at a time for longer songs. Trigger it once - Does it still sound crappy? It will help you see how the program works on your machine. Adjust the buffer rate accordingly, and do this only when you are sure you want to render the track. Your channels on the channel rack are bound to the mixer tracks. Why not download the demo and try it out from here. What settings do you suppose I should change when exporting to get a top of the notch quality track? However I am having troubles exporting the file, as it always comes out in a lesser quality.
Exporting In Fl Studio Help
Download the latest version from image-line. Its not a case of expecting the end user to fix the problems created during the export or get another hobby but a case of exporting them right in the first place. This article was co-authored by our trained team of editors and researchers who validated it for accuracy and comprehensiveness. Determine what instruments and plugins you might want to use or at least start with. Another way of thinking about this is to emphasize the first and third beats of a measure. What settings are you currently using to export your songs? Play around with different instruments and channels, then export it so you can jam along anytime. There, you can add, delete, slice Fruity Slicer! So, think of the mixer as a filter you can use to modify sound as it travels through the mixer.
How to Import Sound Samples Onto FL Studio: 13 Steps

The demo version allows you to export to audio. If you are looking for the , look no further then our selection of hand picked producers here on License Lounge. If so, then it's something to do with the export settings. Through these, you can access projects, samples, plugins, and libraries. I should add that I've mixed and mastered it properly and everything and it sounds absolutely fine inside the project. After naming the file in any of those options not Zipped, Project bones, or Project data files you should see the screen below. Does anyone know what I can do?? As opposed to building music note by note, riffs offer depth through multiple notes, and chords add multiple notes played simultaneously.
FL STUDIO: Importing And Exporting Midi Files In Fl Studio 12
The Fruity Slicer plugin can be added through the Channels menu in the Main menu bar. The above window gives you the options for rendering. Download the latest version from image-line. Note that the height of the rack will change as you add or remove plugins. I do understand that some files work with a tail but that is often because reverb or delay has been added.
Exporting In Fl Studio Help
Particularly if you are doing an extended piece, consider building the track in layers. In this case you can just make a pattern that is twice as long as the actual short loop, and includes the tail in the second half. It's a good thing to encourage new loop uploads! If you don't use the Timeline selection which when used the highlighted area turns Pink then Wrap or cut remainder will not be activated therefore leaving the loop unaffected with Potential tail's. I've looked on how to solve this online and haven't had much luck. Together, they cited information from.
How to Import a folder of files into FL Studio « FL Studio :: WonderHowTo
Im thinking here like a guitar riff for example. By that i mean that the file suffers from one of the following problems extra space at the beginning or end a tail left on, caused by reverb or delay files not being 2, 4 or 8 bars The initial check is done by looking at the waveform here on looperman. You can also actually save your projects for later use after you buy the program. Even if you don't earn money. It makes me so disappointed.
Does FL Studio free (Demo Version) Have Saving Features?

And i can't really buy the purchased versions because i'm under age and my parents wont buy it, i can however buy the programs with prepaid cards if that was possible. You can also use something called the Fruity Slicer to chop up breaks. You may get inspired on the spot to fill in remaining gaps in the track. I finished a song tonight, and after I exported it, I wanted to be sure it sounded ok, so I listened to the. You might also intentionally leave space in the song for improvisation.
Does FL Studio free (Demo Version) Have Saving Features?

Then I try and fix it in audacity and that still doesn't seem to make the loop seamless. These effects are also automatable. The most common bass line would probably be a bass guitar sound or a standing bass, but you could also try a bass sax, tuba, or related sounds. Even if a loop has a tail, it doesn't take a genius to figure out how to use it correctly. Why could this be happening? I also check files by opening them in a daw at the given tempo and then checking the loop point at the correct bar by zooming in at that point. Making these lower will reduce the file size but decrease the sound quality. I am a bit of a novice when it comes to constructing music on my computer.
How to Import a folder of files into FL Studio « FL Studio :: WonderHowTo
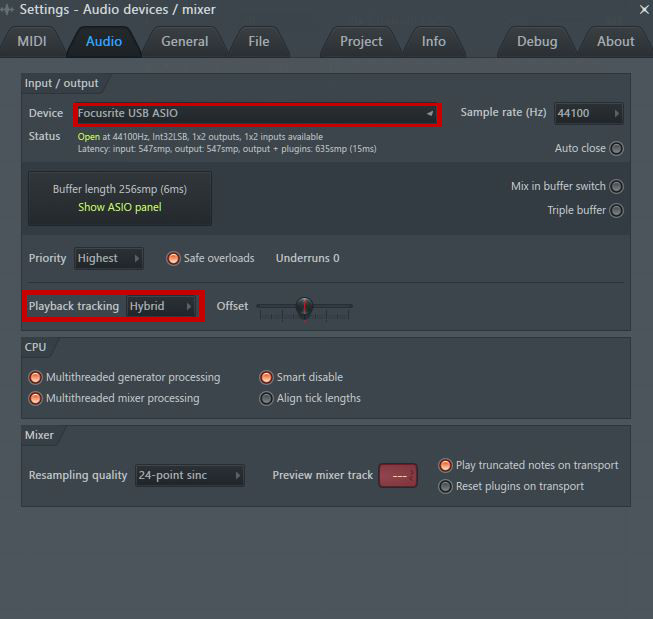
Click the sound sample folder. Its simple to see a loop that fails one of the above situations as the waveform graphic does not line up with the markers. Pay attention to stereo separation, it can drastically improve the soundscape. I want to see my children again. Start the program and look at the setup and options. Most people simply do not know the export settings should be so hopefully this thread and the soon to come tutorials will help avoid problems in future.