Ford ranger pinion bearing replacement. Any special tools required for rear pinion bearing replacement? 2019-01-29
Rear Pinion Bearing

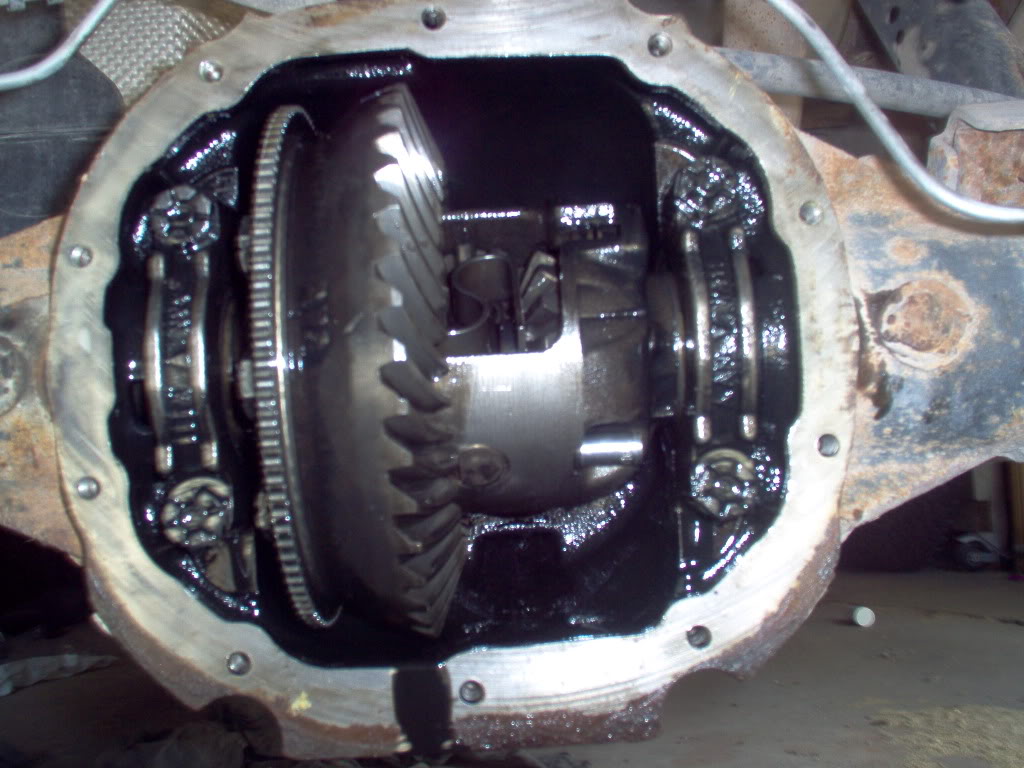
Newer Mustangs have a constantvelocity flange on the rear propshaft joint. Actually, several shops that know rear ends pretty well, told me that it was pretty common for there to be a few chips as they get older. I don't think it's too much to worry about. With the shop rag in place, you can easily continue to tap it out. First, remove the ring gear, which is press-fi t onto the differential case. Once these bolts have been removed, drive the gear off by using a punch in the bottom of the ring gear bolt holes. I rebuilt the rear, with posi, in my 96 last summer.
Ford 8.8 Inch Axle Disassembly and Inspection Guide
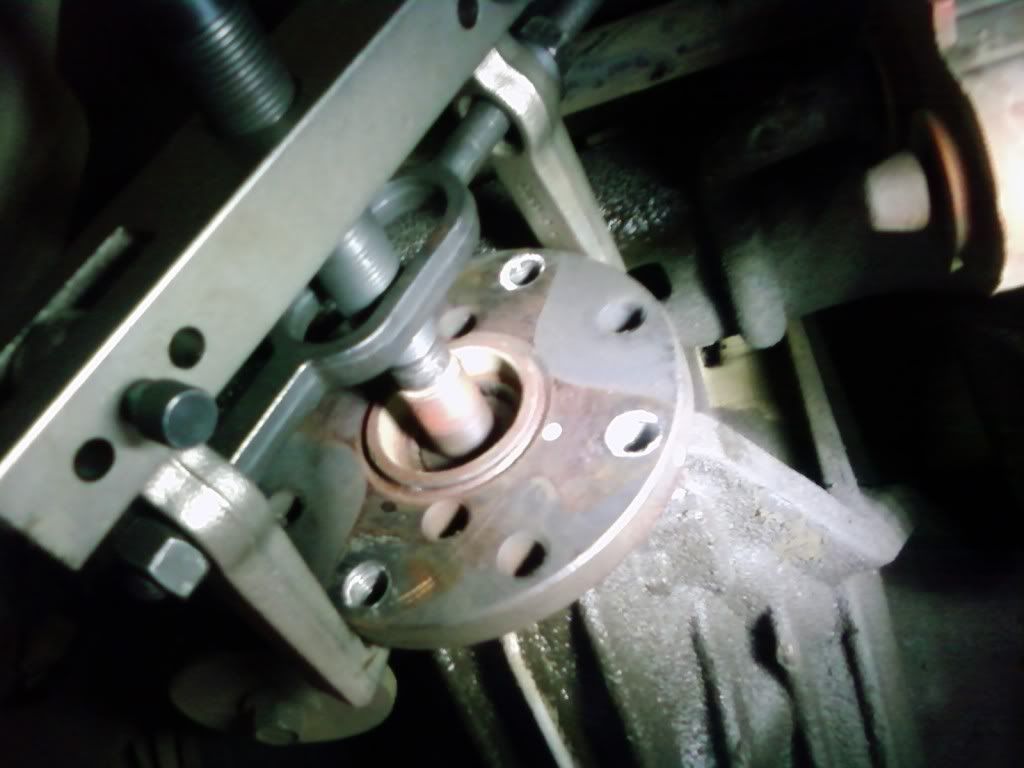
Looks like a full axle rebuild is in order. Botton her up and you're all set. An inverted Torx-headed bolt holds the sensor from the back side of the plating with perfect access. Now that you have the wheel ends and axle shafts sorted out, you can concentrate on the third member and pinion cartridge. This makes quick work of spinning the pinion gears out of the differential. Are you saying the input bearing is a 'pressed on' while the pinion shaft is on the car? Use a ratchet and socket or wrench to remove them. Using a torch is a last resort, as this will surely damage any speed sensors that are behind the rotor.
Replace ring and pinion gear , or just bearings?
If you have a disc-brake arrangement, you never want to let the calipers just hang from the fl ex hoses. This Tech Tip is From the Full Book,. The picture on the right shows the pinion with the bearing removed and the shim on the shaft. The trunnion should be round and smooth without any signs of grooves or gouges. At this point, it is time to upgrade to the stronger and heavier 9-inch axle. Step-14: Clean Inside of Housing The axle housing is completely empty now, except for the pinion bearing races. Rear pinion bearing replacement-Update My first post here so bear with me.
How to Replace a Ford Rear End Seal

If the internal components are worn excessively and the case is questionable, it may make sense to Magnaflux the case or just replace it with a new nodular unit for any performance application. To overcome this tight fit, place a large screwdriver on the housing and into the differential pin hole. The problem with pulling another rear end at a salvage yard is finding the right model, gear ratio, and still not knowing if it's got internal damage or not. Usually, you can unthread it by hand. Like I said I did mine by myself in my driveway, including removing the rear from the car in two days. Always finish with a rinse of brake cleaner to remove any pieces of shop towel.
How to Replace a Ford Rear End Seal
There are two available nuts for 9-inch axles. For any performance build, carbon friction material is recommended see Chapter 4 for more detail. Buy the bearing rebuild kit that Timken's sells. Both axles are badly galled at the outer wheel bearings and the pinion and carrier bearings are both worn. This is great but makes difficult work to remove and install the flange. Chances are that you will be replacing everything unless you are doing a stock rebuild. You have to start off with setting your pinion depth then setting up the backlash between the ring and pinion by changing spacer thickness' on either side of the carrier.
changing pinion bearing

This allows the axle to hang as low as possible and gives more room to work underneath the vehicle. Been driving for nine months approx. They'll throw in a good pressure bleed on the clutch hydraulics also. For more information go to. You want to make certain that the surface is as fl at as possible.
1997 FORD RANGER 2.3L L4 Differential Pinion Bearing

Driveshaft and U-Joints In addition the driveshaft and U-joints should be upgraded. Drive them out with a steel punch. Step-12: Identify Oil Slinger Once the seal is out, you can see the oil slinger and tail bearing. Never attempt to straighten the shaft or flange because it will prematurely fatigue and break. One of my concerns is if the rear axle is that worn will the same wear apply for the front if it had factory locking hubs? Move the keeper out of the adjuster nut hole by sliding out the keeper tab.
2000 FORD RANGER 2.5L L4 Differential Pinion Bearing
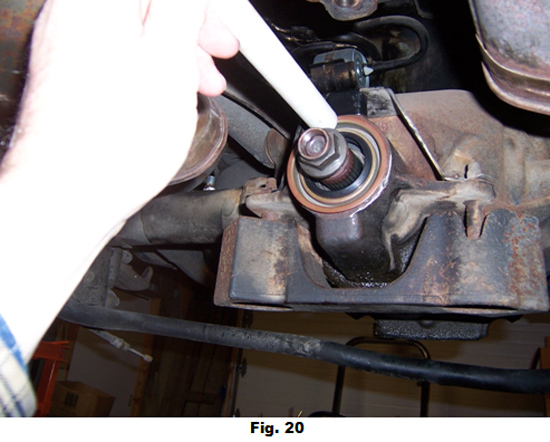
The pinion nut is very tight so you may need to use some torque to break it loose. I would like to avoid doing the Explorer axle swap if I can. Place the end of the punch on the exposed lip of the bearing race and firmly tap and move the punch around the race. Pull and replace the axel bearings. The next step is to position a drip pan under the center of the axle, and remove the rear cover. Take special care to make sure you are prying on just the seal can and not the oil slinger behind it. Typically the pinion flange spline has a slight helix built into it.