L3dt climate. L3DT HeightMaps 2019-02-01
Map Help
So keep this in mind while making your map. Finally is the box Calculation Queue. From 50 to 355, you can expect just as massive of a jump in quality in all other regards to the pack as well. When it comes to terrain generation, there's all sorts of ways to accomplish creating the mesh and texture you're looking for. This is the type of thread that could go Off Topic very quickly, and I would like to keep it from heading that direction, so I would greatly appreciate it if you could help me. At this point, I just check all the remaining boxes, because they won't make a huge change any ways.
arma3:terrain:l3dt [PMC Editing Wiki]

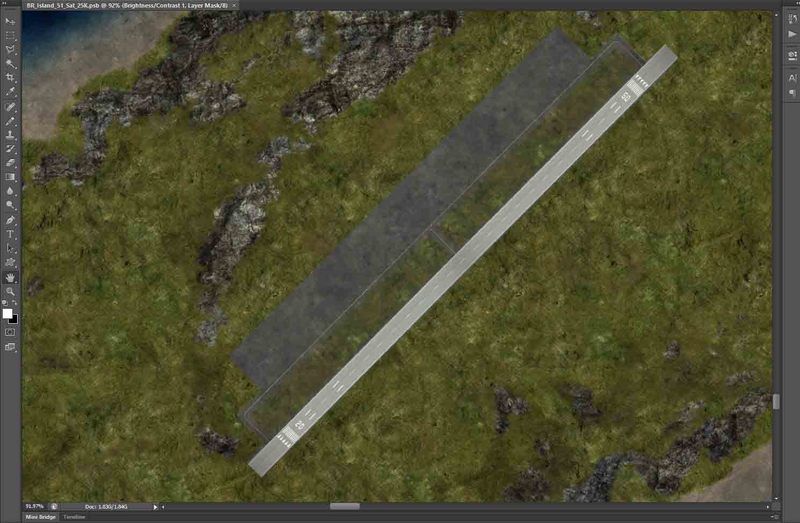
Then select all of the layer, Cut it, go to the satmap, paste it have it fit into the top-left corner. Create preview satmap and satmask Time to create a temporary satmap. I leave the water flooding panel alone. This is mostly a trial-and-error part, you need to get a feel for how strong you should apply the different effects on different areas. Tell it to export as a. If you feel confident enough using other tools, you might skip this step if you already have a heightmap that is 8bit greyscale, though keeping on reading wouldn't hurt. What this does is it converts the design map into a 32 bit heightfield, which is much better for rendering.
L3DT Map Making
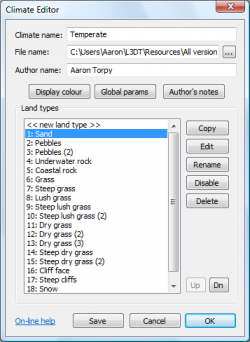
Pat yourself on the back, you have finished about 16. Other map makers may post their techniques, however, keep it limited to the current section as highlighted in red at the top. It is a good idea to have only buildings having the standard color scheme. It will take you to l3dt's climate folder and you should see your climate file there, select your file and hit ok. Sorry lots of daft questions. Here is before I did the heightfield overlay, and then after on Canyons. What settting would I need to make the correct sized map for a 16x16 quad map.
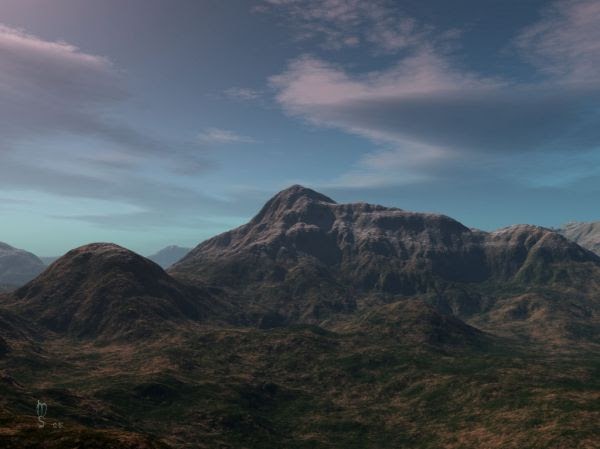
Real life sat image vs L3DT made?
Then decide on a size. Go back to your Design map, select the Altitude brush, take a value between 10-20, tick the Relative box and take a Brush size of 1. I have a workaround for this where you only generate one specific area of your map at a time, so you can still often generate the area you are editing to see how it's coming along. Export Plants, Buildings, Roads and the terrain seperate layers. It's possible that all I need is a really good tutorial, but at the moment I'm leaning towards a replacement.
L3DT Map Making

The best proof of this is what's coming in the 1. I'm not sure if you'll be able to use an actual map as a texture overlay, but you can try adding it as a texture with tile sizes as big as your entire map. Close both of the images. Light mapping I leave alone, because it's minor. Now you should decide how big your map is going to be by filling in the Width and Height fields or using the sliders.
Talk:Custom Terrain
Its a 3d terrain generator that seems quite powerful. Note what happens, the pixels on the Design map have become a lot smaller. Sorry, lots of silly questions. I feel like i don't understand a key concept on some of the settings. Therefore, if your map size is a 16 x 16 your heightfield will be 1025 x 1025. You draw in a 16x16 pixel elevation map of sorts, then apply erosion, terraces, plateau, and all kinds of other effects.
arma3:terrain:l3dt [PMC Editing Wiki]
Put the tdf file in the All Worlds folder. Therefore, if your map size is a 16 x 16 your Feature map will be 1024 x 1024. Is that the size of a person within the game? Creating a Heightmap There are many ways of acquiring a heightmap. Unhide all layers but the background and the buildings layer. After you set the map size, make sure to change the Heightfield resolution to 3 meters.
L3DT Pro 16.05 x86/x64 Free Download
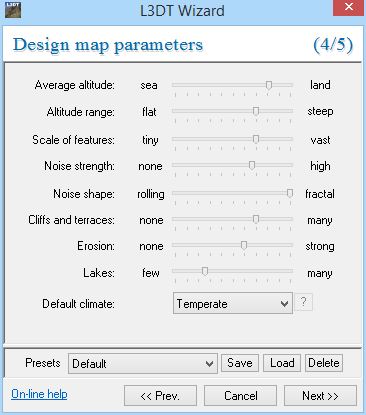
Then click one of the four buttons that are leftmost of the panel shown above to turn the background entirely blue. Keep in mind that this is just the terrain render so if you need to you can massivly cheat on this step to achieve the desired result. Next for page three of light related stuff. Therefore 16 x 16 will be equal to 8192 x 8192 Heightfield Size: To get your heightfield size do this simple equation. There a little green figure in the 3d window, can that be used for scaling? Change the sliders to what you want, or just randomly. On mountains, especially use Fractal, Peak peak doesn't make mountains pointy, it just causes greater height variations and Erosion a lot, on hills especially use Fractal and Peak.
Complete Map Making Tutorial: Done
After you hit it, calculation queue should come up again. First make sure the picture you're going to use as a draqe has the same aspect ratio of your design map if your design map is a square, make sure your draqe image is a square as well to avoid stretching. Also how do you zoom out and in for the 3d map? Posts: 3405 Joined: Tue Mar 27, 2007 11:25 pm I already made a start on a tutorial, I'll post it here and update it: What is a heightmap? Ok for you nubs out there :p. A heightmap is a greyscale image that tells spring how your map is elevated, meaning, if the color on a particular heightmap is white that is at the Maximum height, whereas if the color is black, that is the lowest point. Now, merge all of the metal texture layers so that it becomes one layer.
L3DT Pro 16.05 x86/x64 Free Download

There are plenty tutorials for that out there. Or does it only apply what has been added since? Avoid blurs at all costs! Visior 3 configuration Now your screen should show a blue background. No, the pictures are taken in Oblivion. After it is done, keep in mind that the texture might look a little bland in 2d and without shadows on it, but that's fine. The important thing is that the overall elevation for all the flat lands are correct. This is where it gets extremely hard to explain.