Lightroom adjustment brush slow. Julieanne Kost's Blog 2019-03-16
LR lags when I use adjustment brush : Lightroom
Excluding the Lightroom data files as well as your raw files and preview folder will significantly speed up your Lightroom. . Imagine if every time you moved a slider, Lightroom had to write that change into a separate text file. There must be about 1000 ways to program this differently by Adobe so no one would suffer eg in batch. Any ideas as this is not good? I made the whole photo warmer. Check out the video version of this tutorial below! And now I'm going to paint on these rocks.
5 Tips for Using the Lightroom Adjustment Brush Tool

There is also at least one case I can think of where Divide will indicate that two pixels are different when they are the same! Simply select the pin for the adjustment that you want to correct and make the change! But as soon as I started doing work in the Develop module, especially brush work, everything crawled to a halt. So that's why we have those little pins, so we can go inside of there, and we can start to finesse those things. You'll know you have an eraser tool when the + plus in the center of the brush turns into a - minus sign! And then if you go to O,O turns the overlay on or off. Don't forget to read about our favorite too! You can turn the overlay on or off or you can just hover over the pin or, again, you can press the letter O, and that'll turn it on and off for you. No matter what, the pins will only show up when the tool is selected.
Simple Tips for Using the Lightroom Adjustment Brush Tool

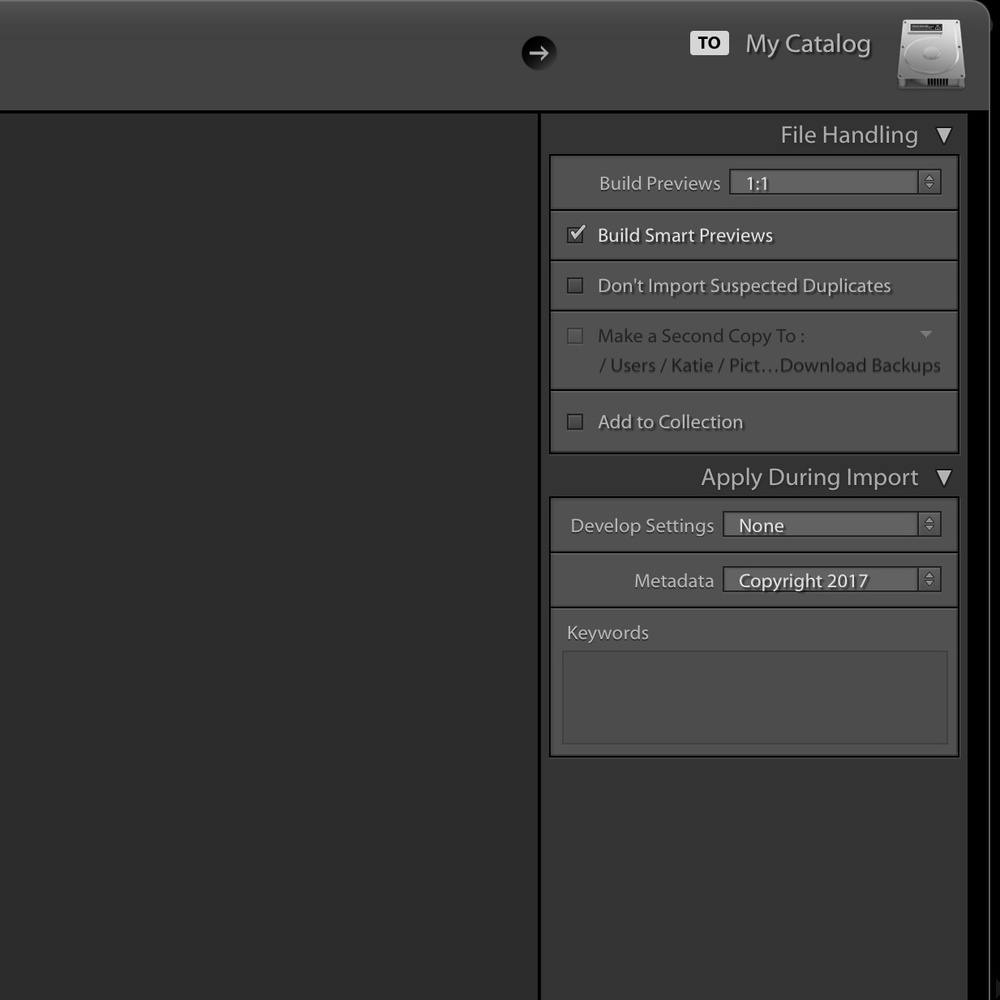
For me, the most obvious two brush types to have set here are a soft edge brush and a hard edge brush. One day you're going to wonder why can't I ever see my little adjustment pins over here because they're gone because you chose Never over here. Note that Auto Mask also works when you erase. One often overlooked setting that you can uncheck is under Catalog Settings. So then I can come over here, and remember because I have the waterfall pin selected over here, I can just move this toward blue just a little bit and just kind of even out the color of the water so the water doesn't look yellow.
Brush adjustment lag

All right, so let me zoom back out here, paint a little bit over here, so forth. So we've got our photo the way we like it. Once you select what adjustments you would like to make, simply take your brush indicated by a circle with a + in the center and brush over the areas of your image that you would like to edit. I want this right from the beginning. I have a relatively new iMac with 32gb memory and Lightroom is optimised according to every bit of advice available on this forum and elsewhere. In the Develop module, click on the Adjustment Brush icon or press K. I know the retina screens have so many more pixels to paint and display, but the performance is simply lacking, especially given the power of the hardware itself.
Adjustment Brush: the basics
We've got a little toggle switch down here. For example, a large soft brush and a small hard one. That's over a minute to update one simple adjustment. Everything seems to be working much better. Exposure-wise, I think I'm overall happy.
Adjustment brush (retouch) slow to the po…

And then there's a keyboard shortcut, H cycles through. That's core functionality that's not functioning! This is why you should edit with 'proxies'. If I zoom in here, and I show you the before and after, see how it spills over onto the water? As such, here are a few more tips and tricks that I have found quite handy and you might too. We have identified this issue as a bug and our engineering team investigating a fix. The response is so slow that it is very difficult to make any sort of fine adjustment.
Lightroom 4 Adjustment Brush vs Photoshop

Do you have or comments about our Tips for Using the Lightroom Adjustment Brush Tool? So they wet it to kind of darken it up a little bit. I have one comment and one question — after working in the Develop module for quite a while on an image at high magnification, brushing and panning around, sharpening , etc. I've continued troubleshooting these problems without any progress so I've now taken the same images into OnOne and Affinity and been able to process them far more intensely and without the slightest issue. And now—and I'm going to get a bigger brush. Lightroom Fanatic — Where are my adjustment pins? The toolbar that comes along with all of your tools, of course. You can't hear its presence, though you might hear its absence! Lightroom Adjustment Brush Keyboard Shortcuts At Pretty Presets, almost everything we do is about helping you save time in Lightroom. And the problem is these rocks get wet.
Lightroom Adjustment Brush: 5 Must
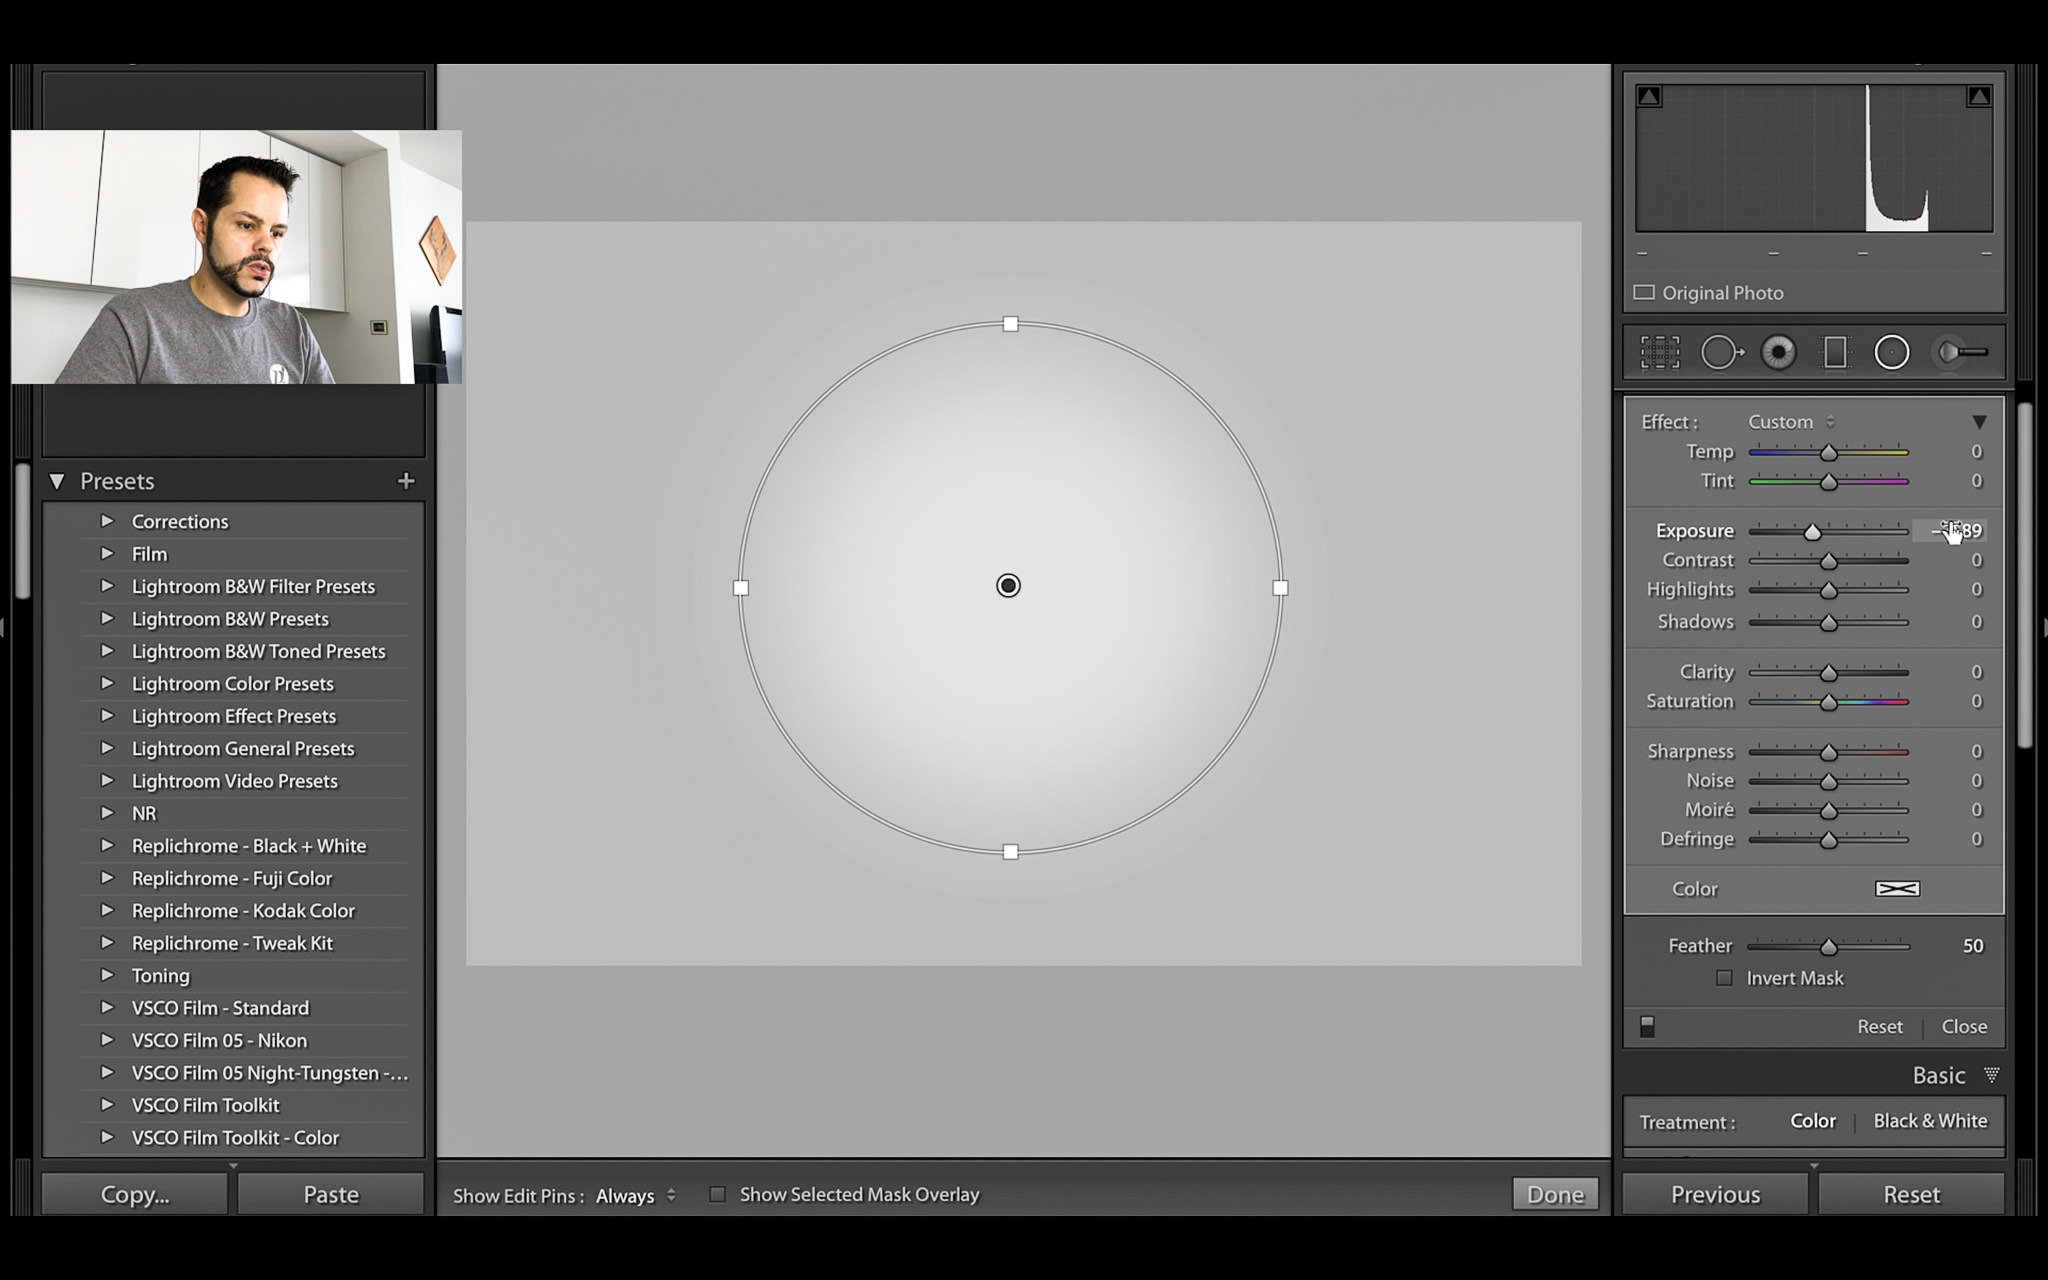
Show Selected will only show the pin that is selected, which usually means the one you are currently painting in. But you can test your image by applying a quick adjustment brush change to your image to see if you see a pin. If you are missing your pins, it is possible that Never Show or Show Selected is selected. Brush strokes are at least a second or more behind my hand movements. All of the come with collection-specific brushes. Maybe I'll bring the highlights of the waterfall down.