Lightroom how to blur background. Lightroom Masterclass 2019-04-14
Blur The Background In Lightroom

You will see that the red paint over the mask overlay can no longer be seen. A way that you can have some more control over this is… I would first go down to here to show select mask overlay, so you can actually see all that is being affected. By the way, I find your tutorials so very easy to understand and follow. Instead, you can work with varying degrees of sharpness to soften the edges of figures and lines and create a dreamlike haze. Flow — Defines the intensity of the stroke, the lower the value, the lower the intensity of the mask. Now let's go to the next filter, the next blur filter. If you want to minimise the DoF, to better isolate your subject from the background and have nice bokeh, then you should use small f-numbers, long focal length, and move closer to your subject.
How to Blur Backgrounds in Adobe Lightroom

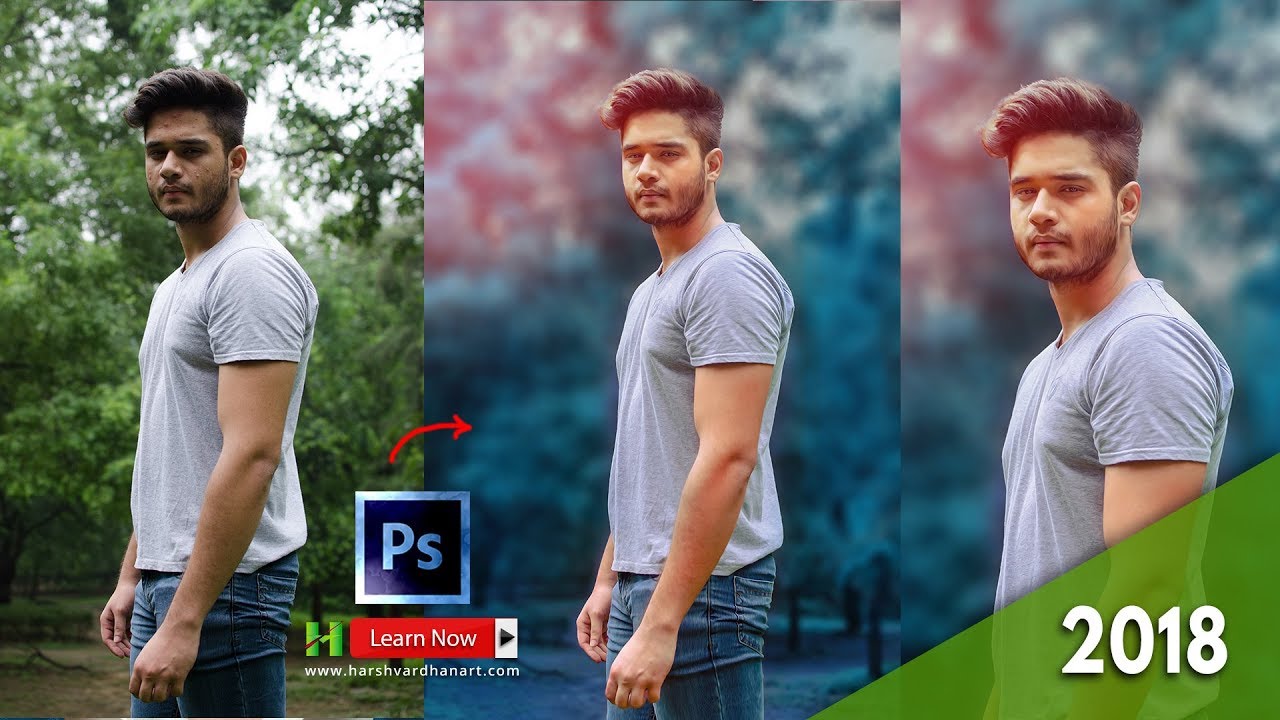
And let's, you know… let's just paint a little bit away here. You will also need to edit each section of each photo individually to achieve the best results. With Photoshop, it took me about 3 minutes to mask out the gorilla, and blur the background. Photo A : Before and After Brush Blur Copyright © Jim Austin The Brush Blur Tutorial 1. Let me know in the comments below. You can see that the closer I moved to my subject, the more blurred the background became. Here it is reduced to 4.
Lightroom Masterclass

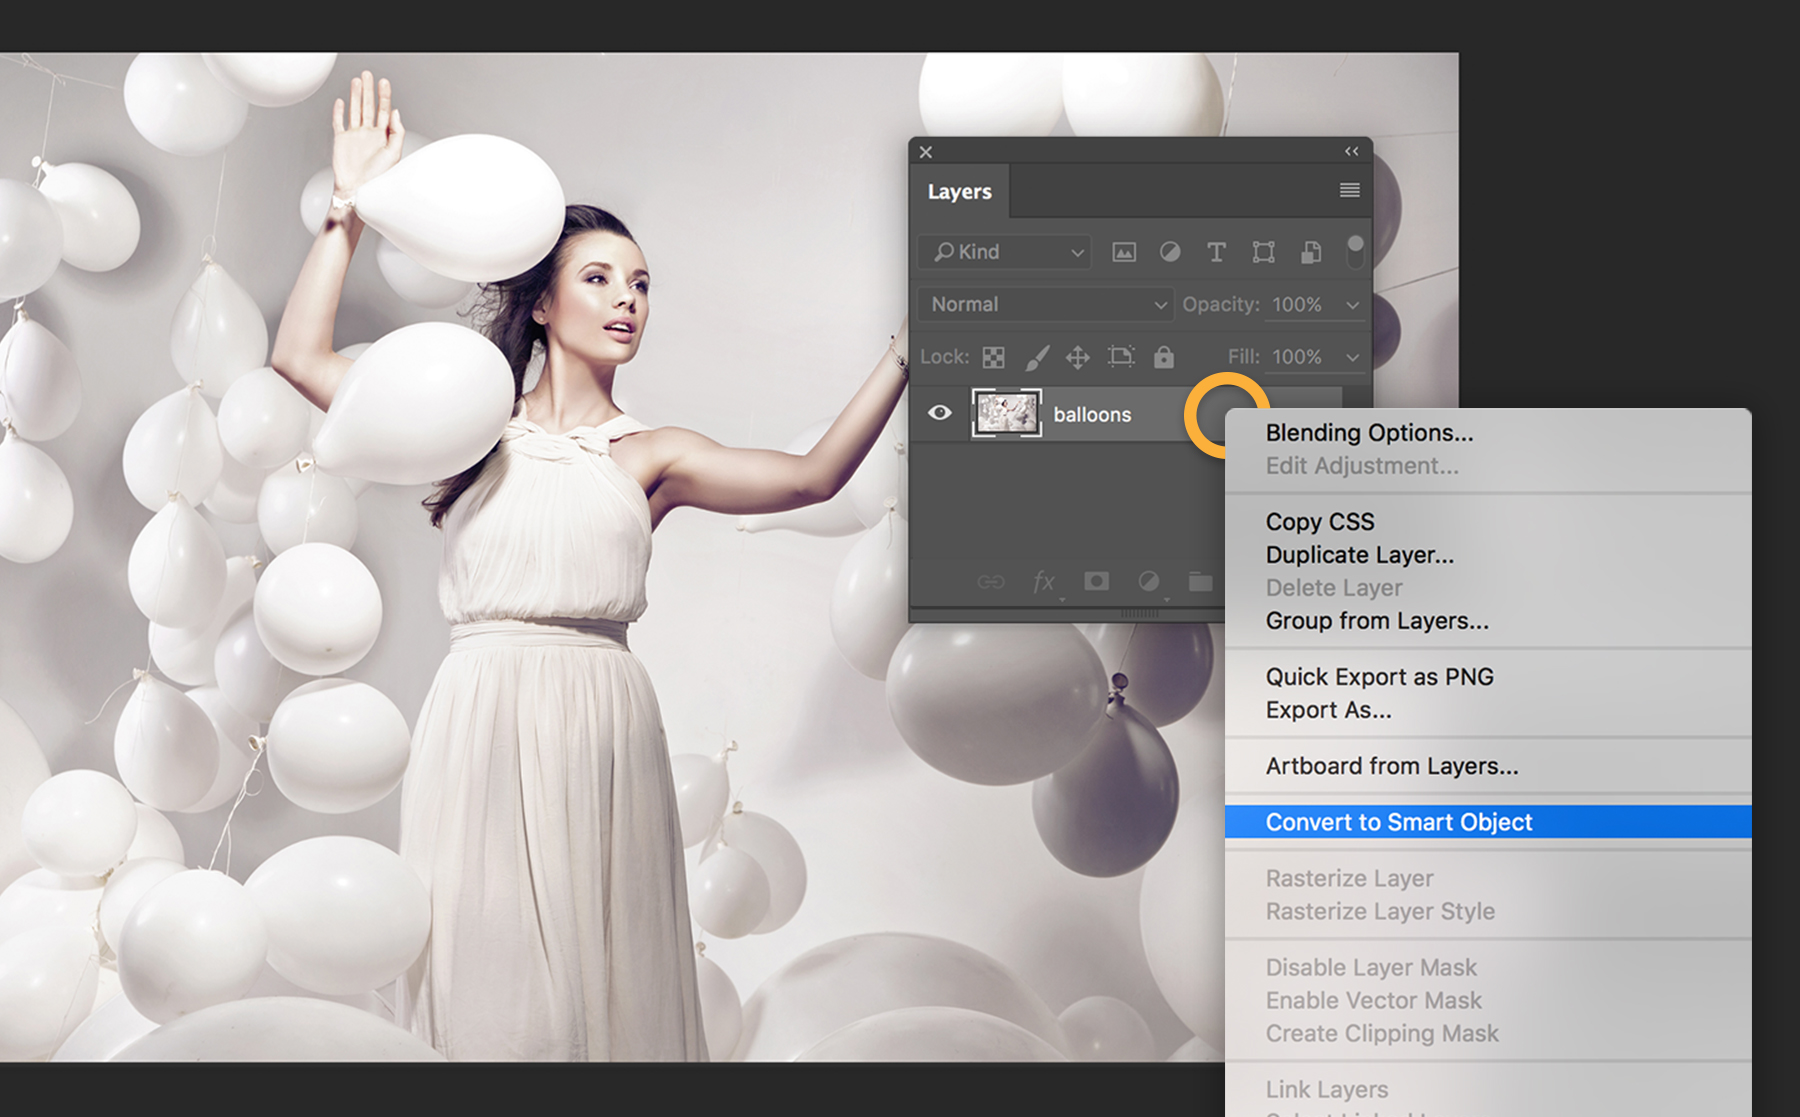
In the layers part of the panel on the right, right-click on the background layer. We also love to share valuable insights on topics that are relevant to your photography, including and blur the background in Lightroom. I hope you enjoy the video series you purchased… let me know how it goes. Adobe Photoshop is the standard for these manipulations. While there are many tutorials on blurring the background of a photo, most of them either cut off the feet, or have a weird looking halo around the edges. For this image, we want to get the most blur we can for the background, so we set both values at -100.
Fake Shallow Depth Of Field In Lightroom
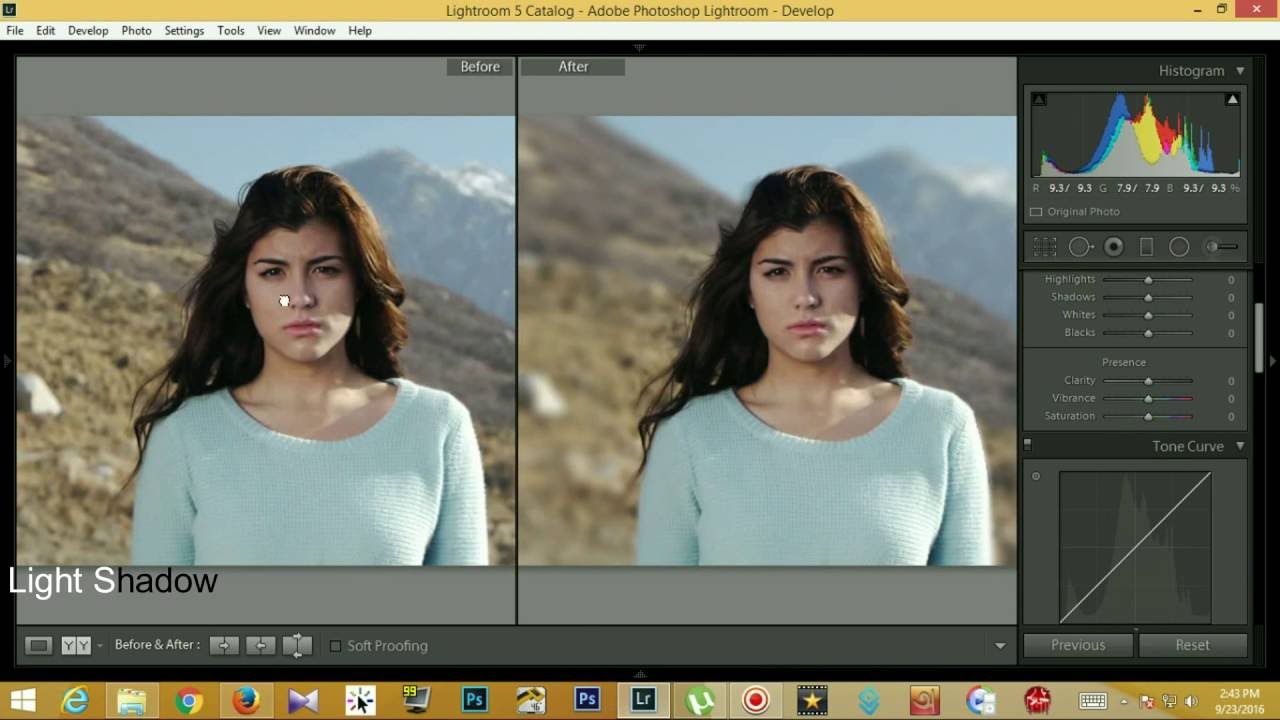
In this black and white version of the original photo the background is still distracting. A preview box will appear, asking for the amount of Gaussian Blur to add. Don't waste time and come to it's official website to have a try of it! If you want to see where the mask is just hover your cursor over the edit pin and the red paint will be seen again. This allows you to create a very realistic depth of field effect that add depth as well as simplifies the composition of an image and makes it more pleasing. Click on the background to make it active. The clarity tool basically just increases the contrast. She is the owner and principle photographer of Betsy Davis Photography.
Lightroom Presets
The software basically lets you create a mask over the original photo to which you can add any amount of blur you want, and for that reason, you need to click on the New icon in order to create a new mask. Her love of photography was born out of a lifelong passion for documenting memories, and is rivaled by an almost equal love for good coffee and sunny weather. I chose Mae West in Miami. When the subject was pulled away from the background an additional 15-20 feet, you can see the background beginning to smooth out, and the light on the foliage becomes gorgeous bokeh that adds some great dimension to the photo. The rainbow let's do that too because it's nice to have rainbows visible. A great replacement for Photoshop at an affordable price is from Serif. If you want completely foggy background, put it to maximum.
How to Blur in Lightroom
Choose select mask Turn on show edges This time make the outline thicker Turn off Show Edges Step 9. The clarity tool is located in the Presence panel. Grab the Quick Select Tool. The one you want to find is Sharpness. Let's delete that again let's just copy our background again.
How to blur the background of a photo in Photoshop tutorial

Enhance the Ambiance of the Photo Wedding photos often have a dreamy quality about them. When you click on the adjustment brush, a panel will open below it. Smith, I taught graduate and undergraduate students for 35 years. Now, the blur effect will just be added to the background. Throughout this post, we share reasons why you might want to use this effect, plus we share how to blur background in Lightroom to create variety in your images.
Blur The Background In Lightroom

With no tools to help you mask the background, you have to manually create one by painting the background with an adjustment brush. You can notice that the right panel has the same adjustments for the normal brush, being able to control size, hardness and strength parameters. This Photoshop tutorial shows you how to blur the background of a photo to add a realistic depth of field by using Depth Maps, or blur masks as they are sometimes called. Well, way long ago used to use a variety of film cameras. The two areas we will be adjusting are sharpness and clarity. In photography, is the aesthetic quality of the blur produced by a lens in the out-of-focus parts of an images.