Mac convert cr2 to jpg. RAW VS JPG, Convert RAW Image to JPG on Mac and Windows 2019-01-12
CR2 (RAW) to JPEG Conversion

Each named Tiff data area begins with the image header pointing to the image file in the directory storing the submitted images and information about them. It's the raw data format created by Canon digital cameras. So there will be higher requirement for storage capacity and longer file transfer time. That's all you have to do to batch convert image files from one image file format to another i. It can save images in shades of gray. Also, it is extremely easy to use.
converting photo file from CR2 to JPEG in…
Convertio is a tool that can be used for a wide range of conversions from documents to even videos. It supports batch processing of the files. Even, it allows user to edit the image effects to get expected image output. I enjoy using the program because it is easy to use. Snap Converter for Mac Details Rating: 4. With this software, it is easy for the users to do the conversion. The resultant 'lossy' file means that quality can never be recovered.
Convert CR2 (RAW) to JPG (Online & Free) — Convertio
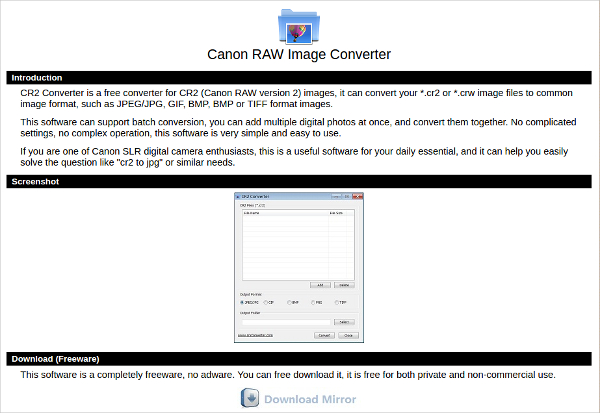
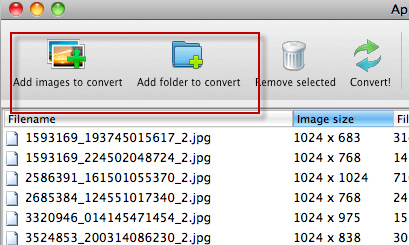
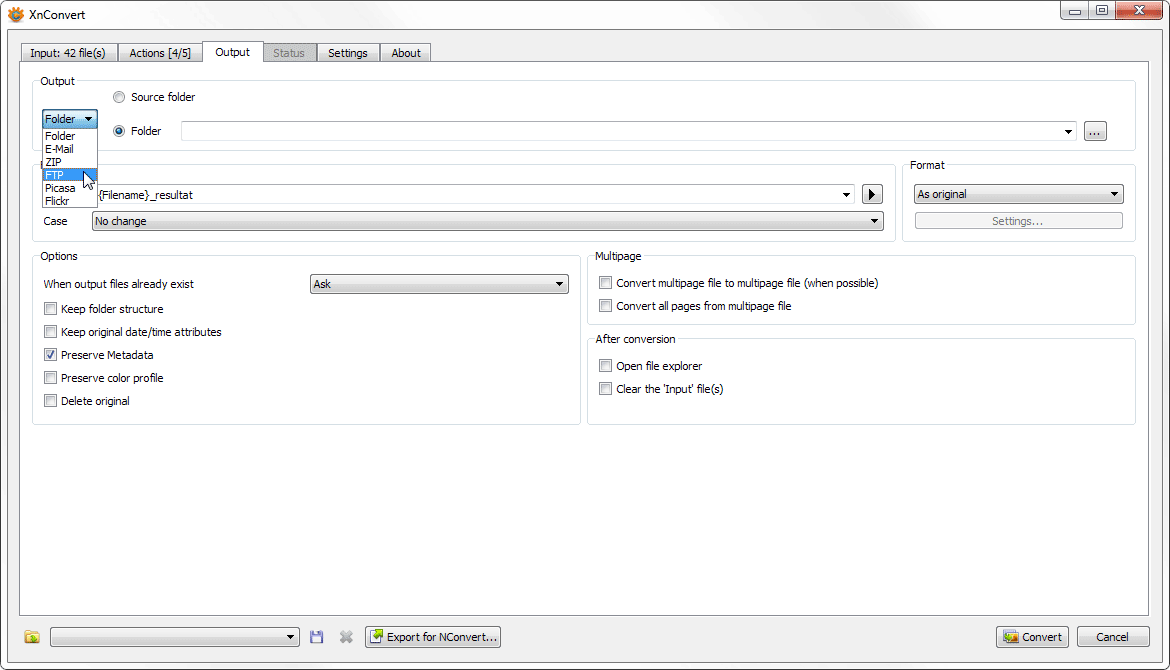
It allows batch conversion, adds multiple digital photos at once, and convert them together. Higher depths and higher quality also result in a larger file size, which is displayed at the bottom of the window. Finally, the colors and brightness are coded. Are these photos already in iPhoto? Tiff is also named as Tif, actually they are exactly the same thing with different extensions. The checkbox is in the lower-right corner of the drop-down. Look for the Change Type of Images action under Photos and then you just need to decide on your workflow - whether you save this as a service that can be activated by the contextual menu or perhaps make it into a drop folder so you can automate the next step of the process as well.
Cr2 Converter Mac
The fast batch conversion process is ideal for bulk photo transfers. You can make a custom workflow to do this as a. I enjoy using the program because it is easy to use. It's towards the top of the pop-out menu when you right-click on an image. The file name is displayed at the top of the image window. Tif is used in file systems that applies the 8.
How to Convert Canon CR2 Images to JPG on Mac or Windows?

The extension correctly interacts with most applications that provide graphics. This being the case, in this article, we will be looking at some of the converters that ride on specific platforms to help you choose the best. However, most of the users prefer a tool that covers their needs on file conversions as many as possible. With this software, it is incredibly easy and fun to perform the conversions and offers a great way of enjoying photography. It took me many months of looking for, but your software really does make the image conversion easy.
3 Ways to Convert cr2 Images to JPEG on a Mac
I can now 'shrink' down image sizes and email them or post them online much more easily. In this case, a great idea would be to try Movavi Video Converter. The software is desktop based, and it is easy to download, install and use and thus a favorable companion for the Canon users. It does not have any complicated settings. In the window that opens, select the tools you want to use.
3 Ways to Convert cr2 Images to JPEG on a Mac

They are used in everything from web applications, email, print files, and a variety of other applications. After making that backup, open a Mac Finder window, select the image files you want to convert to a new image format, and drag those files to the right side of the Automator window. Download it now and see what it can do for you! It's next to an icon with photographs. This software is available online as a service or a downloadable software. There will be a tool, perhaps automator, but I better check.
macos

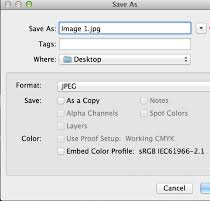
It is created by specialists from Aidus, which later became a part of Adobe Systems. In the opened window set the frame size to Custom, and change the Width and Height values to what you need. Next, select the Change Type of Images action, and drag it to the gray area on the right side of the Automator window, beneath the list of files you just added. The wikiHow Tech Team also followed the article's instructions and validated that they work. Compression rates of 100:1 can be achieved, although the loss is noticeable at that level.