Maschine mk3 djing. Native Instruments Maschine MK3 @ The DJ Hookup 2019-02-08
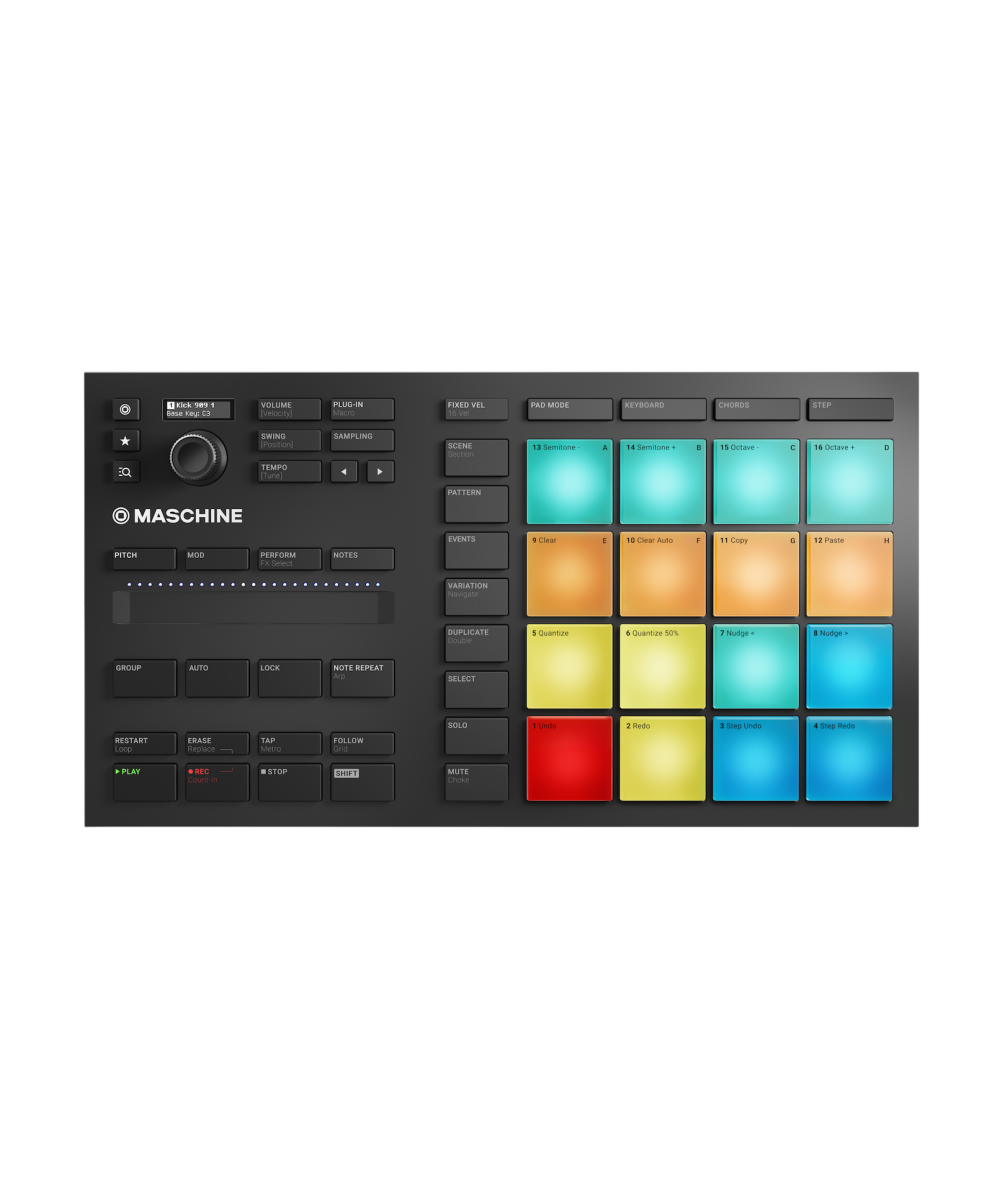
Native Instruments Maschine MK3 review: an all
If you click Apply, the Slices will be mapped to individ- ual notes of this Sound, the Sample Editor will be replaced by the Pattern Editor in Keyboard view, and the pads of your controller will switch to Keyboard mode so that you can directly play your Slices on the pads. Any manual adjustments that were previ- ously made are discarded. The pad of the Sound starts blinking. The Group takes its new place in the Group List. When a Native Instruments or External Plug-in is disabled, it will not be available for loading from the various Plug-in menus in the software and from the Plug-in Browser on your control- ler.
NATIVE INSTRUMENTS MASCHINE MK3 MANUAL Pdf Download.

They can be used to combine Patterns in order to create musical ideas. Check the for more details. At low values, the groove is static and the notes rather quiet, as if the shaker were being shaken very gently and uniformly. In Group view the events cop- ied from the topmost Sound in the Sound List are pasted onto the focused Sound, and the other events will retain their vertical position relative to these topmost events. Check out the promo video below. Available values range from 0.
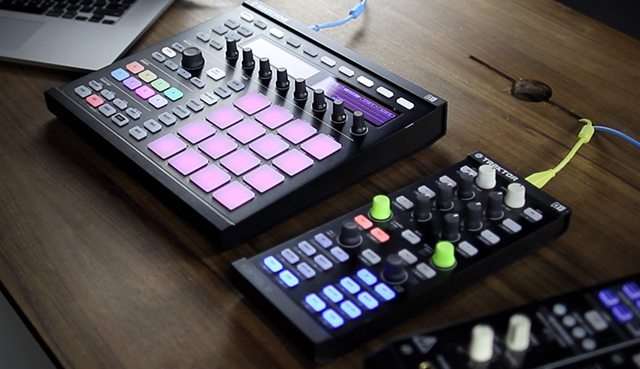
How to Use Maschine in a DJ Set : www.littleboyblu.com

The context menu will open. The flexible routing system also allows you to create send effects, multi-effects, and side-chains. Selecting a Scene in the Ideas View To select a Scene in the Ideas view, do the following: Select the desired Scene by clicking its name at the top of the Ideas View:. Click the desired tab to switch the display of the Control area. From this position, turning the Sustain knob to the left shortens the sustain phases, while turning it to the right prolongs them.
Native Instruments Maschine MK3 review: an all

Grid mode: The Sample will be sliced according to note values. While holding the pad s , turn any of the Knobs 1—8 under the displays to edit the modu- lation value of the corresponding parameter for this step. Using Maschine as a Controller for Ableton Live Maschine can also be used as a very cool controller for Ableton Live, and it ships with templates for Live. The signal travels from top to bottom: from the input routing settings at the top, it passes through the var- ious Plug-ins loaded in the channel, then goes through the pan and level controls, and finally arrives to the output routing settings at the bottom. What are your thoughts on this new update? Available values range from 0. The Lock button, also from Maschine Jam, is wildly entertaining for taking your loops off course.
DJ TechTools

All steps together make up the Step Grid. A parameter of a Native Instruments or External Plug-in can be assigned to one knob only! All the automatable parameters are found in Plug-ins or Channel properties e. Tension Adjusts the tension of the drum skin, measured as a percentage, allowing for a longer and bigger pitch bend. The Maschine line has been a staple in production studios because of its tight integration with the accompanying Maschine software, which itself has matured into a full-on digital audio workstation. Don't tell them all your secrets.
How to Use Maschine in a DJ Set : www.littleboyblu.com
Velocity Hi Adjust notes with a velocity no higher than the set value. Specifically, that many well-used features were buried behind Shift functions. This notably in- cludes adjusting the effect parameters, removing effects, moving effects to other Plug-in slots, saving and recalling effect presets, etc. The Pattern Length is measured in bars and beats, and Patterns can be up to 256 bars long. Available values range from 0. This is equivalent to setting the Dest. One of the first, and most striking.
DJ TechTools

The Flanger in the Control area. Similarly, by default the outputs of all Groups are sent to the Master, where they are mixed together and processed by the Plug-ins loaded in the Master, if any. You are ready to select more than one Sound or Group. Anyone with a Maschine studio will probably use this and decide to make this their go to device. Select one of eight different sequences and apply it to the arpeggio you are playing. The Analog Distortion panel in the Plug-in Strip.
Native Instruments' Maschine MK3 and Komplete Kontrol MK2 S49 / S61

Size Adjust the size of the virtual room here. Click the Connect button to connect the controller to that instance. If your Project has more than eight Groups, you can use Button 3 and 4 to first select the desired Group bank. The Resochord panel in the Plug-in Strip. In Harmonic mode all oscillators track the Tune parameter on the Main page, see above and your keyboard evenly. Available values range from 0.
Native Instruments Launches Maschine MK3, With Audio Interface

The selected Pattern bank is surrounded by a white border and its Patterns appear in the list on the left. The pad turns fully lit to indicate that all its notes are selected. Available entries are None no external input and the four external stereo inputs Ext. Modulation Page As with all other engines and Drumsynths, the Modulation page contains one parameter: Veloc- ity. Select the desired color in the Palette. This way, you always see the portion that is cur- rently played. The following table summarizes the main differences: Modulation Automation Source of control Internal e.