Adobe premiere pro cs6 color correction presets. Premiere Pro Presets for Color Grading Video 2019-05-03
52 Free Color Grading Presets and Looks

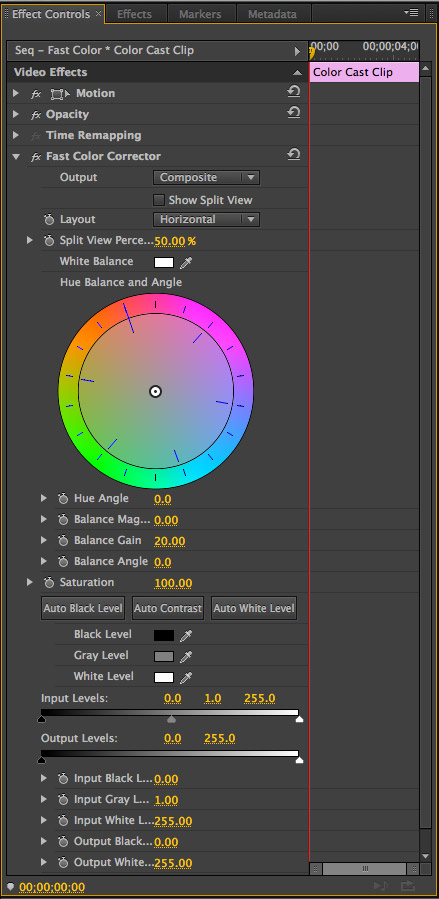
Yes, I swapped the shots in the image above. In addition, you can use the Mask tools in the Effect Controls panel to draw free-form masks and shape masks. So what control panels will work? This process may take some time, since finding the right ratio for all of these options is a skill that takes some time to master. Each has a video sample and the templates are 1920×1080. The center point corresponds to the color you selected.
Color grading and finishing in Premiere Pro CS5.5
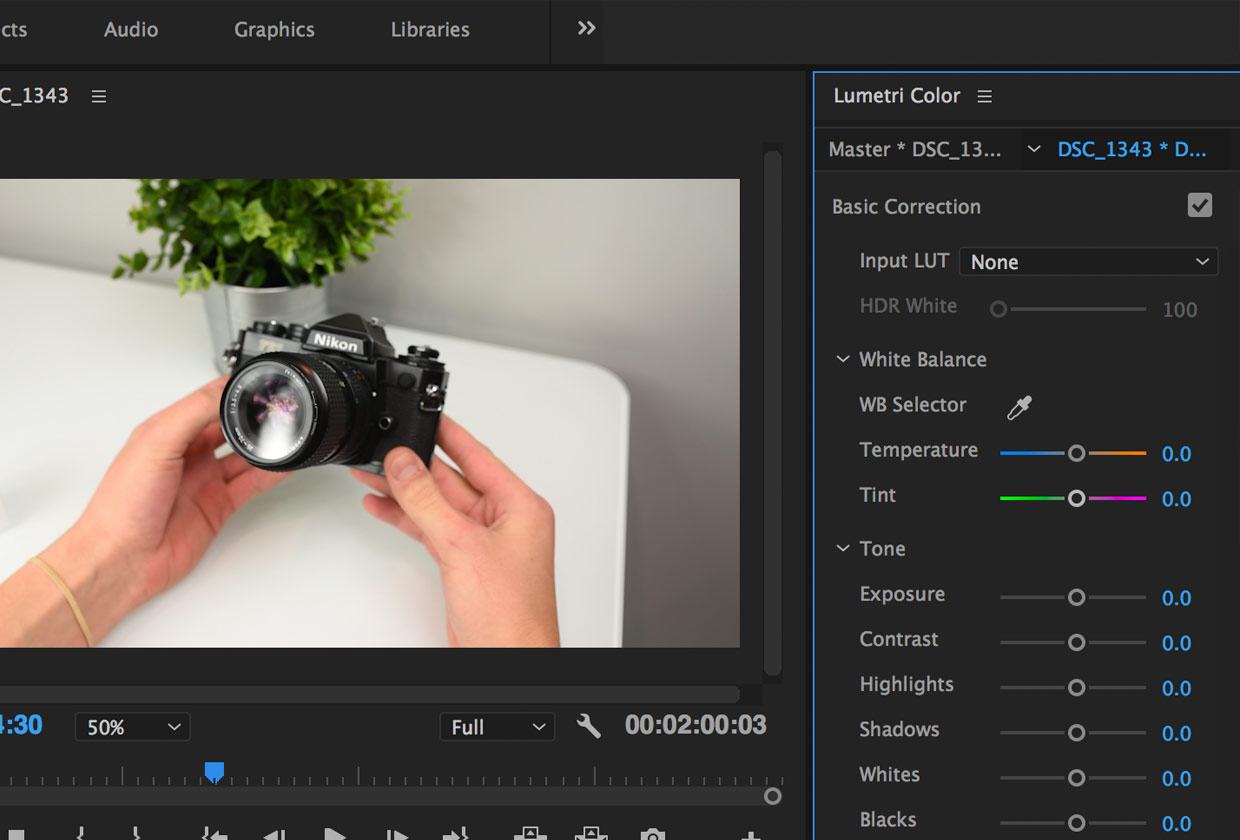
The lower one resets the parameters in the Tone section only. The White Balance part of the Basic Correction section. Now only the pixels inside the mask are affected. Note the compressed highlights in the scopes, resulting in very flat highlights, and very little detail in the white walls of the lighthouse. Sometimes without even knowing they did.
The Complete Guide to Premiere Pro Color Correction

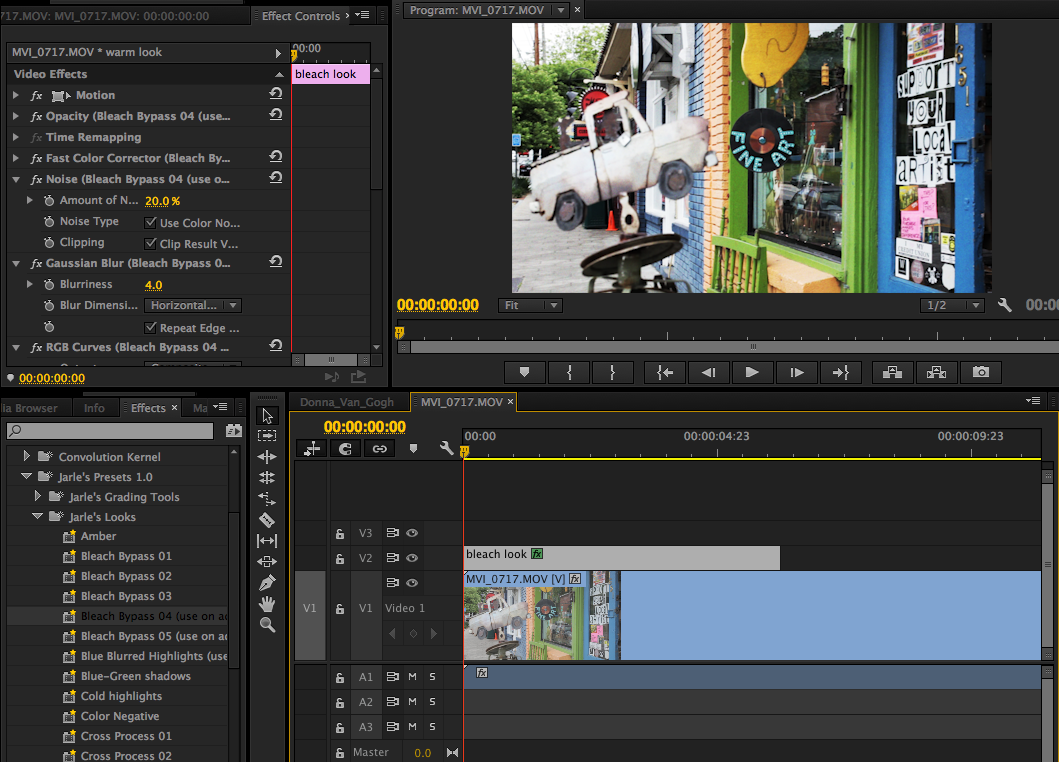
Vertical split view clearly shows that the image on the right has a lot more blue and a bit more green than the one on the left. This is especially useful with waveform scopes in vertical split view. Just remember to do this before any other adjustments to avoid trouble. It comes with a video where you will learn how to apply this effect to your own work. He has over 20,000 subscribers on YouTube, and over 20,000 followers on Instagram. You can easily apply these to your standard footage and get the look of popular films like , , and.
99+ LUTs Cinematic Color Grading Pack + Free — IWLTBAP
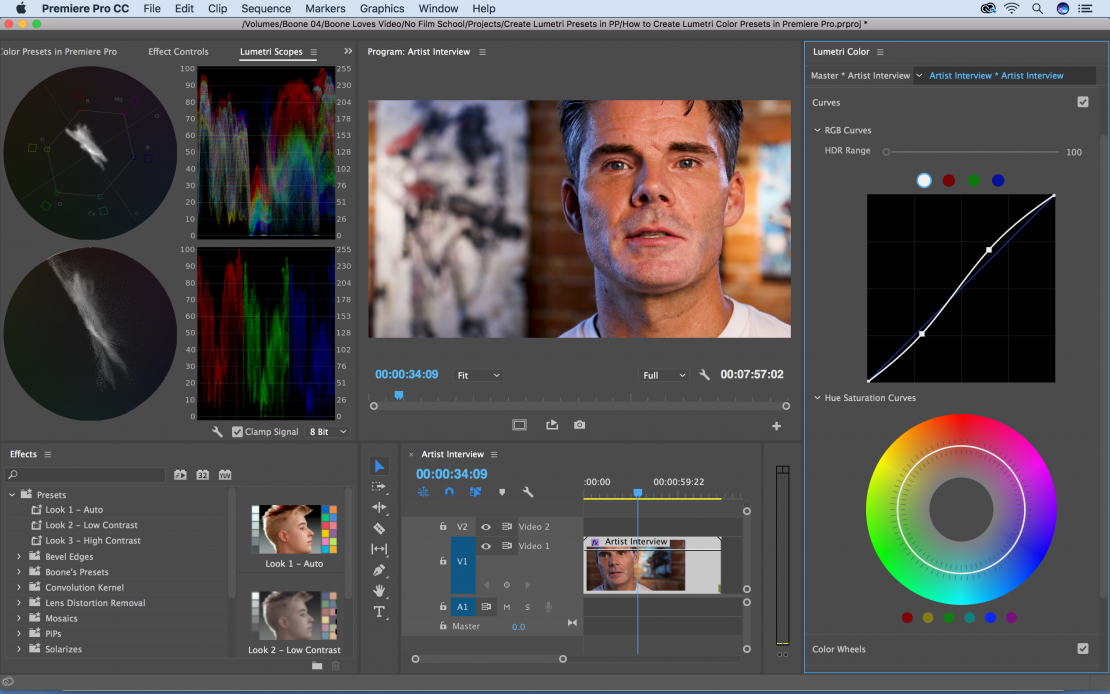
Now that you know that the levels are out of gamut, you can grade the clip to make it adhere to the standards. All the other ones reset individual parameters. Then add another copy on top, add Gaussian Blur to it, and set it to Screen mode. An example to illustrate this behavior: If you use the Hue versus Hue curve to change a green color into blue, and then use the Hue versus Luma curve to sample the resulting blue color, Premiere Pro adds the control points to the green section of the curve - the original color - not blue. Most people see the buttons in the middle, but the two on the sides are often overlooked.
Color Grading and Correction in Adobe Premiere Pro
This is because sliders like Exposure and Contrast only work on pixel values between 0 and 100 and compress the levels when you bring them close to 0 and 100. If you use face detection, there is a slight increase in the amount of time it takes to calculate the match. Soft compression introduced by the Contrast slider. Just use keyboard shortcuts to switch between the panels. Real life material All the footage is real life recordings from my own films. Prepare to take a few more steps toward greatness! I just find Premiere to be the fastest editor with the best user interface. This will give you a much better representation of the color, as there will always be small variations in the pixel values due to noise and compression artifacts.
Color correction

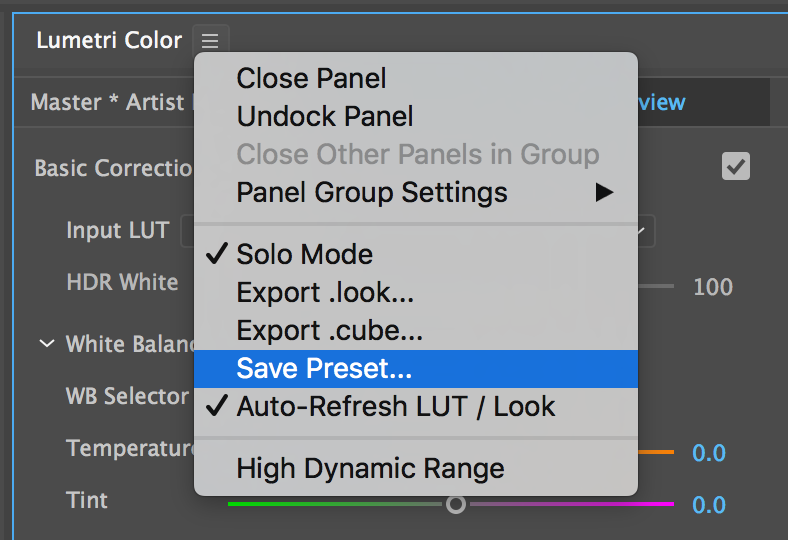
In this tutorial, you will be taught how to use these Free Presets provided by BjK Productions. The High Dynamic Range controls in the Lumetri Color panel give you access to a wide range of shadow and highlight detail. And few tools are as important and nuanced as those that affect color grading. So, the render order is almost like the order you see in the Lumetri Color panel, except that the Whites and Blacks sliders in the Basic Correction section work before the other controls. This Pincushion transition makes a lens distortion similar to what a pincushion lens distortions will look like.
Color grading workflows in Adobe Premiere Pro CC

The Color Wheels and Saturation slider if necessary update to reflect the adjustment that the automatic color matching algorithm has applied. Adobe has done a great job adding some much-needed features and changes. Even though After Effects has both Lumetri Scopes and the Lumetri Color effect, this feature is available only in Premiere Pro. Everybody has a preferred approach for color correction. Then I adjusted the wheels for shadows and midtones towards orange and lowered the midtone levels. The project has been carefully arranged, taking speed into cognizance, to make it as straightforward as possible.
Free Color Grading Presets For Adobe Premiere Pro
The most obvious one is to click the new Comparison View button in the Transport controls, located in the lower right-hand portion of the Program Monitor. Constrain your adjustment to a determined range by creating a minimum of three control points. If there is more than one face, the face detection will focus on the one closest to the camera. The Curves Section This is my favorite section! An increased edge definition makes the details in the video more pronounced. Dragging a control point left or right increases or decreases the contrast. More on that in the Color Science section. This glitch effect for text and logo can be used without any plugins.
99+ LUTs Cinematic Color Grading Pack + Free — IWLTBAP
Premiere Pro offers the following color curves that you can use to make different types of curve-based color adjustments to your clip. Have something in mind related to web design, freelancing, and other awesome stuff? To make sure your levels are within range, add an adjustment layer above everything else and apply the Video Limiter effect to it. Adjusting the white balance can effectively improve the ambient color of your video. I highly recommend that you buy a control surface if you do a lot of grading in Premiere. In this case, I just need to lower the whites. Double click on the preview screen if you want to apply a preset.
Color grading workflows in Adobe Premiere Pro CC
This will blend frames and may make the flickering less obvious. To select the box and type a new value, click the current value. What mask view that best shows your selected pixels will depend on the footage. The Lumetri Color Panel Is A Remote Control Think of the Lumetri Color panel as a remote control for the Lumetri Color effect. This is where most people work when they do color grading. Your video is ready to roll. There are two buttons in the Comparison View that are easy to miss—the Shot or Frame Comparison button on the left, and the Swap Sides button on the right.