Cc lightroom presets. How to install Presets and Profiles in Lightroom CC 2019-02-27
380 Free Lightroom Presets

So, if I have a photo with a really bad color cast I might first come here to the White Balance tools and correct that. The last lesson in this tutorial covered the basics of using presets on your photos. Then go over and click the Editing icon or just press E on your keyboard to go into the editing workspace. The controls in the column that just opened are the global controls. The early versions of Lightroom included basic functionality for editing photos, but the Library Module for organizing photos was equally important.
380 Free Lightroom Presets
Select the preset you want to use from the list and it will instantly be applied to your import. For more control, click the value to the right of a slider and press the up or down arrow key on your keyboard to move the slider in increments. All images are owned and copyrighted by Nathan Johnson unless otherwise noted and may not be used without his consent. Navigate to the folder with random numbers and letters like: ab414778e2e444859150c9a15f1481da 4. Now you can save the settings and use them for further photo editing without repeating all the steps to achieve the desired look.
39 Free Lightroom Presets

Import and export presets allow you to apply certain choices when importing and exporting your images. Mix these presets with other Lightroom filters for a better look. Fortunately, creating and working with import and export presets is extremely easy. Tip: This is a useful way to teach yourself about the effects of different editing controls. Each bundle includes 25+ Lightroom filters to choose the preset you like.
How to install Presets and Profiles in Lightroom CC
Bring a unique look to all of your portrait images having mixed several presets for Lightroom. Every week we add new Lightroom presets free for every photographer, retoucher, and digital artist who want to edit photos fast and professionally. We have 500+ presets for Lightroom that you can download free. It tells you exactly what you're undoing which is the last slider move that you made. I usually will collapse this filmstrip at the bottom that shows you all the other photos in the selected source. I'll come over to the filmstrip and I'll select this photo and then I'll go back and hover over my User Preset and I really like the color and punch that the new preset adds to this photo, so I'll click to apply it here too. You can use Landscape Presets to emphasize the mood and tonal qualities of each season, natural lighting, and weather.
How do I import my presets into the new Lightroom CC (2017/2018)?
And then if you want to revert everything back to the very beginning you can come over to the three-dot menu, the more menu and from there you can choose Revert to Original. The so-called develop presets provide a simple method to change the look of an image with just one click. And his has helped thousands of photographers design incredible styles of their own. Have other thoughts or questions? Today I bought E Chrome, too, your presets are so much smarter for my use, when I still waiting for X Chrome Update, that you have announced. And you can't delete groups of presets inside the app. Adobe Lightroom presets are saved Lightroom settings that help edit a photograph as you like and then save that exact combination of settings for other images.
Installing Your Pretty Presets in Adobe Lightroom CC

They are suitable for different photo genres, be it portrait, wedding, beach, landscape or street photography. As a designer you probably work with a lot of images, including those provided by clients, purchased stock photos, , and possibly even your own photos. Using Export Presets Export presets are the cool uncle of our import presets. You don't need to worry about the new process version, which simply has to do with masks. I like the way that looks but I'd like to change it a little bit opening up the darker areas of the photo.
Installing Your Pretty Presets in Adobe Lightroom CC

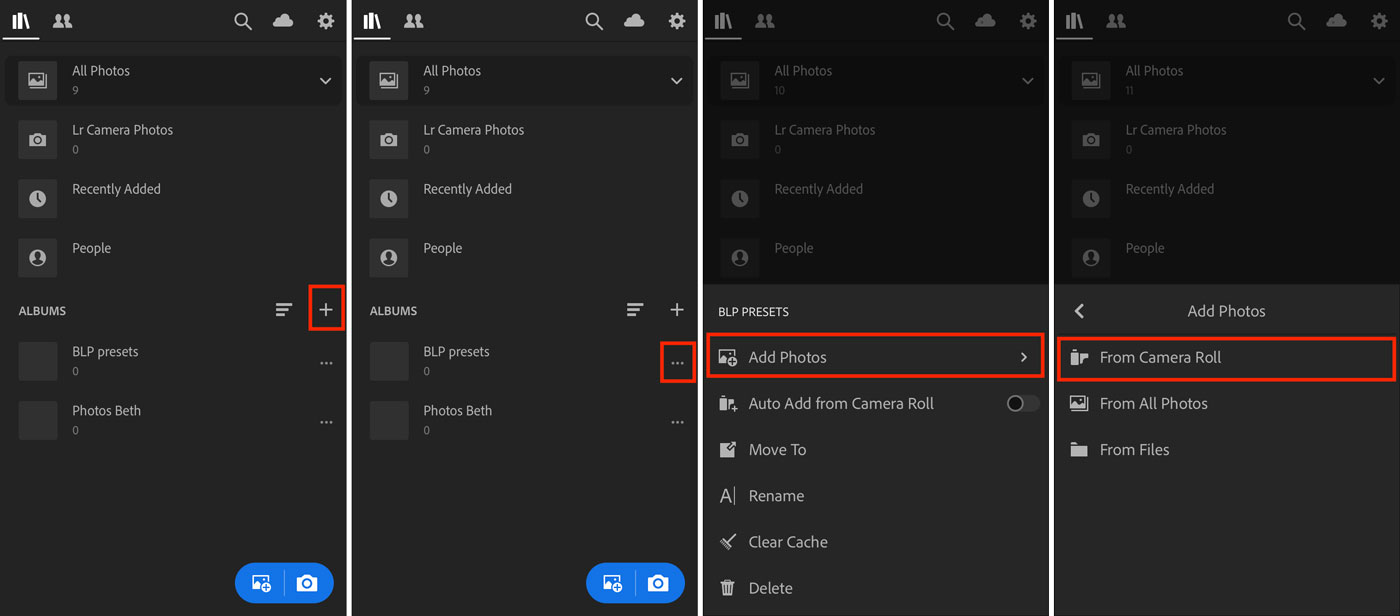
So, in that case you can click in the value field for a slider and then you can use the up and down arrow keys on your keyboard to adjust the slider in small increments. You can apply multiple presets to the same photo. For this last step, just navigate to where you have your presets saved on your computer and click on the folder that holds the xmp or lrtemplate files. The presets are already in Lightroom, but the colour is really strange. How To Use Lightroom Presets? Anyone can use our Free Presets to quickly edit their images.
39 Free Lightroom Presets
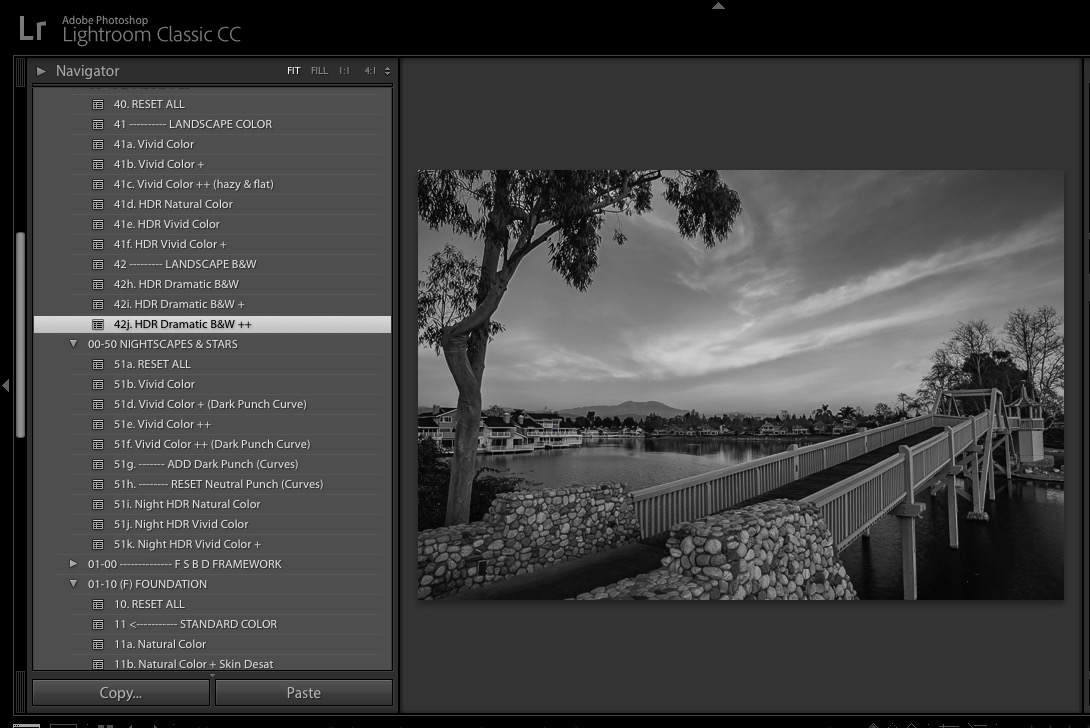
Let's hover over another one, the Natural preset and notice that other sliders in the Light and the Color panels have moved to other values. Method 1: Manually adding your presets This is probably the most straightforward method if you know how to navigate around. Free Lightroom Presets for Outdoor Photos Cityscape, Street, and Glow Free Presets are perfect Lightroom plug-ins to make outdoor photography pop. And I like that look better. You have to delete each one individually.