Change default font in microsoft word 2013. Word 2013 2019-03-23
Change the Default Font in Microsoft Office
Or if you are good with the slider you can simply move it to your desired percentage. The font sets up the way your text looks — its overall text style. No doubt, I will add more, as I am sure you will too. Set the default font Start with a blank document, or if your document already contains text that is formatted with the properties that you want to use, select that text. Once there, select your preferred font.
Changing Default Label Settings (Word 2013)

You can click the More Colors option if you do not see the color that you want to use. I change the font to Arial 10. Note If you do not highlight any text, the font size will change as soon as you type new text. Therefore, Microsoft tries to include common fonts in its applications like Times New Roman, Calibri, and Arial. If you have any feedback on our support, please click. Make your changes to the margins here, and then click Default. Click the AutoFormat tab Figure E and deselect the Replace Straight quotes with smart quotes check box.
Why Did Microsoft Change The Default Font To Calibri?
We will show you how to change the paste settings so anything pasted into Word will only be pasted as plain text. Under the Proofing tab you will see a button with the label: AutoCorrect Options. Word is configured this way as well. . Customizing the settings in a Microsoft Office is program is a great way to give yourself a sense of ownership when you are using the program. I also typically click the check box that turns on Use Normal style for bulleted or numbered lists.
How to Change the Font in Word 2013

Although deciding on a proper font may be agonizing and, indeed, many graphic artists are paid well to choose just the right font , the task of selecting a font in Word is quite easy. The Advanced screen on the Word Options dialog box displays. The font you see with Body after its name is the current text, or body, font. You are free to choose your preferred font, style size and color from the provided section of the window. In Word 2013, you can change many default settings, including font, font style, font color, font size, effects, paragraph spacing, and indentation. The default is 100%, but for 24 inch screens I typically bump this percentage to 180%. Using a different font color for a document in Word 2013 is as simple as changing an option in the navigational ribbon.
How do I change the font color, size, or type in Word?

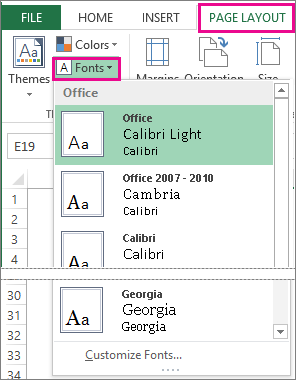
Step 2: Click the Home tab at the top of the window. To do so, switch to the Page Layout tab and then click on the expand button to change default settings. Figure E No Smart Quotes for me Here is the slightly tricky part, you also have to look under the AutoFormat As You Type tab and uncheck the appropriate check boxes under the Replace as you type category Figure F. Now when you create a new document in Word 2013, it will be using the color that you just selected by default. There were two key reasons to support the change: 1. For example, the layout attributes for new blank documents are based on the Normal template. Word for Office 365 Outlook for Office 365 Word for Office 365 for Mac Word 2019 Outlook 2019 Word 2019 for Mac Word 2016 Outlook 2016 Word 2013 Outlook 2013 Word 2010 Word 2007 Word 2016 for Mac Word for Mac 2011 Word Online Word Starter 2010 When you set a default font, every new document you open will use the font settings that you selected and set as the default.
How to Change the Default Font in Microsoft Word

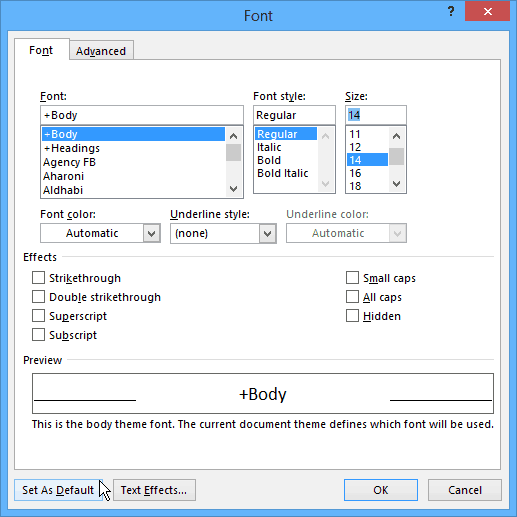
As you move the mouse over a font, any selected text in your document is visually updated to show how that text would look in that font. That it is causing this problem may or may not mean it is more problem than help. Step 2: Simultaneously press Ctrl + Shift + F key to open Font dialog. Change other default settings in the Normal template You can customize the Normal template and change default settings for many aspects of a document, such as text formatting, paragraph formatting, document formatting, styles, text, pictures, AutoText entries, and keyboard shortcuts. So while it may be tempting to set an obscure font from someplace like dafont. You need to click the Font menu button at the bottom right corner of the Font section of the ribbon.
How to change the default font and font size in Microsoft Word
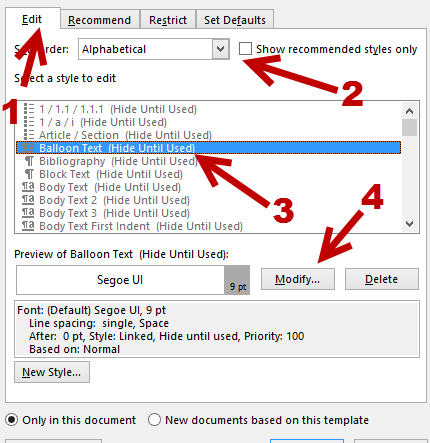
Once you right-click it, select Modify. You can also use the Font menu to preview the look of fonts. In the pop-up menu box, select Modify. Step 3 Change the default font by changing font, Font style and Size within the font window and see all the changes in the preview window. In the Styles section, right-click the Normal box. Click the Mail section header.
How to change the default font and font size in Microsoft Word

You can specify the font, text effects, character spacing, paragraph breaking, bullet and numbering formats, horizontal rule lines, and tab placement. Step 4: Finally, click Set As Default button. I want to set the default yellow to one of the available colors thus when I edit any document, select some text and click on the text highlight tool I want it to highlight using my desired color not the yellow without me selecting a color from the dropdown. The fonts in the All Fonts part of the list are displayed in alphabetical order as well as in context as they appear when printed. If all you want is the text, now you can easily get just the text without having to take the time to tweak the formatting. Figure B Change the font I then click the Format button to access the Paragraph options screen Figure C.